PI Prerequisites
Notice
Not all steps might be necessary in order for PI Vision and PI Web API to work correctly.
Prerequisites
PI has to be installed on a server
The server must use domain users (e.g. TRENDMINER\tm-user)
An asset server must be configured
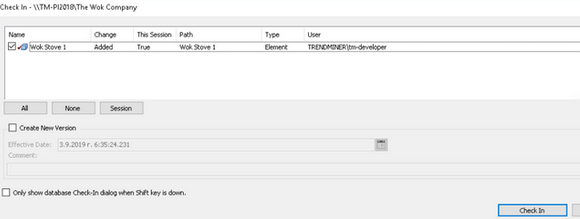
Know that you have to 'Check In' changes done in 'PI System Explorer':
Click 'Check In' in the menu bar

Click 'Check In' on the dialog

Adding a database
Open 'PI System Explorer'.

Click on 'Database' (top left).

Click on 'New Database' (top left of dialog).

Click 'Apply' and 'OK'.

Click 'OK'.

Adding assets and attributes/tags
Right click on 'Elements' in the list on the left and click on 'New Element'.

Click on 'OK'.

Right click on the newly created element and select 'Properties'.

Fill in the information for this asset.

Select an asset in the left panel and select 'Attributes' tab.

Click on 'New Attribute', this will open a panel on the right side.

Fill in the information and select 'PI Point' as 'Data Reference'.

Note
This fills in '\\TM-PI2018' because we selected while adding the database.

Click on 'Settings ...'

Click on the 'search icon' (the magnifying glass).

Click on 'Search', select the data representing the temperature data and click 'OK'.

This fills in the 'Tag name', select '°C' as 'Source Units' and click 'OK'.

This will update the information.

Note
Do not forget to 'Check In' your changes.