How to enable HTTPS/SSL connection to the Connector?
Setting up an HTTPS/SSL connection between TrendMiner and Plant Integrations Connector involves the following steps:
Install and configure a SSL certificate on the IIS server hosting Plant Integrations Connector.
Assign SSL certificate to a web site and configure the web site for HTTPS access.
Export the certificate from IIS.
Import the certificate in TrendMiner's ConfigHub.
In ConfigHub create a HTTPS connector.
Install and configure SSL certificate
If you are planning to use a self-signed certificate, please follow this online article to generate your self-signed certificate and proceed to the Export the SSL Certificate section below to continue.
Certificates are issues by a Certificate authority and are applicable to a particular domain. The following steps can be followed:
First, create a Certificate Signing Request (CSR)
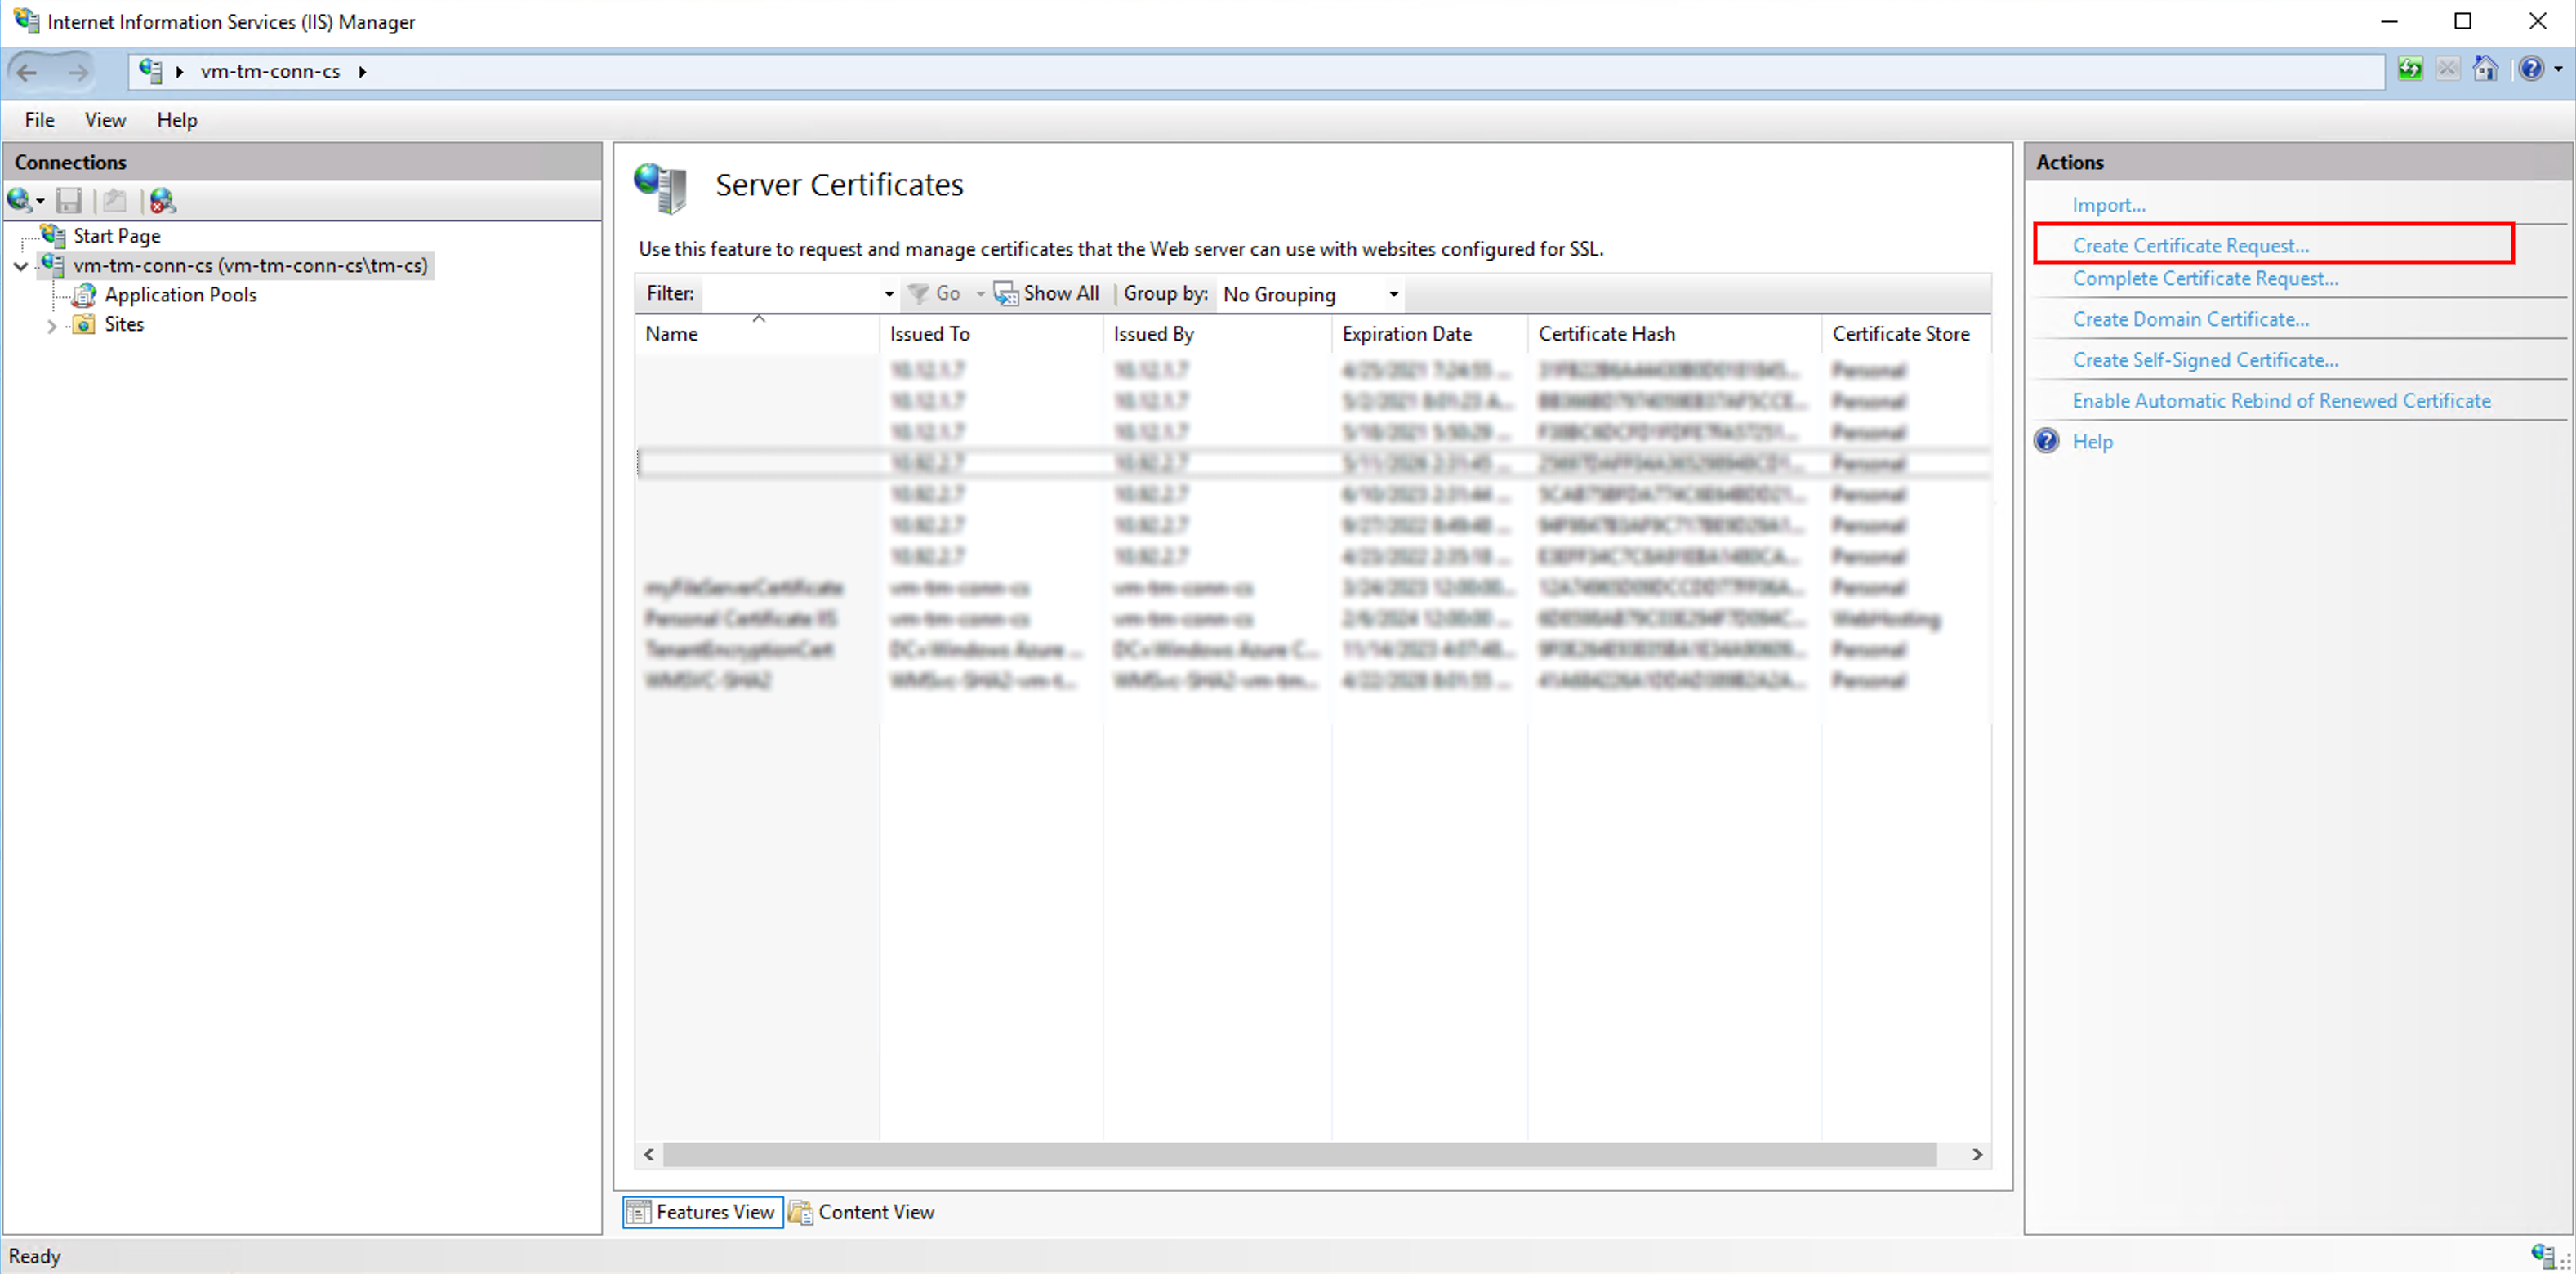
In Internet Information Services (IIS) Manager, in the Connections menu tree (left pane), locate and click the server name.
On the server name Home page (center pane), in the IIS section, double-click Server Certificates.
On the Server Certificates page (center pane), in the Actions menu (right pane), click the Create Certificate Request link.
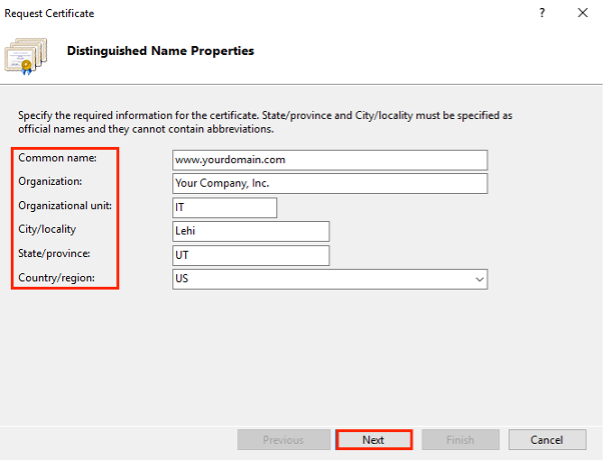
In the Request Certificate wizard, on the Distinguished Name Properties page, provide the information specified below:
Common name:
Type the fully-qualified domain name (FQDN) (e.g., www.example.com).
Organization:
Type your company’s legally registered name (e.g., YourCompany, Inc.).
Organizational unit:
The name of your department within the organization. Frequently this entry will be listed as "IT", "Web Security," or is simply left blank.
City/locality:
Type the city where your company is legally located.
State/province:
Type the state/province where your company is legally located.
Country:
In the drop-down list, select the country where your company is legally located.
Click Next.
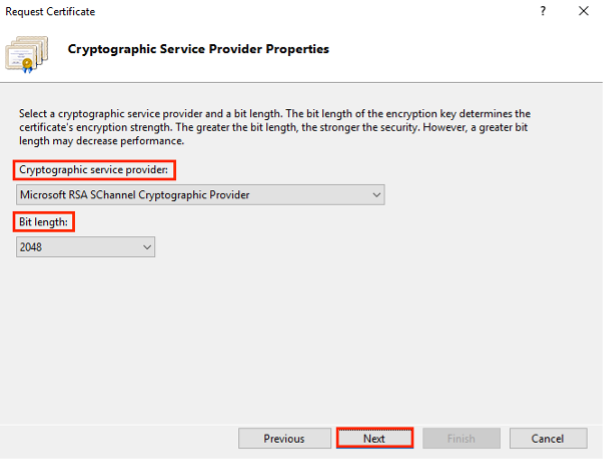
On the Cryptographic Service Provider Properties page, provide the information below and then click Next.
On the File Name page, under Specify a file name for the certificate request, click the … box to browse to a location where you want to save your CSR. Click Finish.

Send the CSR file to you Certificate Authority.
Next, the Certificate Authority will generate SSL certificate .cer file and send it to you. To complete the SSL configuration in IIS, follow these instructions:
In the Windows start menu, type Internet Information Services (IIS) Manager and open it.
In Internet Information Services (IIS) Manager, in the Connections menu tree (left pane), locate and click the server name
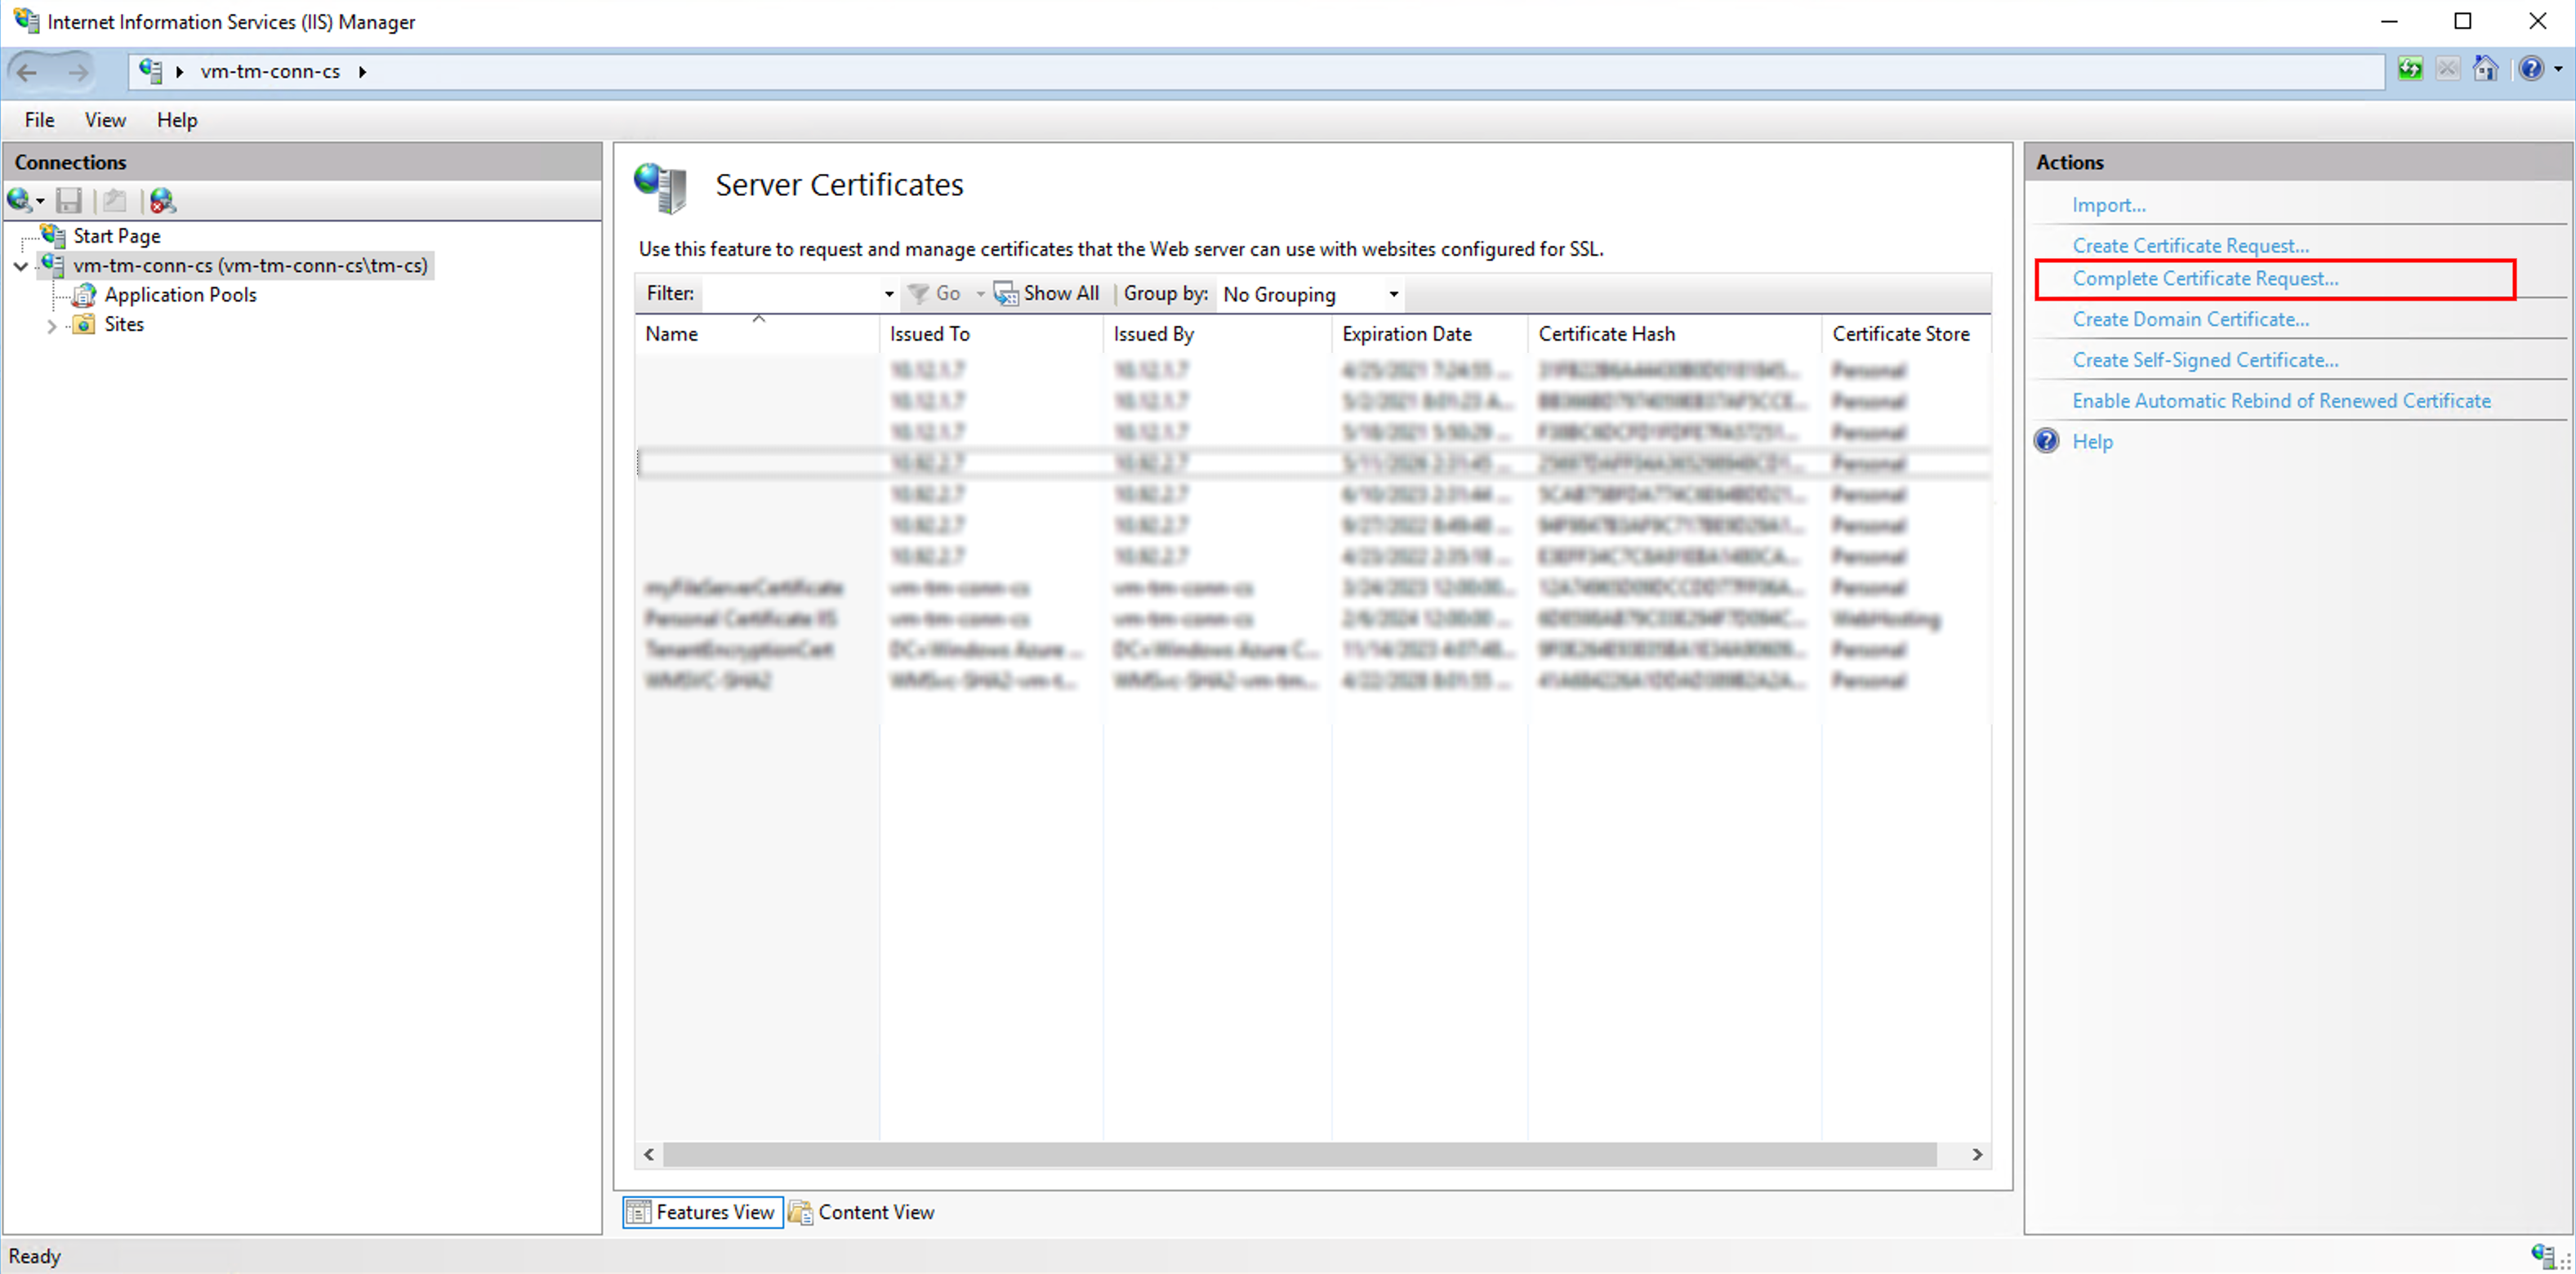
On the server name Home page (center pane), in the IIS section, double-click Server Certificates.
On the Server Certificates page (center pane), in the Actions menu (right pane), click the Complete Certificate Request… link.
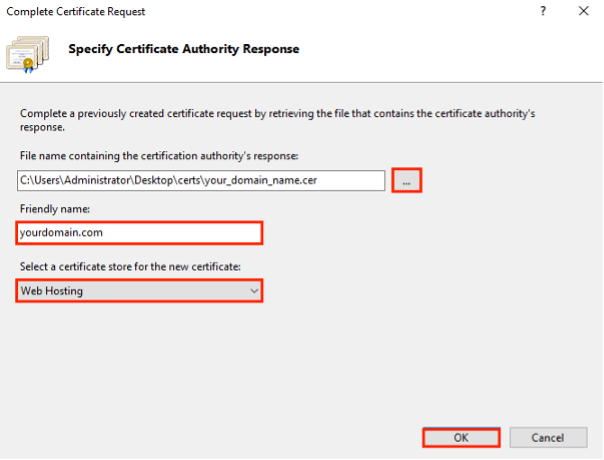
In the Complete Certificate Request wizard, on the Specify Certificate Authority Response page, do the following:
File name containing the certificate authority's response
Click the … box and browse to and select the .cer file (e.g., your_domain_com.cer) that the Certificate Authority sent to you.
Friendly name
Type a friendly name for the certificate.
The friendly name is not part of the certificate; instead, it is used to identify the certificate.
For example you add the issuer and the expiration date to the end of your friendly name, for example: your site-issuer-(expiration date).
This information helps identify the issuer and expiration date for each certificate. It also helps distinguish multiple certificates with the same domain name.
Select a certificate store for the new certificate
In the drop-down list, select Web Hosting.
Click OK
The SSL certificate should be successfully installed.
Assign SSL certificate
Once the SSL is installed on the IIS server, it should be assigned to a web site:
In Internet Information Services (IIS) Manager select a web site to assign a certificate.
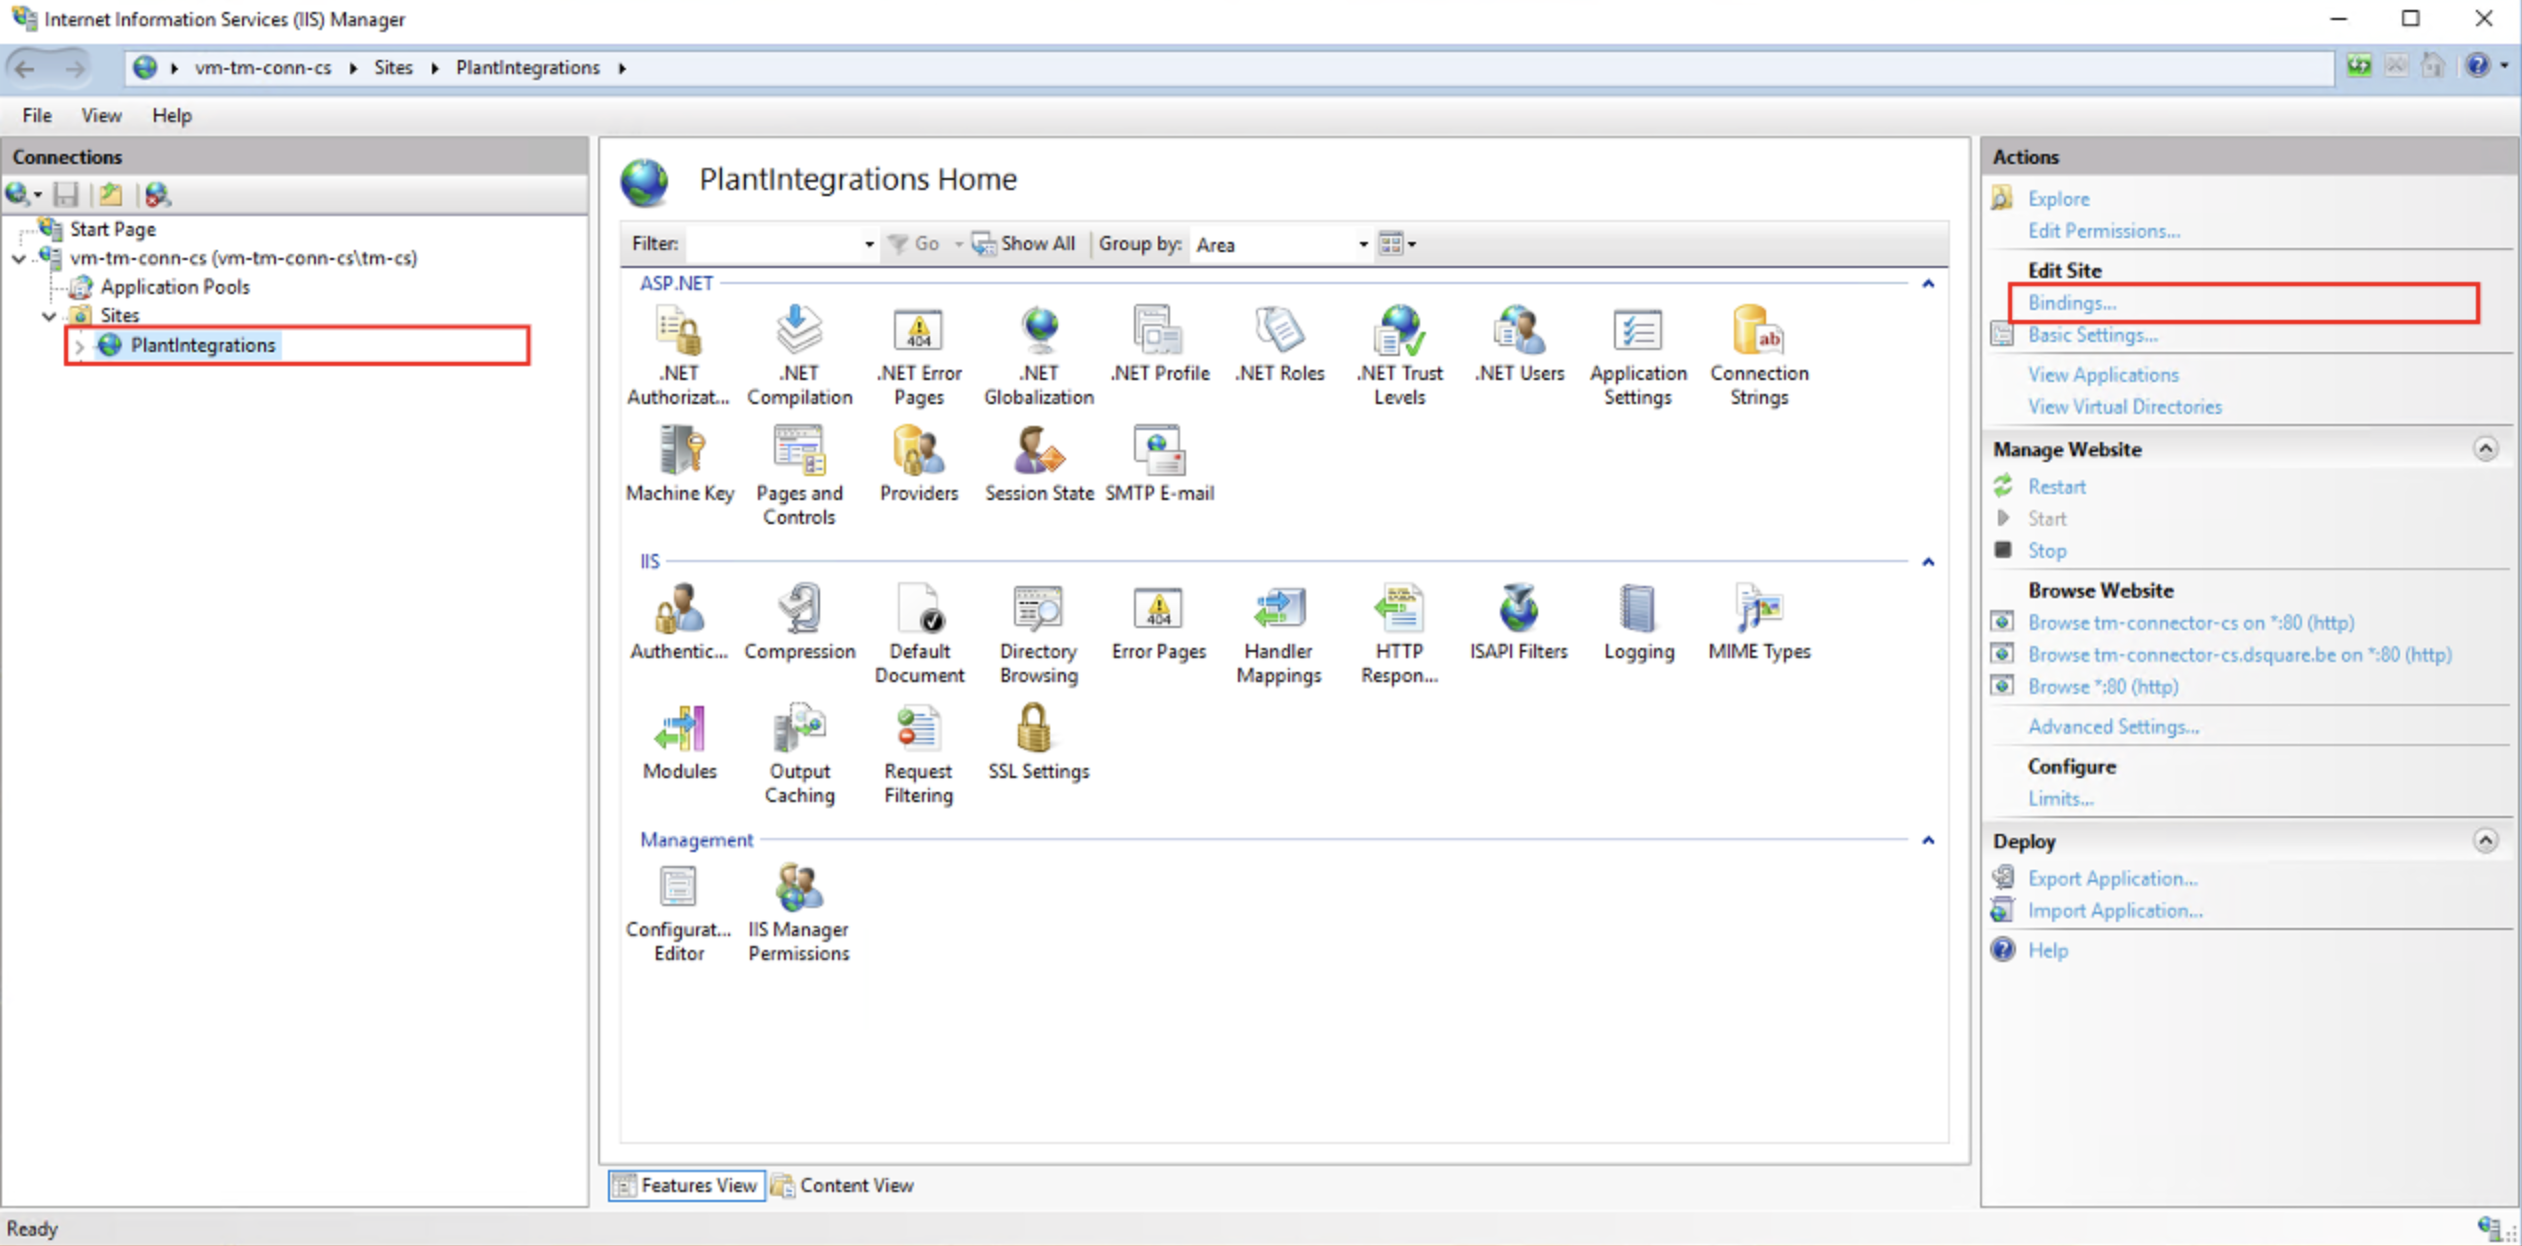
Select bindings and click Add.

In the edit site bindings dialog, set the following data:
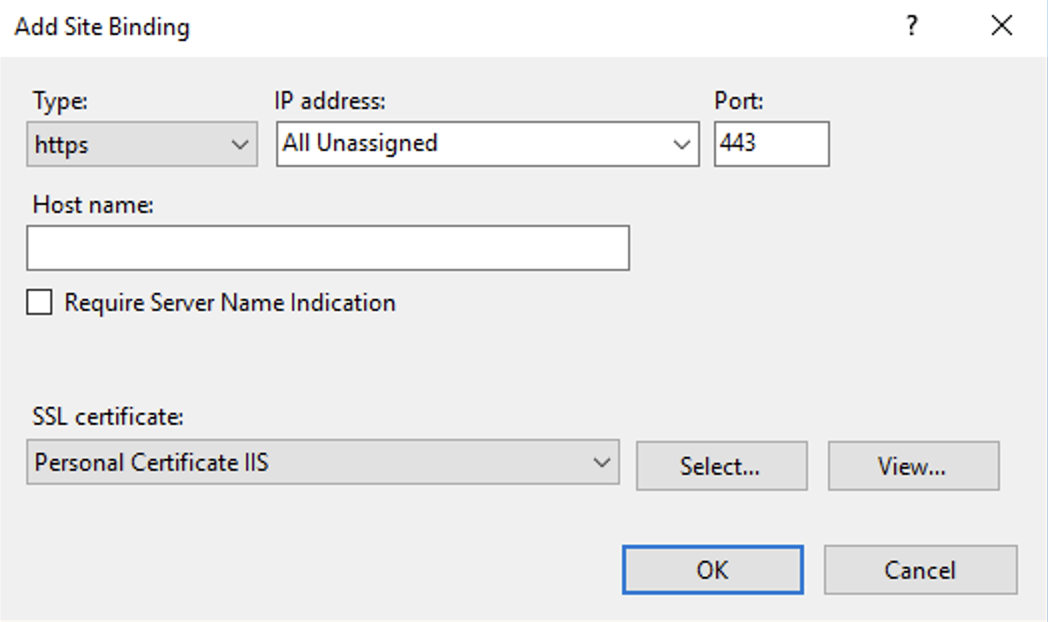
Here test-self-signed-cert is the new SSL certificate.
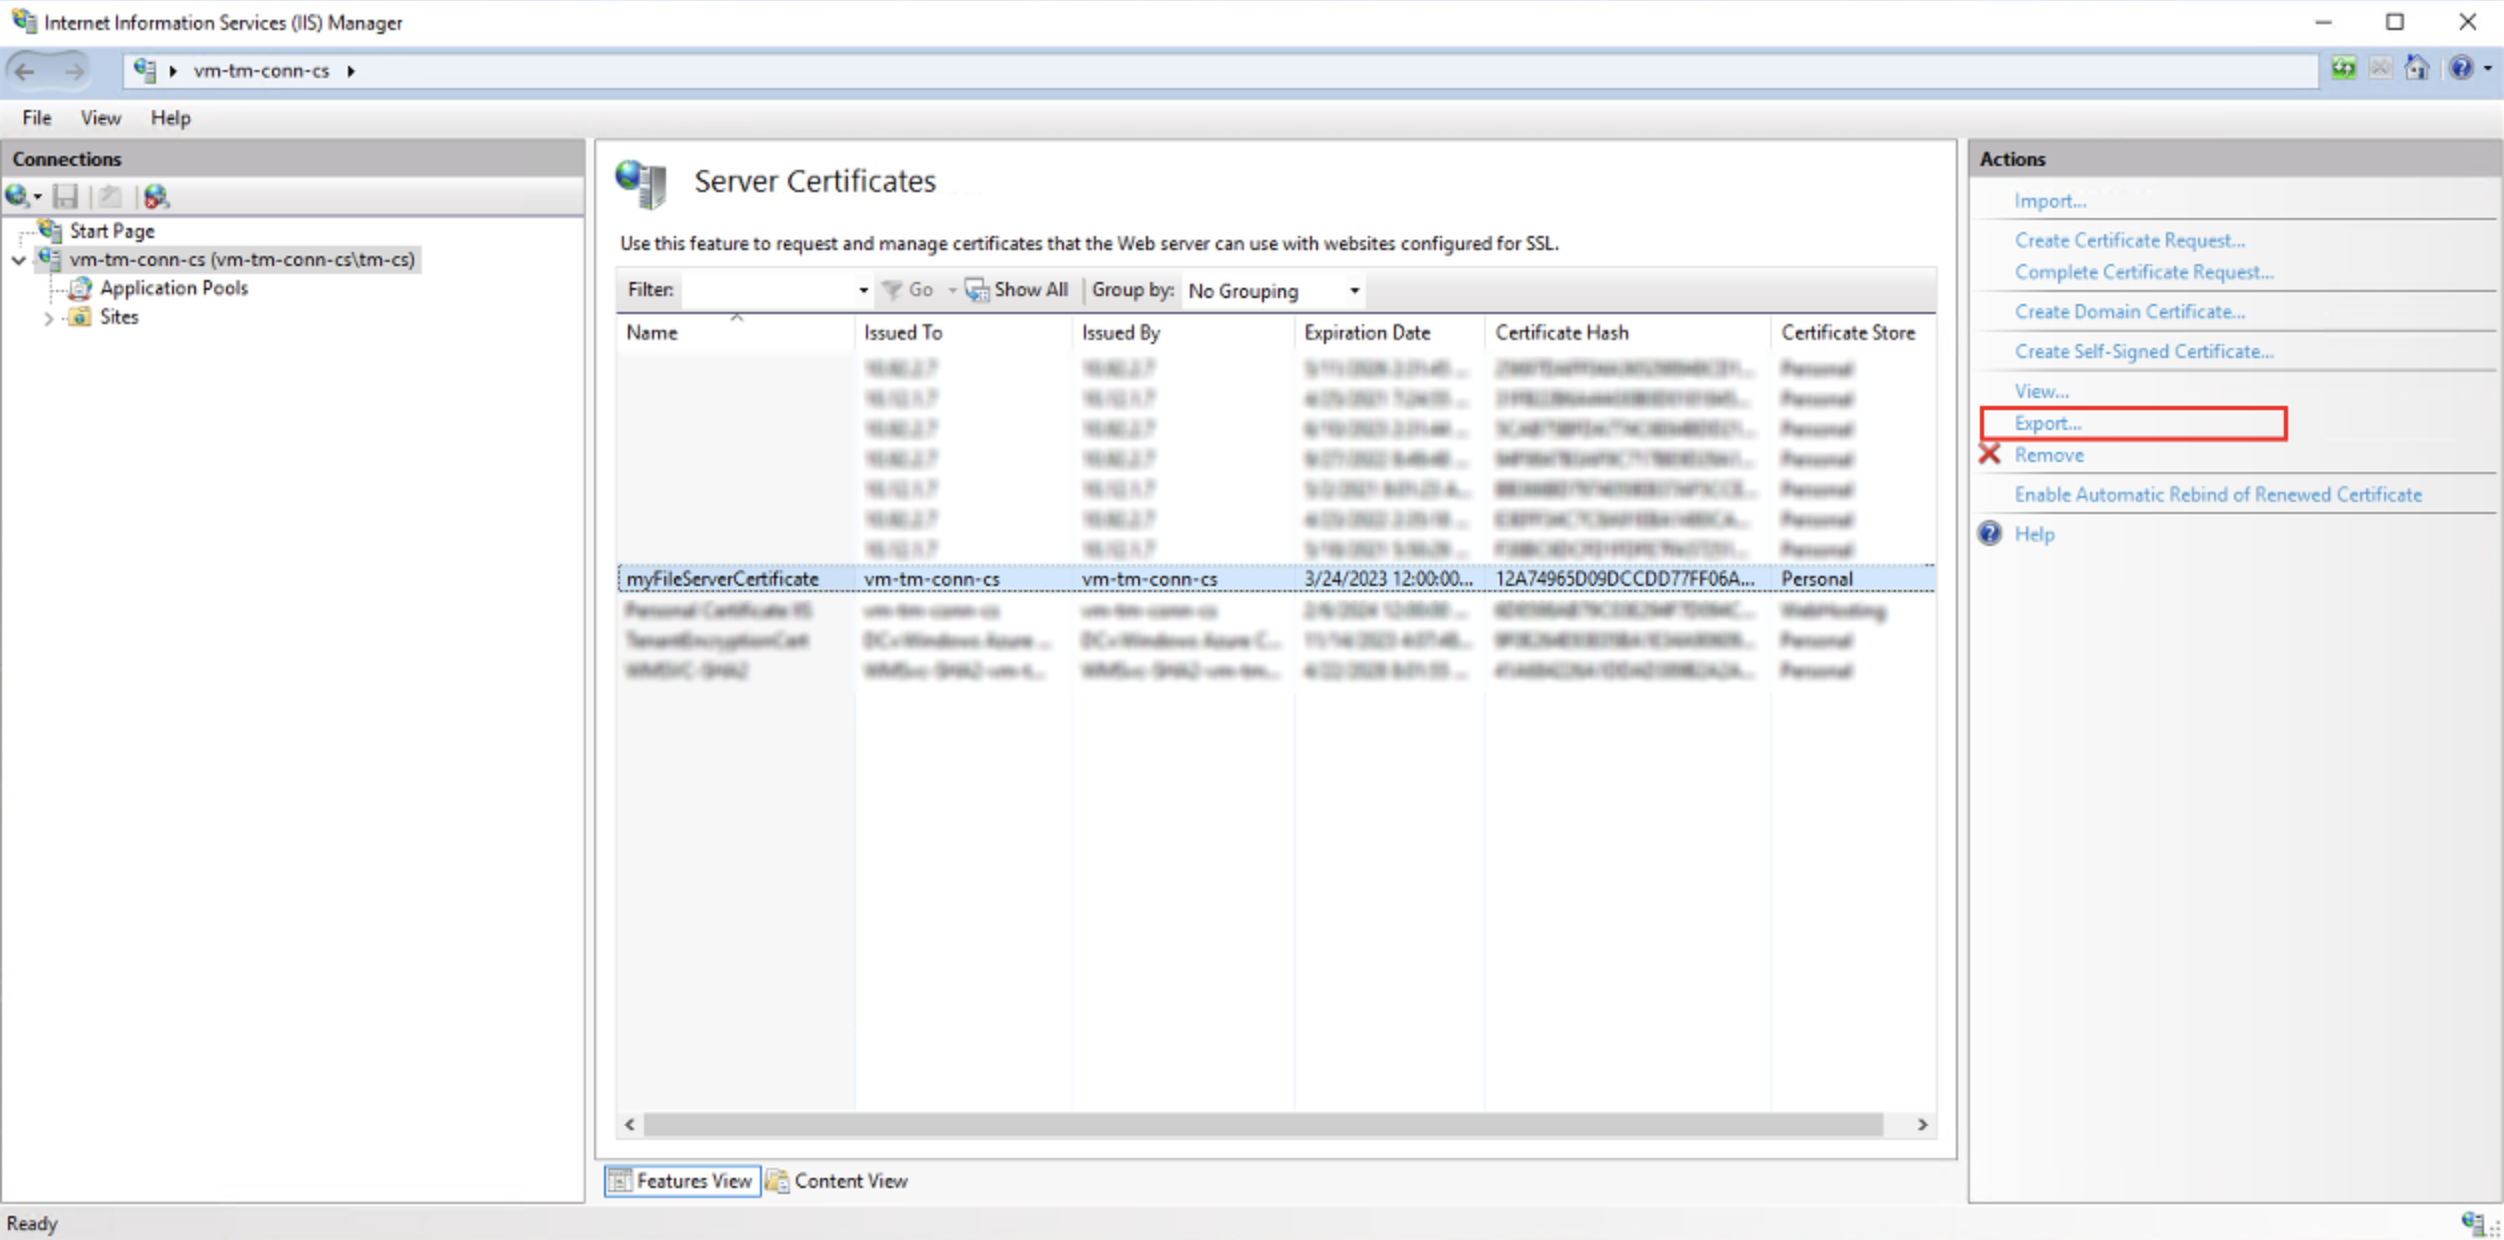
Export the SSL Certificate
From the Internet Information Services (IIS) Manager select Server Certificates and then double-click to view the installed certificates. Then export the certificate to a file:
Note
This will export the certificate and the private key into a single .pfx archive file. To use the certificate in the next step, it first needs to be converted into the format supported by TrendMiner, which is the pem format. OpenSSL is a multi-platform utility that can be used to perform this step. For example, you can convert your certificate using this online converter or using the openssl utility on your local Linux/Windows.
openssl pkcs12 -in certname.pfx -nokeys -out cert.pem
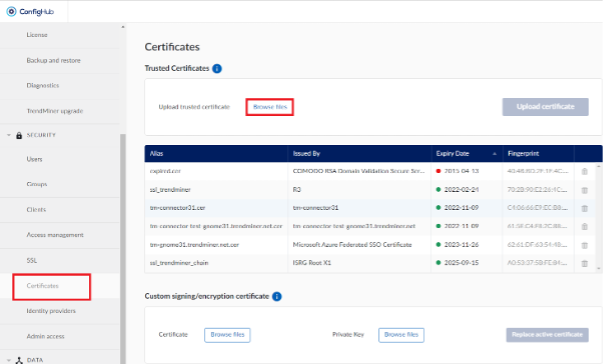
Import the certificate in TrendMiner
Log into ConfigHub on the TrendMiner server. Select the Certificates menu option and then from Trusted certificates screen upload the Certificate, which was exported in the previous step.
First select the certificate file from Browse files button and then click Upload certificate
This will start a process in the background, which may take 1-2 min to complete.
After the certificate has been uploaded, the tm-datasource service needs to be restarted to load the certificate. This can be done from ConfigHub -> Services menu.

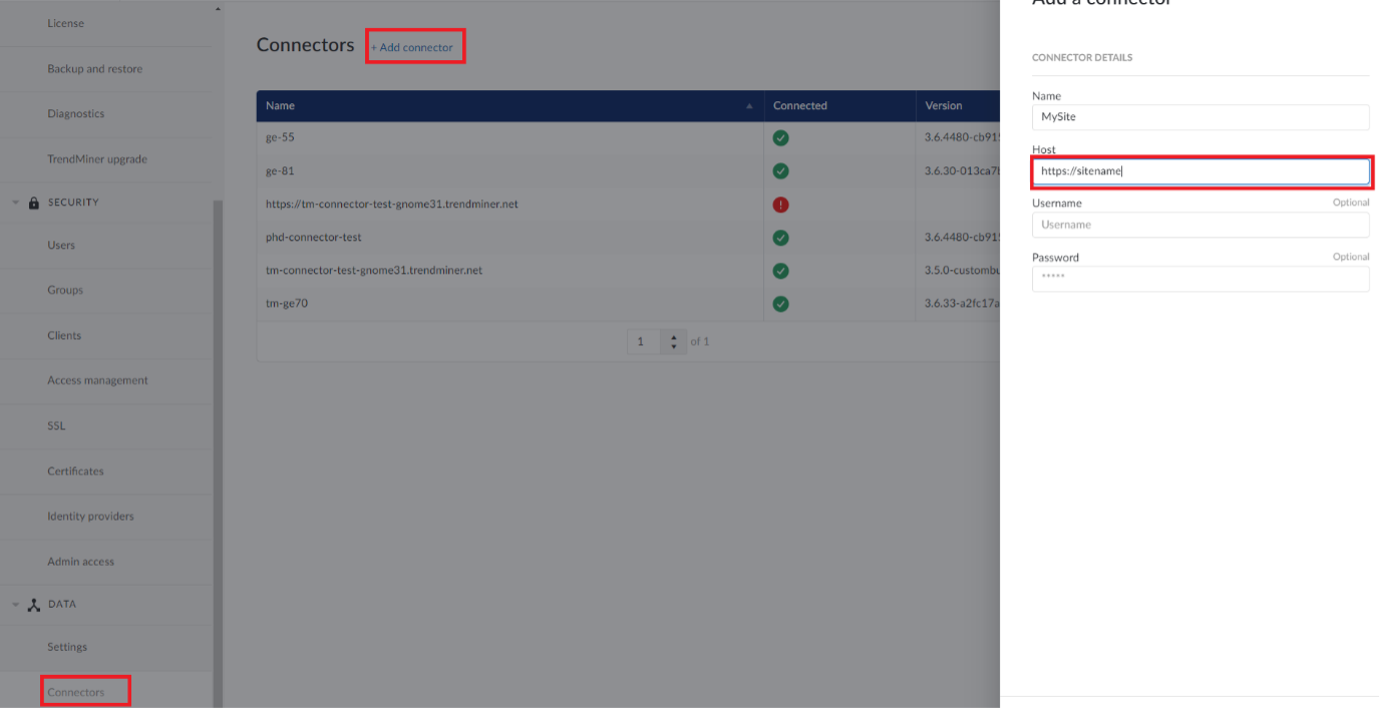
Create a HTTPS Connector in ConfigHub
From ConfigHub, create a new connector to the web site which uses the SSL certificate. The protocol should be set to https.