Upgrade Center
The upgrade options shown in your Upgrade Center are determined automatically based on your server's internet access.
3 different upgrade methods are supported:
Manual | Semi-automated | Fully automated | ||||
|---|---|---|---|---|---|---|
|
|
| ||||
Upgrade package download/upload | Manual download from the TrendMiner file server (files.trendminer.com) to the local machine. Manual upload from local machine to the TrendMiner appliance. | Automated download from TrendMiner cloud server to the local machine. Manual upload from local machine to the TrendMiner appliance. | Automated download from TrendMiner cloud server to the TrendMiner appliance machine. No manual upload required anymore. | |||
Separate upload and upgrade option to reduce downtime | No | No | Yes | |||
Admin is informed when new release is available. More info: Upgrade availability | No | Yes | Yes | |||
Required TrendMiner server internet access | None | https://license.trendminer.cloud (13.248.161.236, 3.33.158.180) | https://license.trendminer.cloud (13.248.161.236, 3.33.158.180) + https://download.license.trendminer.cloud (Amazon Cloudfront) |
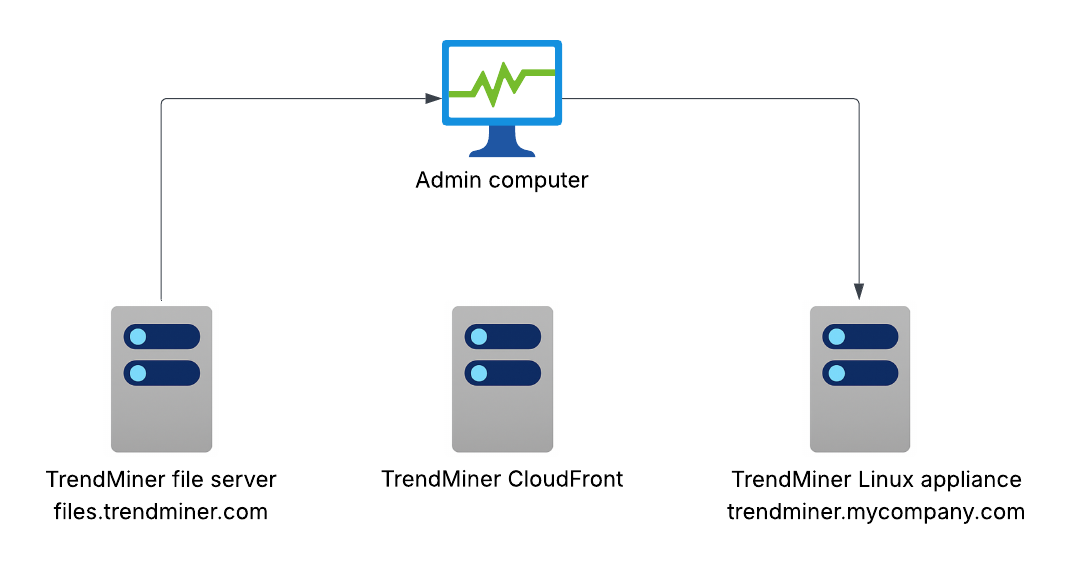
Manual upgrade: classic upgrade method where you manually need to download the upgrade package from the TrendMiner file server (files.trendminer.com) to your computer and upload it manually to the TrendMiner appliance server.
More info on manual upgrades: Manual upgrade
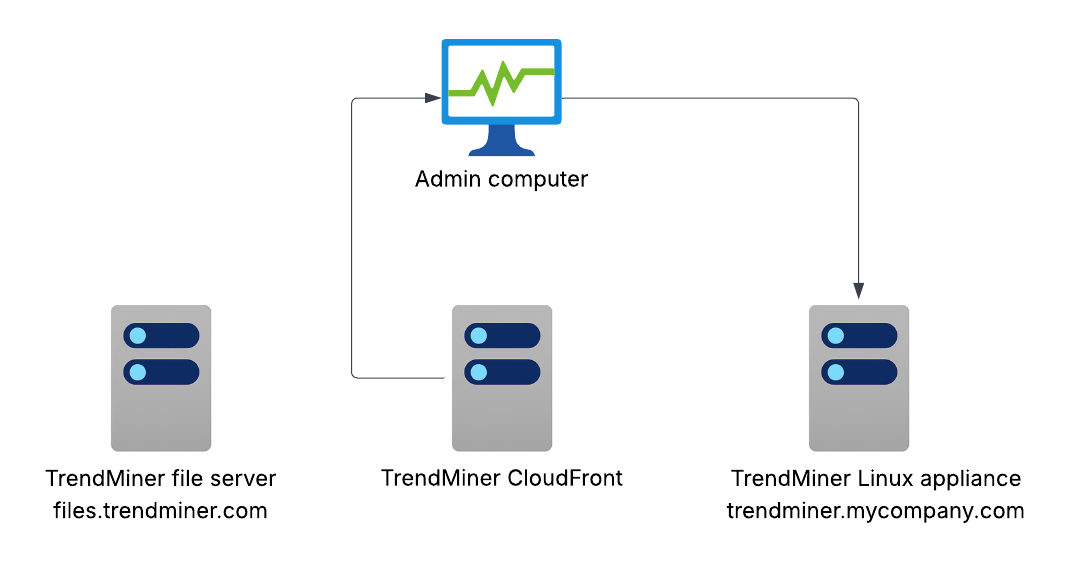
Semi-automated upgrade: in Edge Manager you only see upgrade packages which are compatible with your TrendMiner installation and you can download them directly from within Edge Manager to your computer (no more need for a username/password to access the TrendMiner file server). It is still required to manually upload the package to your TrendMiner server.
More info on semi-automated upgrades: Semi-automated upgrade
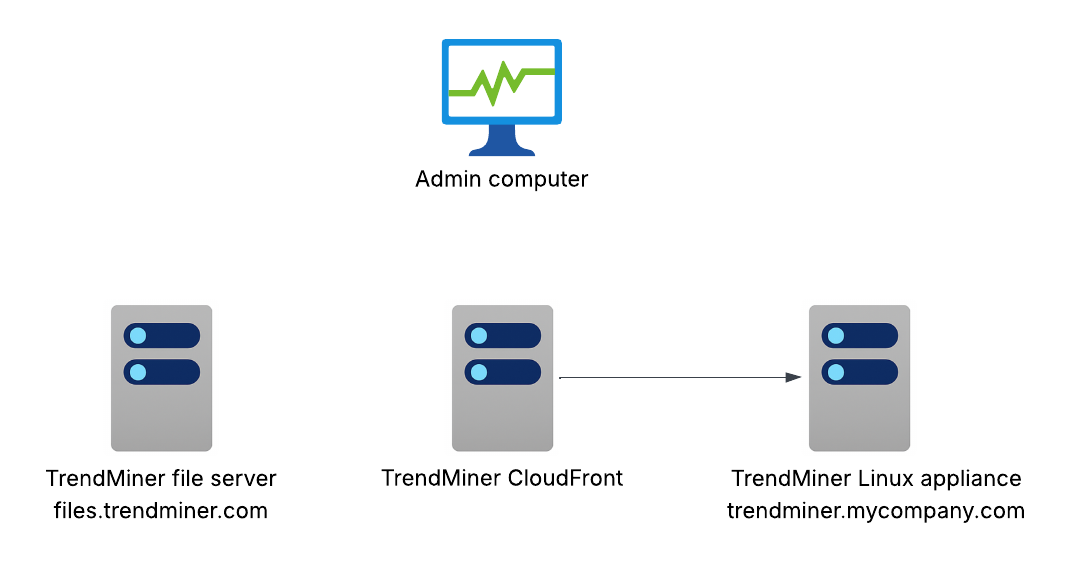
Fully automated upgrade: the upgrade package is downloaded directly from Amazon CloudFront to your TrendMiner appliance server. The package can be downloaded onto the TrendMiner appliance server separately from the actual upgrade to schedule the actual upgrade later on and reduce the upgrade downtime.
More info on fully automated upgrades: Fully automated upgrade
More details on the technical requirements and how to enable fully automated upgrades can be found here: Upgrade Center technical requirements