How to create a webhook?
Introduction
TrendMiner's webhook system enables external services to receive real-time updates when specific events occur within our platform. This document outlines how the webhook mechanism works, how to configure it, and what to expect during its lifecycle.
Our webhook system is built on an event-driven architecture. When an internal event is triggered, a webhook is dispatched to subscribed external endpoints via a POST request.
Notice
This feature is available on demand only: contact your CSM for more info.
Supported webhook types
Currently, webhooks are triggered by Context Item events only. These include:
Event type | Trigger description |
Context Item created | A webhook is sent when a new context item is created. |
Context Item updated | A webhook is sent when an existing context item is modified. |
Context Item deleted | A webhook is sent when a context item is removed. |
Note
It is possible to save a webhook definition without selecting any triggers. In this case, the webhook remains inactive until at least one trigger is selected.
Payload format
Webhook payloads are sent as JSON. Payload structure may vary slightly depending on the Context Item type. Example for an UPDATE event:
{
  "contextItem": {
    "type": {
      "name": "TM_Monitor",
      "identifier": "aa9a192c-a20f-4672-9da4-f325ff1b9456"
    },
    "events": [
      {
        "state": "START",
        "occurred": "2025-09-04T11:10:22Z",
        "identifier": "de5b1868-7b45-4809-45tr-d6838151baf3"
      },
      {
        "state": "STOP",
        "occurred": "2025-09-04T11:10:32Z",
        "identifier": "2da1d2b2-fe78-4a4c-d4s8-c8f6a5709c34"
      }
    ],
    "fields": {
      "VALUE_TRIGGERED": "43"
    },
    "components": [
      {
        "type": "ASSET",
        "identifier": "748474kj-1bb6-46e9-ds98-73da0a6a6b21"
      }
    ],
    "identifier": "9425acb2-6ea5-4b22-9f34-2d0d567368af",
    "createdDate": "2025-09-04T11:10:36.296218Z",
    "description": "TM monitor to track temperature spikes",
    "endEventDate": "2025-09-04T11:10:32Z",
    "totalDuration": "10.0",
    "lastEventState": "STOP",
    "startEventDate": "2025-09-04T11:10:22Z",
    "lastModifiedDate": "2025-09-04T11:25:29.589398226Z"
  },
  "triggerType": "CONTEXT_ITEM_UPDATED_WEBHOOK_TRIGGER"
}
Registering a webhook
Go to ConfigHub > Data > Webhooks
Click Add webhook

3. Enter webhook details and select authentication method.
Note
Each webhook must have a unique target URL. This prevents conflicts and ensures that data is delivered to the correct destination without duplication or unintended behavior.
4. Toggle ‘Enable webhook’ to start sending data to the external system once the webhook is saved.
Webhooks can be disabled at any time without removing their configuration. When disabled:
The webhook configuration remains intact and can be re-enabled later.
The events will be generated and queued to be delivered to the webhook’s endpoint later, once the webhook is re-enabled.
Disabling is useful for:
Maintenance windows
Endpoint migrations
Temporary suspension of integrations

5. Select the webhook triggers and context item types
Once a webhook trigger is selected (e.g., Context Item created, updated, or deleted), a context item type filter section becomes visible. This section allows users to assign one or more context item types to the webhook. Only context items matching both the selected webhook trigger type and context type will be pushed to the external system.
The context item type filter applies to the entire group of context item-related triggers.
It is mandatory to select at least one context item type to proceed.

Note
A maximum of 20 webhooks can be configured per environment. If the limit is reached, you’ll need to delete existing unused or outdated webhooks before adding new ones.
Error handling and diagnostics
When a webhook delivery fails - either due to repeated retry attempts or an immediate client-side exception - TrendMiner will take the following actions to ensure traceability and prevent further disruption:
Offload the failed event: The event is offloaded to the NOT DELIVERED CONTEXT ITEMS table for inspection and troubleshooting.
Disable webhook delivery: The affected webhook definition is automatically disabled to prevent additional failed attempts.
Notify administrators: Admin users receive an in-app notification and an email alert (an email is being sent to all admin users that are part of
tm-confighub-notificationsgroup), prompting investigation and corrective action.

Retry logic
To improve reliability, failed webhook delivery supports retry attempts for up to 8 hours when an endpoint is temporarily unavailable. If all retries fail:
The event is marked as failed. As a result, the webhook definition is automatically disabled.
Manual intervention is required to either retry or purge the failed event.
Once the issue is resolved, webhook delivery will automatically resume.
How retry mechanism works
The system retries failed webhook deliveries using an exponential backoff strategy.
This prevents overwhelming the endpoint while ensuring retries continue for a reasonable duration.
Setting | Value |
|---|---|
Initial Delay | 1 minute (60 seconds) |
Maximum Delay | 15 minutes (900 seconds) |
Maximum Retry Period | 8 hours (28,800 seconds) |
What it means
The first retry happens 1 minute after the initial failure.
Each subsequent retry delay grows exponentially (multiplied by the backoff factor), capped at 15 minutes.
Retries stop after 8 hours from the first failure.
Managing failed webhooks
Admin users can review and manage failed webhook events via ConfigHub → Diagnostics → Context Write. Available actions:
Retry: resend the event after resolving the issue (e.g., restoring system availability).
Purge: permanently remove the failed event and all records from the queue for the affected web hook (e.g., due to misconfigured fields or unresolvable errors).
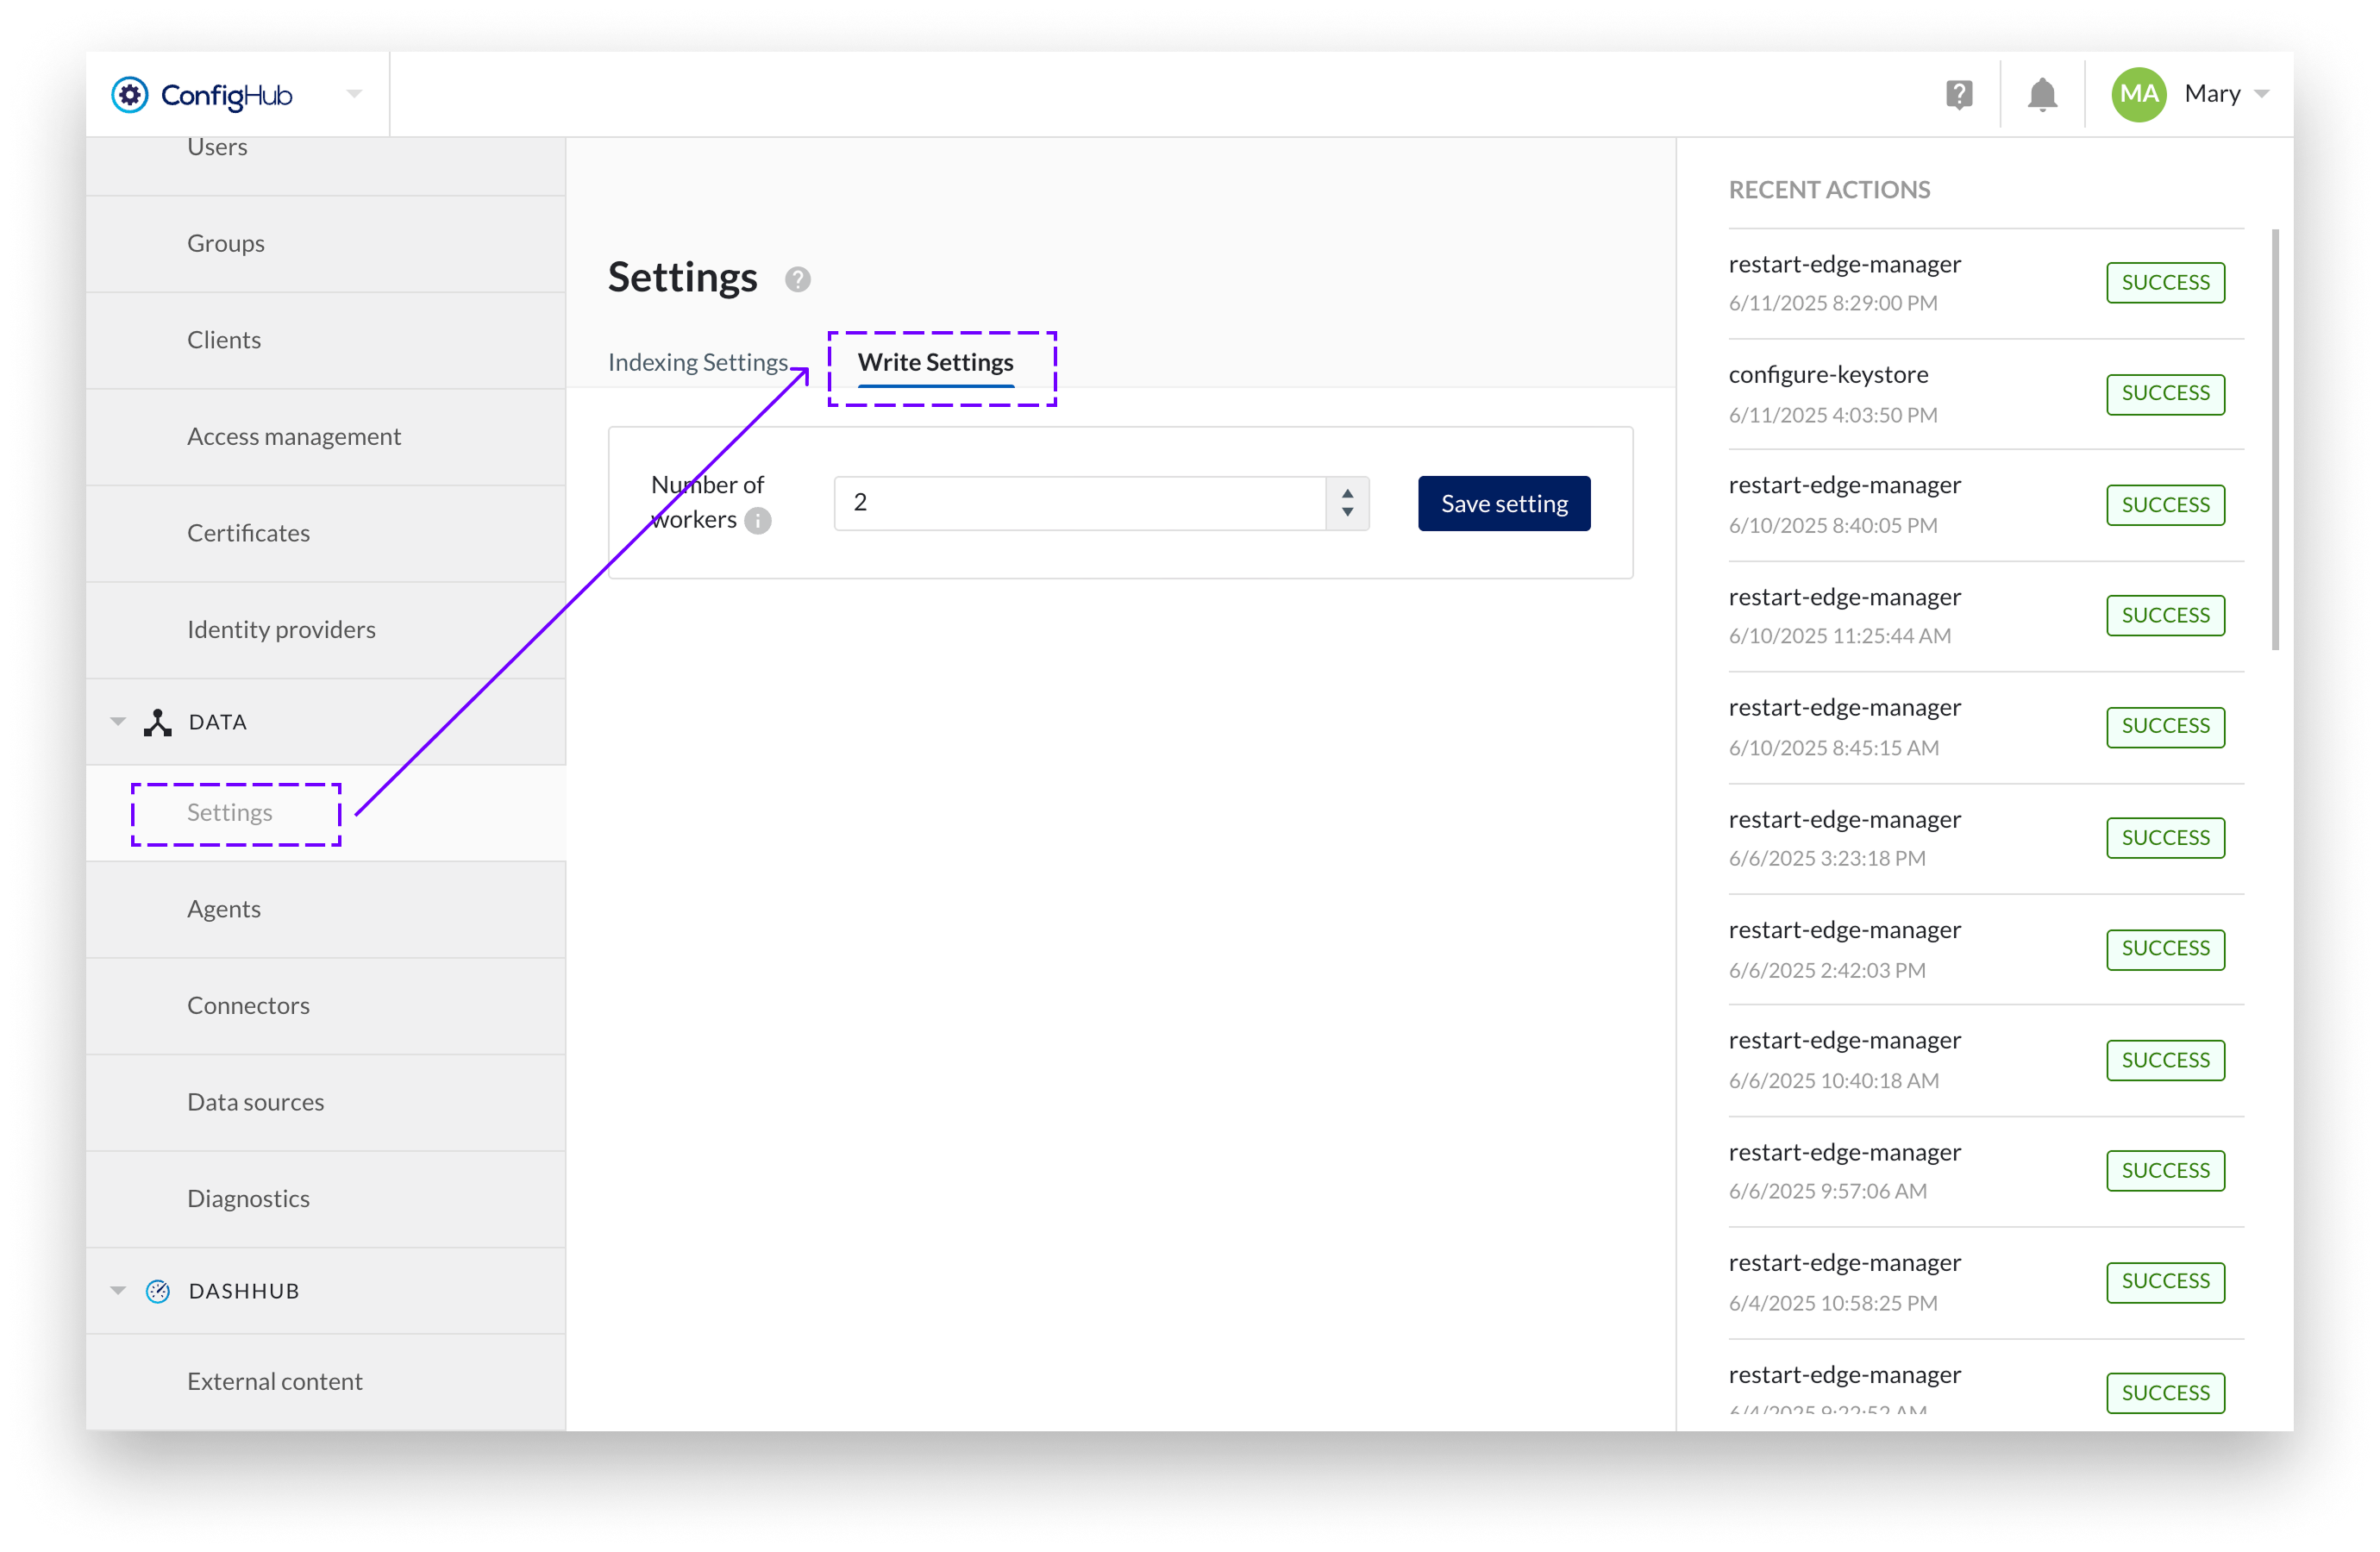
Performance tuning
In the Data → Settings → Write Settings, administrators can configure the number of parallel processing workers. This setting controls how many events are processed simultaneously, allowing optimization based on system capacity and webhook endpoint performance.