Full
Remote backup allows you to backup and restore you TrendMiner installation using a remote storage locations.
the current options available are:
Amazon S3 Storage
Azure Blob Storage
MinIO
Custom S3:
A list of supported S3 providers can be found here: https://velero.io/docs/v1.6/supported-providers/#s3-compatible-object-store-providers
Other S3 compatible object store providers might also work but are not supported by TrendMiner.
Create your storage location using Amazon S3 Provider
You have full admin permissions on a AWS account, or at least the permissions to create a new S3 bucket, IAM Rules and the access to use CloudFormation templates
Download this file, you need it during setup: cfn-backup-s3-customers.yml
login to your AWS account (https://aws.amazon.com)
Click on “sign in to the Console”

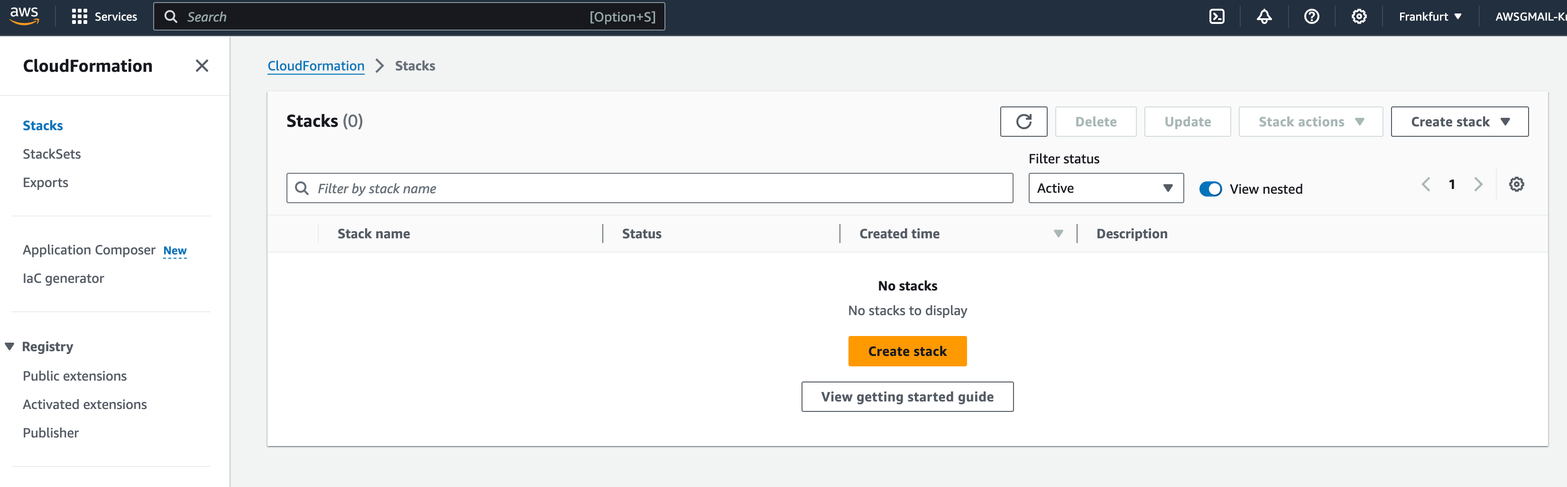
Open CloudFormation, and click on “Create Stack”
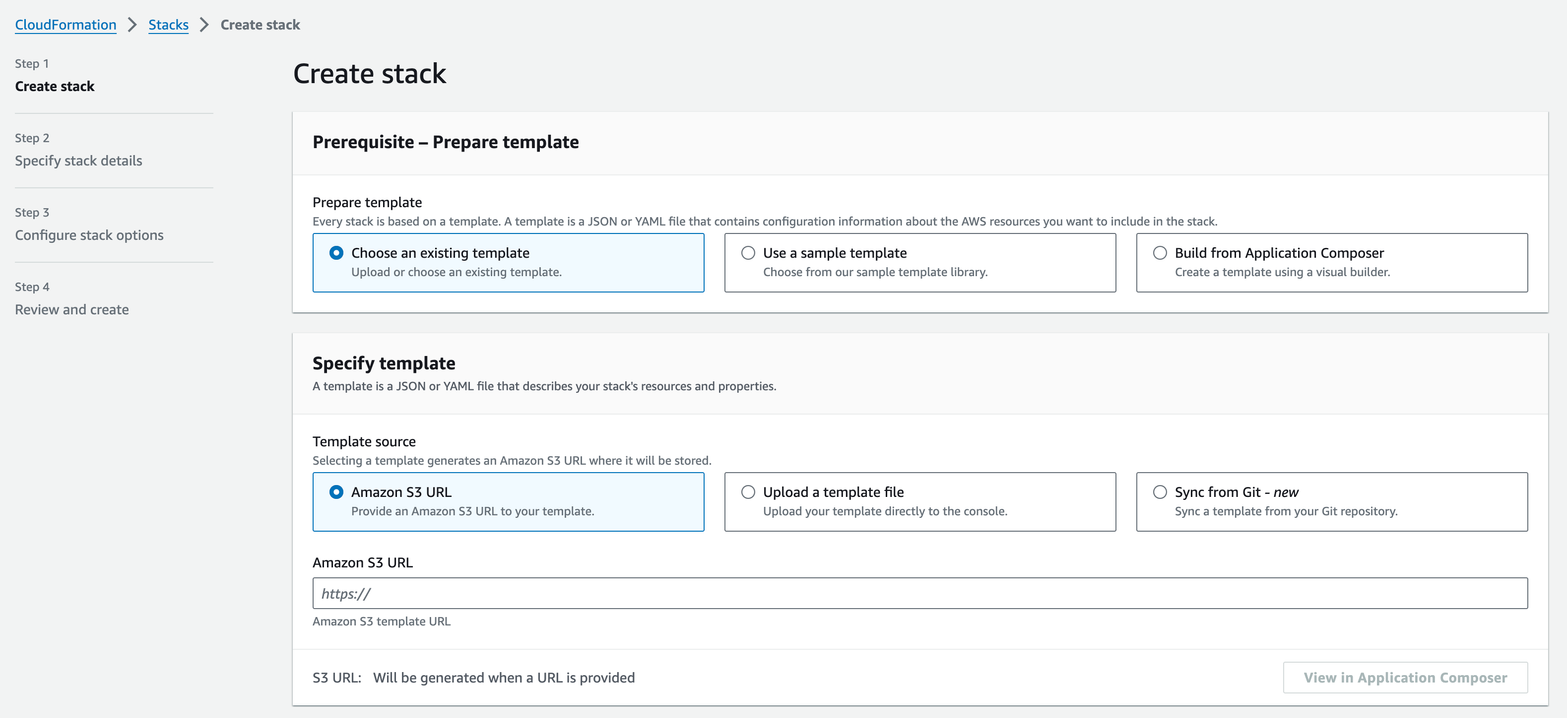
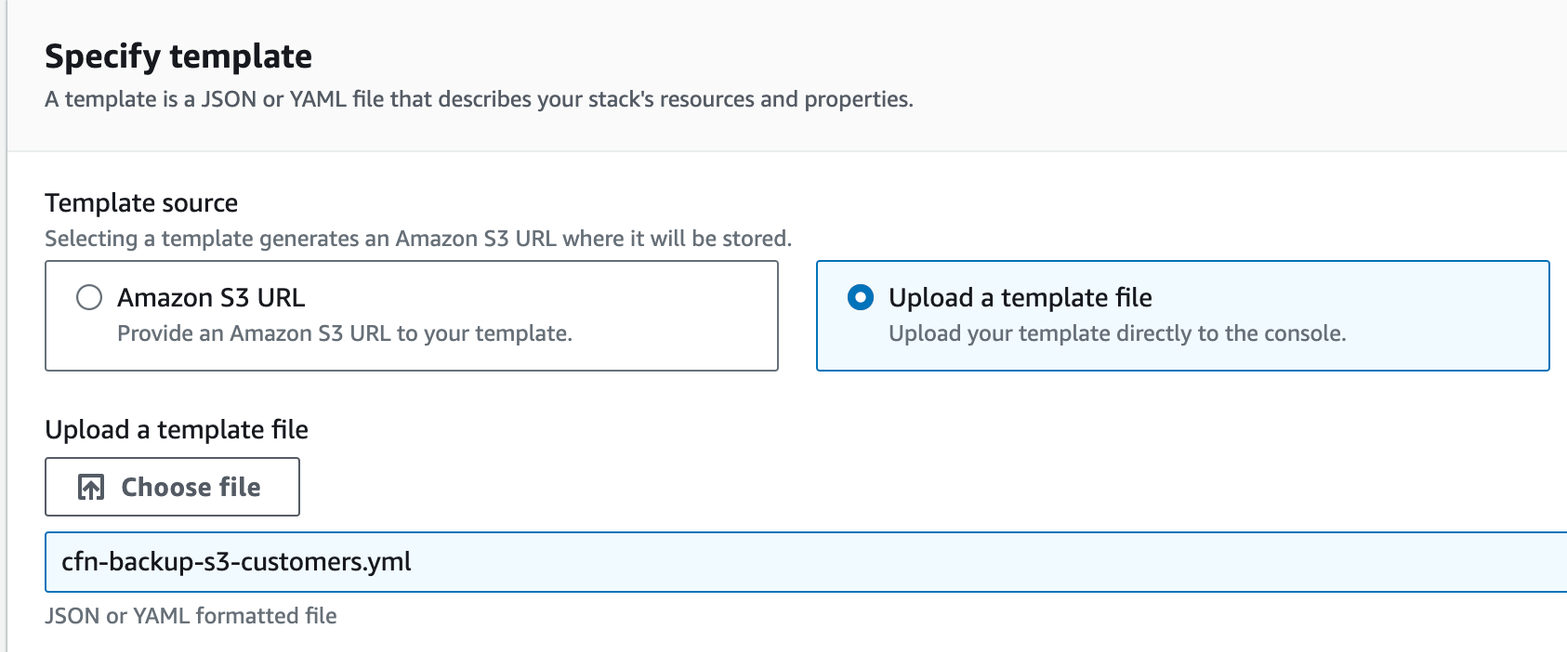
Click on “Upload a template file” , then choose the file you have downloaded in the prerequisite step
Click Next
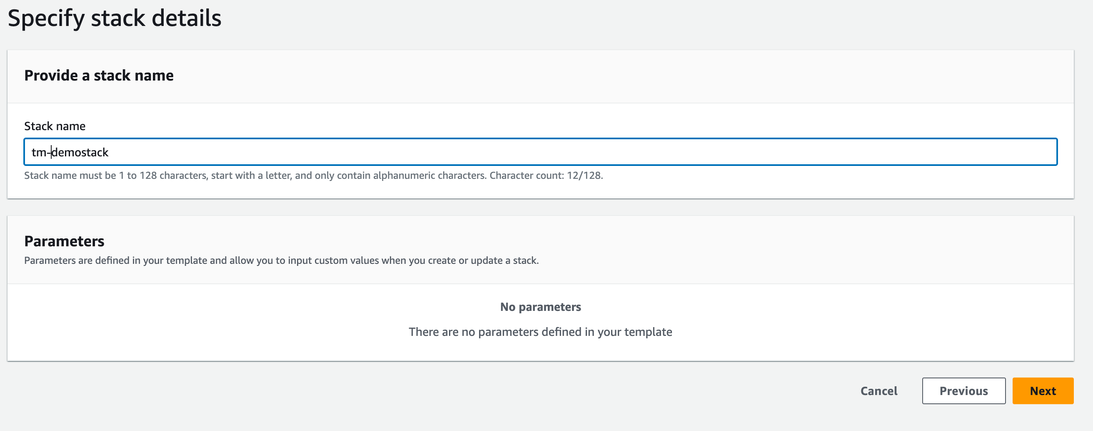
On the “Specify stack details” page fill in the Stack Name
the stack name is used to create the S3 storage and credentials. Please use something meaningful, that you can easily find back like tm-s3backup. The Stackname will also be the name of your bucket. This you will need when configuring Trendminer.
Click Next
The “Configure stack options” are optional. Just click Next
On the “Review and create”
scroll down, read & accept the terms

Click Submit
Wait until the Stack is created
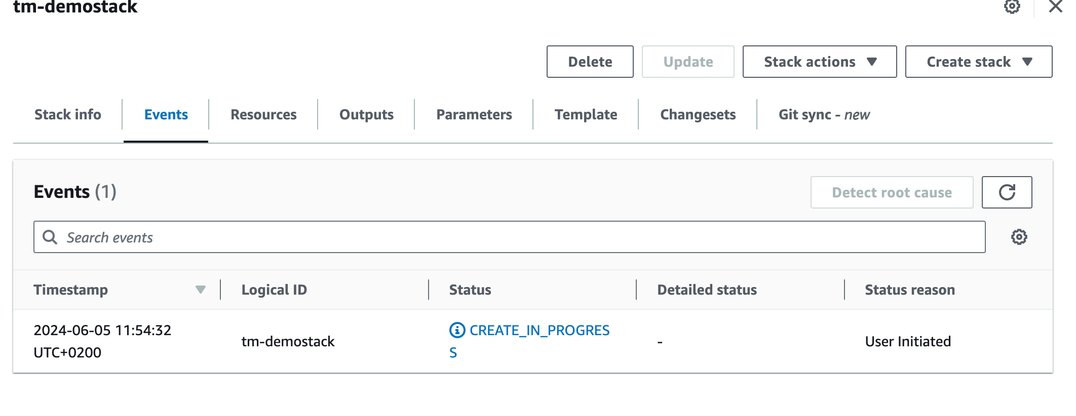

you might need to click on the refresh icon, to see the status change.
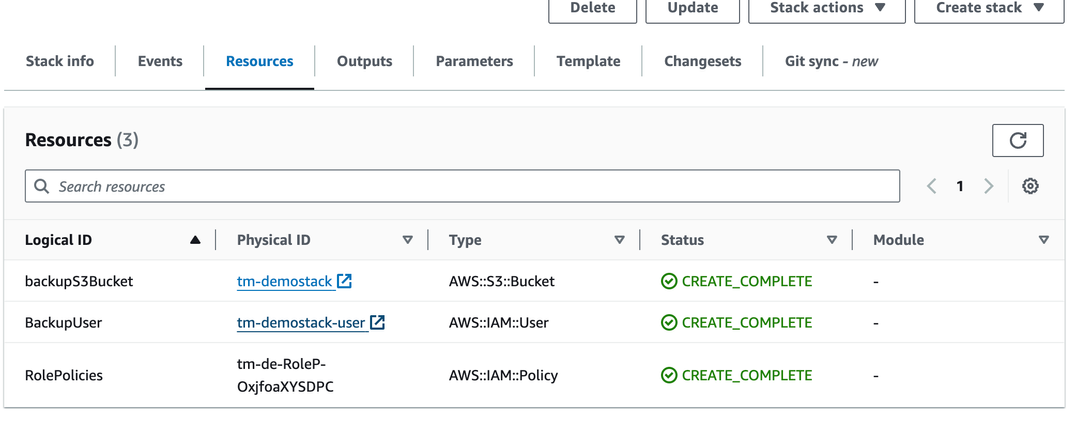
To get your S3 access credentials navigate to Resources and then click on the physical ID link next to BackupUser to open the user details and configure access credentials
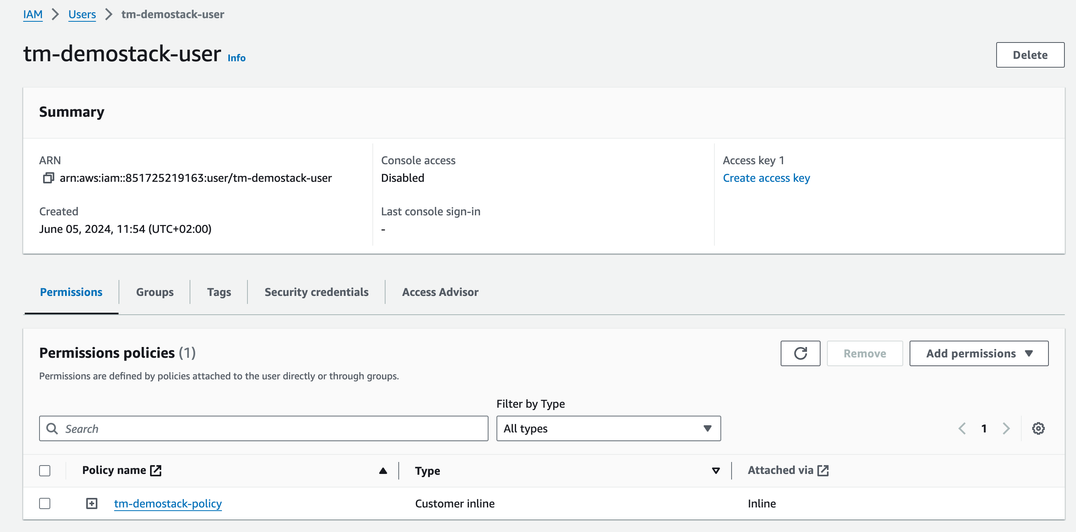
you should have been redirected to the IAM User section.
Please create an access key under the "User summary" by clicking on "Create access key" on the right-hand side.
Select Other
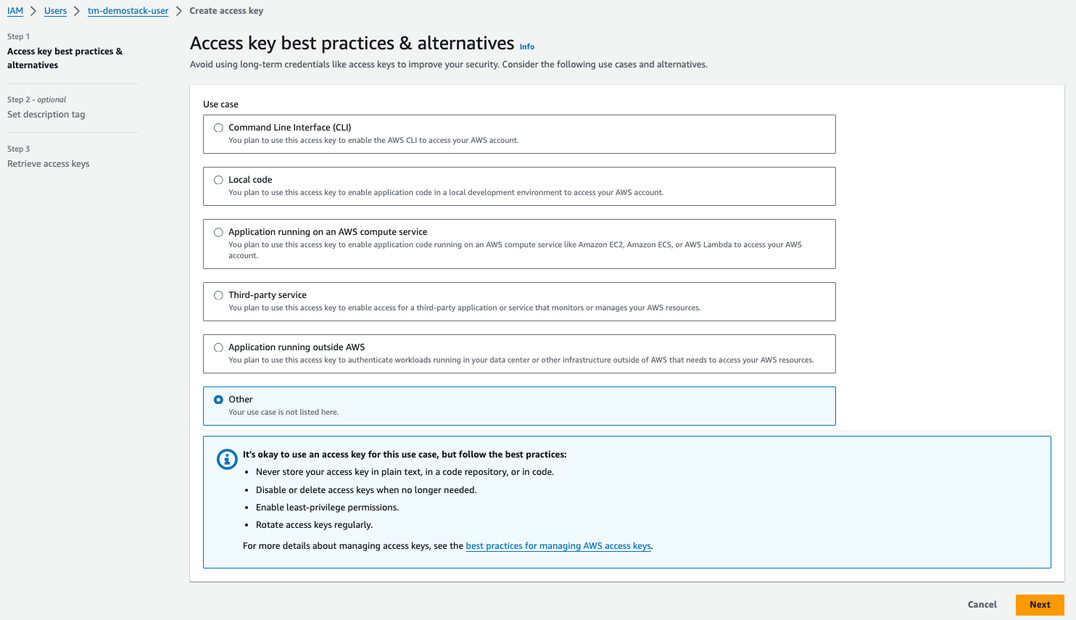
Click Next
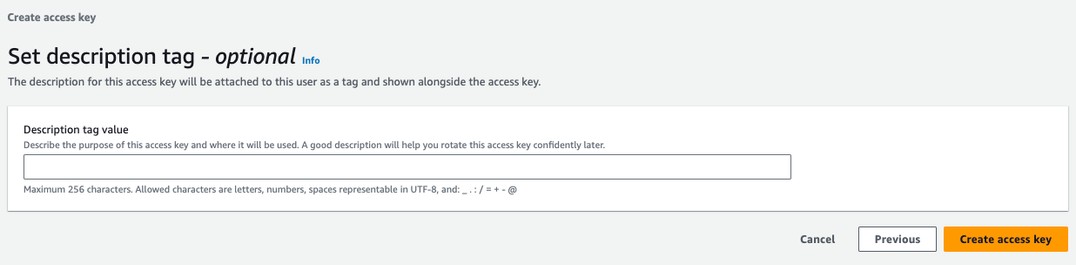
on the “Set description tag” you can optionally specify a tag. After that click “Create access key”
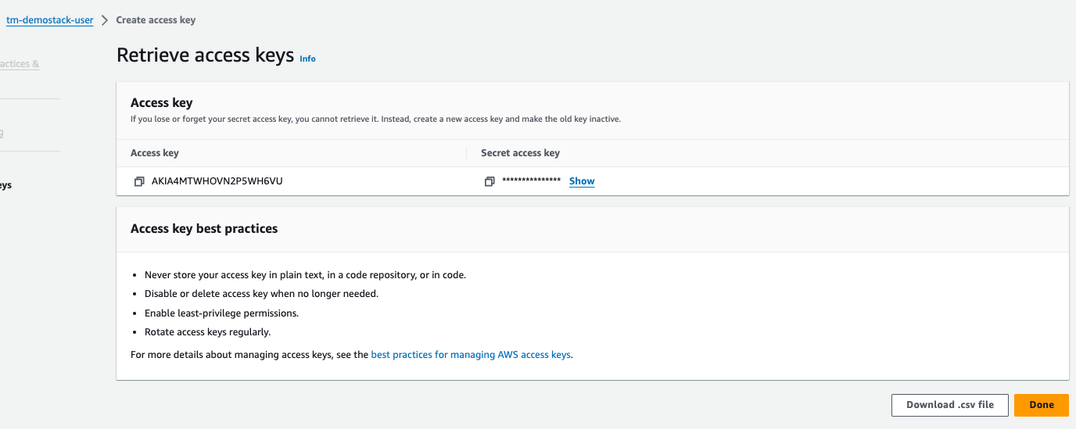
The access key is now visible on the screen. Save the access key information displayed on the screen to a secure location, either by storing it manually or downloading the CSV file and securing it accordingly.
Important
Deleting the Cloudformation stack on Amazon, will delete the IAM user but not the S3 storage bucket.
The information from this procedure you need to save to be able to configure backup/restore in TrendMiner.
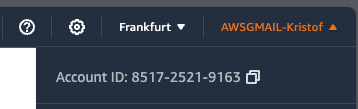
AWS account ID. This information is located in the upper right corner when clicking on your account name, example:
The bucket name: this is the same as the Stack name.
Access Key
Secret Access Key
Create your storage location using Azure Blob Provider
You have Full Admin access on a azure subscription, allowing you to create resources needed for creating a Azure Blob Storage account.
You know how Azure is working and have basic knowledge to navigate and use Azure services.
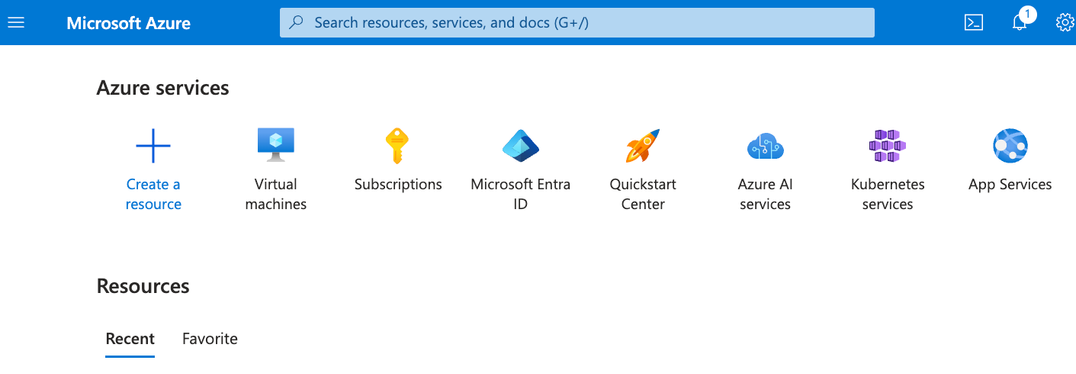
Login to Azure (https://portal.azure.com)
after login, you shall be arriving at the dashboard page, that could look like this:
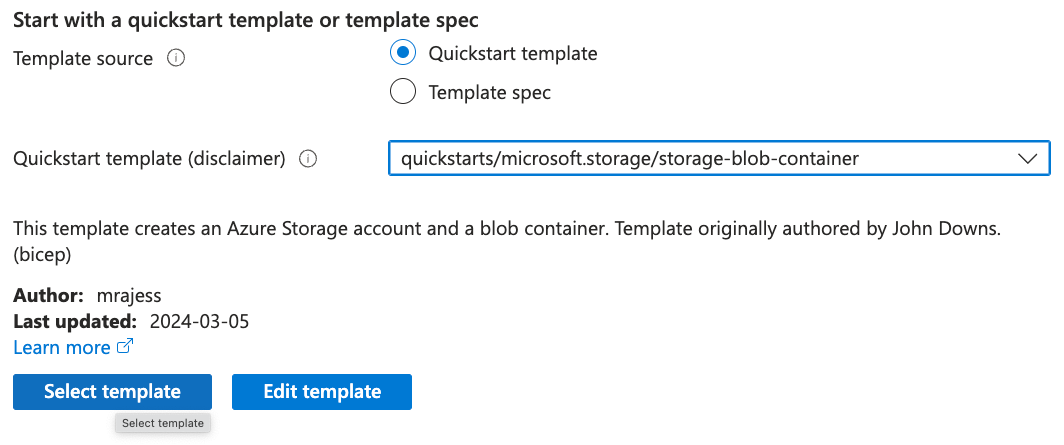
Deploy a custom template
Search for “deploy” in the microsoft search bar, and select “Deploy a custom template” service

Scroll down and search for the quick start template called “storage-blob-container”

Click on “Select template”
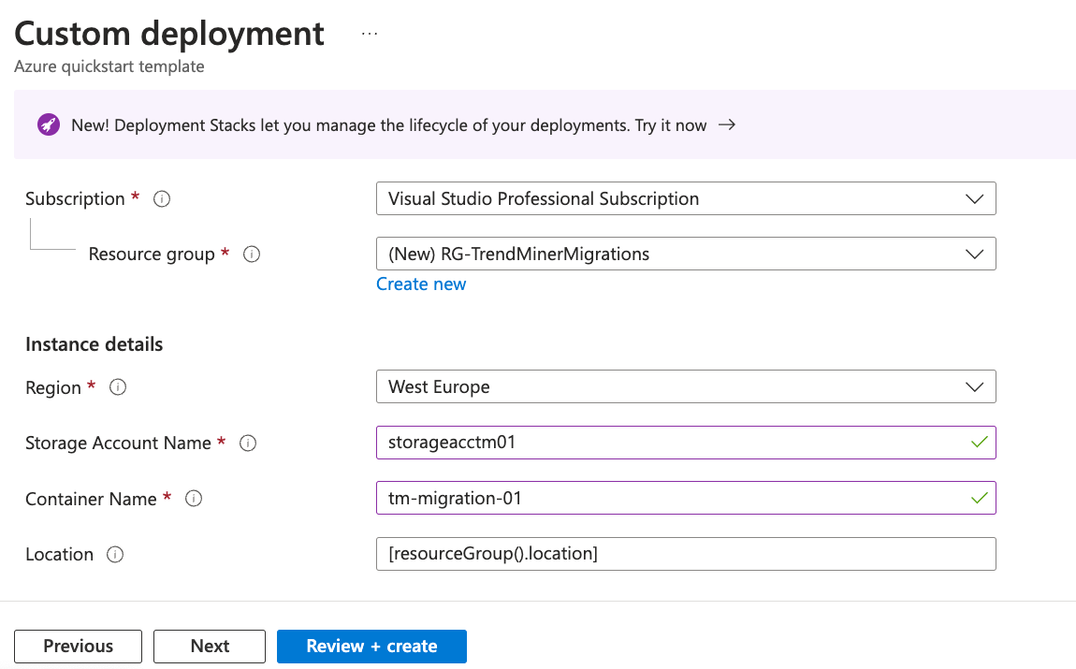
On the Custom Deployment screen, fill in the following information
- Resource group: select a existing one, or create a new one (Take Note for later use)
- Region: select the region where the files need to be saved in. This is best as close as possible to your TrendMiner installation to avoid any delays.
- Storage Account Name: specify a self generated name, that you can easily find back later (Take Note for later use)
- Container Name: Suggest you are using the name of the server you are migrating here. But this field is also open to pick a generic name. (Take Note for later use)
If done, click Review + Create
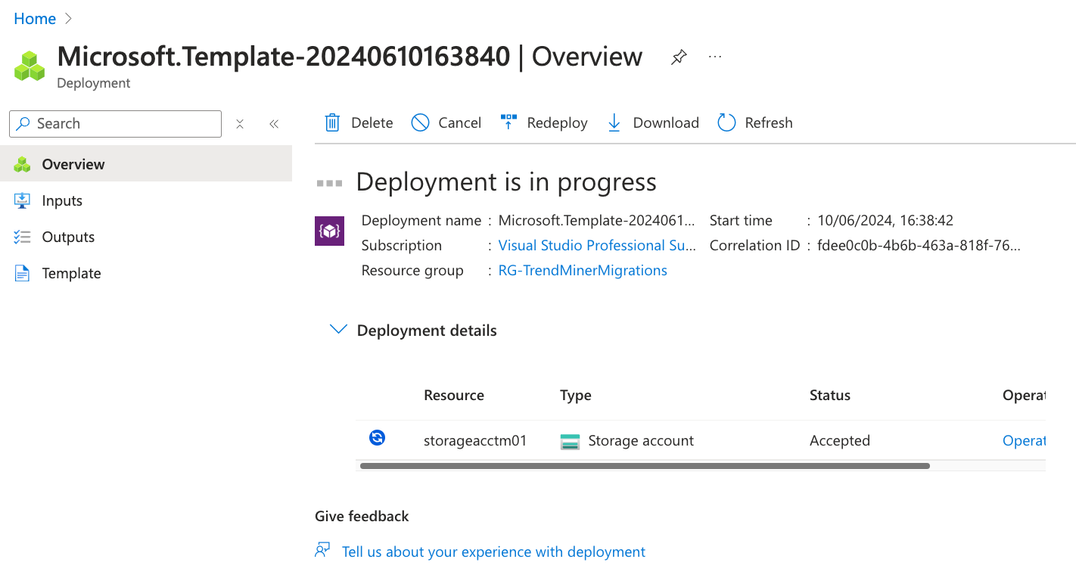
On the last screen (review changes), Click “Create”
Wait until all actions are done
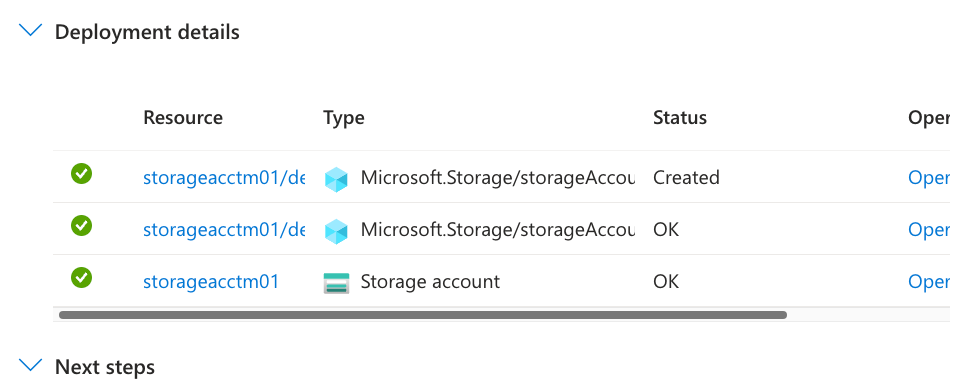
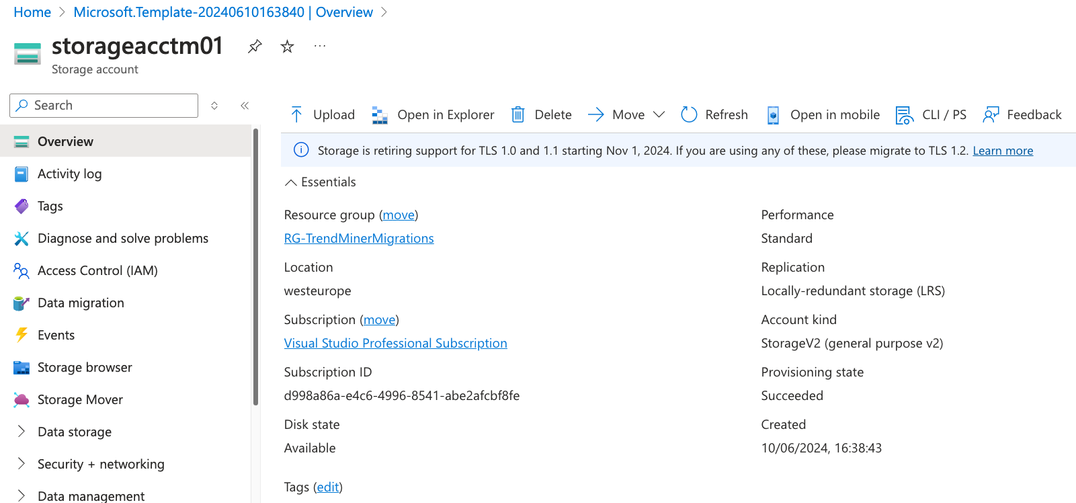
Click open the ‘Deployments details’ and find back the Storage Account.
Click the link left from “Storage account” Type
In this case “storageacctm01”
On the overview page, make note of the “Subscription ID”
Open Security + Network menu
In the menu at the left of the screen, click on “Security + Networking” and click on “Access Keys”
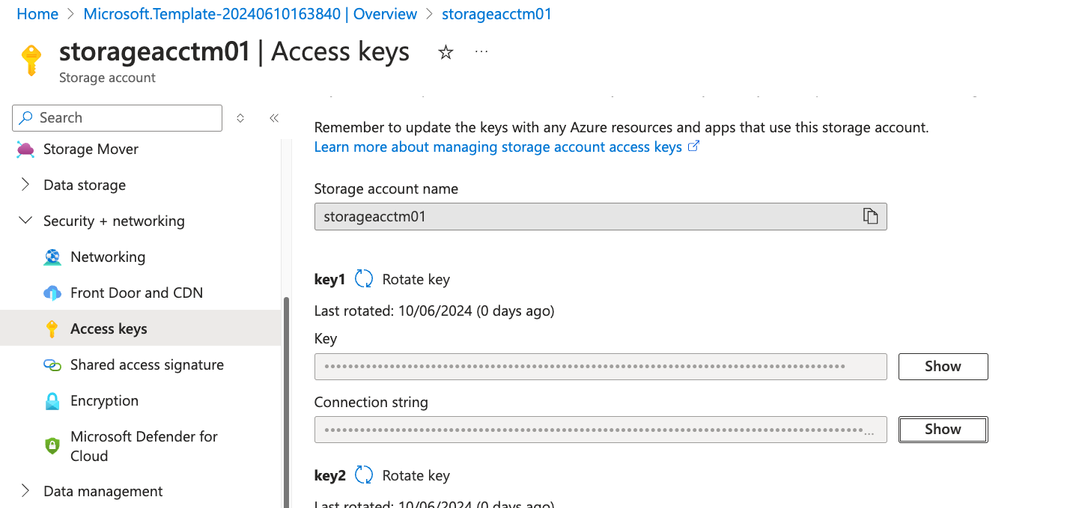
Retrieve your Access Key by clicking on Show button next to the “Key” Field.
Note
If you plan on rotating your access keys, do not forget to update the TrendMiner Installation with the new access key
The information from this procedure you need to save to be able to configure backup/restore in TrendMiner.
Subscription ID
Resource group
Storage account
Container name
access key
Configure your Azure Blob Storage provider in Edge Manager
you have created the Azure Blob Storage Account according to our procedure.
You are running a TrendMiner version later then or equal to R2
Login to TrendMiner EdgeManager
https://url/edge or http://url:8080 (in case no valid certificate is installed)
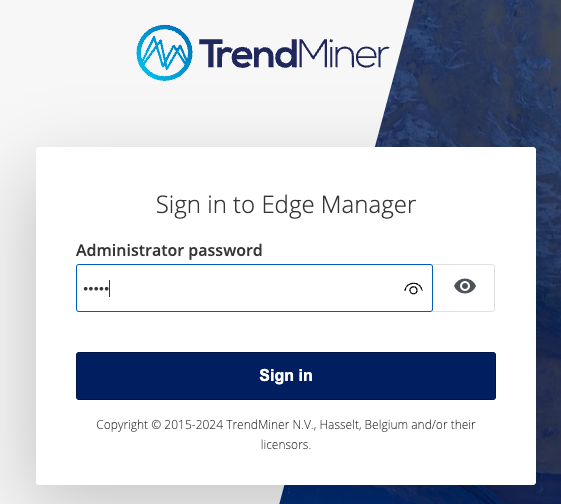
Click “Sign In”
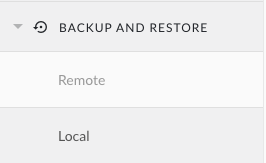
Navigate to “BACKUP AND RESTORE” -> Full
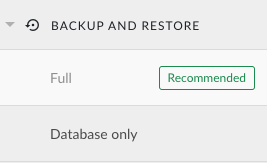
Click on Full
Click on Storage Settings
In this procedure we use Azure Blob Storage, after selecting this, fill in all information required
You should have captured the data from the procedure on how to create a Azure Blob Storage account, except the backup Path.

Note
You can choose a backup path yourself. E.G. name of the server that your are backing up.
One storage account, can be used for multiple TrendMiner Installations, however, it is advised to use at least another backup path to be able to use the same storage account.
There are 4 reasons for this recommendation:
It simplifies backup management for each environment.
It ensures that backups for each environment remain separate, minimising the risk of accidentally restoring from one environment with backups from another.
It streamlines the process of deleting backups specific to an environment.
It prevents scheduled backups from interfering with each other if they are executed simultaneously.
When restoring to a new server, make sure to use the same backup path on the destination server
Important
The configured bucket needs to be empty
Click Save
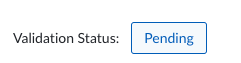
Wait until storage location is validated
you can click on Storage Settings tab, to refresh the page
The status should say Available before continuing with the next steps.
 |
In case the status is as following
 |
Tip
In case something is going wrong (Status stays on Unavailable), these are some tips you can try to fix
make sure the date and time are correct on the server. Also NTP server need to be in place. Not setting it, will result in authentication failure for the backend tooling used to setup the remote storage
Doublecheck all parameters provided.
Validate you can properly communicate to Azure Blob from the TrendMiner Host.
In case all parameters are properly set, and it still doesn't work, please try to use a Azure Blob client (E.g. FilezillePro https://filezillapro.com/) that you can run on your Laptop/Desktop to try to access the Storage Account, to fully validate the parameters.
In case all above is not helping, please contact TrendMiner Support.
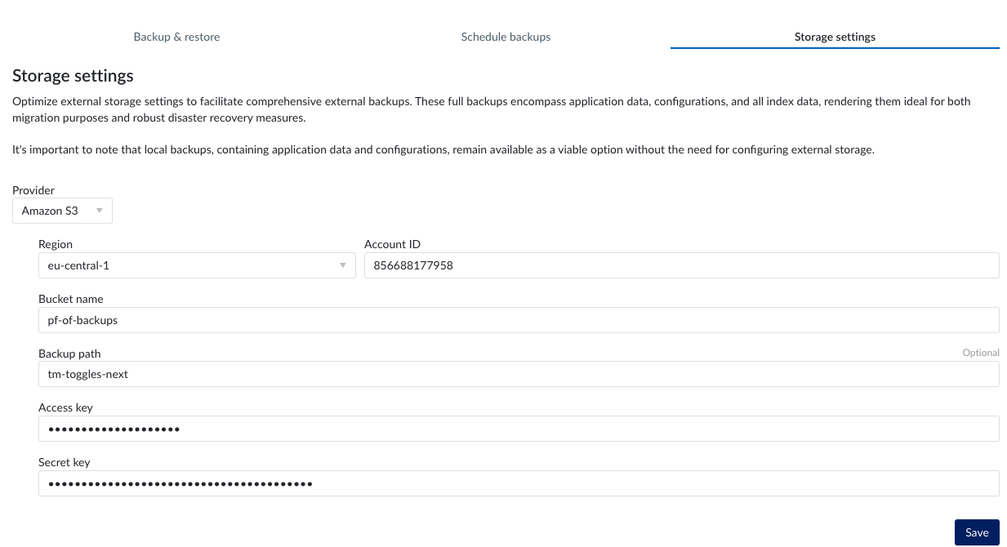
Configure your AWS S3 storage provider in Edge Manager
you have created the AWS S3 credentials according to our procedure.
You are running a TrendMiner 2024.R2.0 or later
Login to TrendMiner Edge Manager
Click “Sign In”
Navigate to “BACKUP AND RESTORE” -> Remote
Click on Storage Settings
In this procedure we use Amazon S3 (default). After selecting the storage provide you need to fill in all information required, as shown in the screenshot below.
You should be able to fill in all information from the procedure to create the S3 bucket, except for the backup path.
 |
Note
You can choose a backup path yourself. E.G. name of the server that your are backing up.
One storage account, can be used for multiple TrendMiner installations, however, it is advised to use at least another backup path to be able to use the same storage account.
There are 4 reasons for this recommendation:
It simplifies backup management for each environment.
It ensures that backups for each environment remain separate, minimising the risk of accidentally restoring from one environment with backups from another.
It streamlines the process of deleting backups specific to an environment.
It prevents scheduled backups from interfering with each other if they are executed simultaneously.
When restoring to a new server, make sure to use the same backup path on the destination server
Important
The configured bucket needs to be empty
Click Save
Wait until storage location is validated
you can click on Storage Settings tab, to refresh the page
The status should say Available before continuing with the next steps.
|
In case the status is as following
|
Tip
In case something is going wrong (Status stays on Unavailable), these are some tips you can try to fix
make sure the date and time are correct on the server. Also NTP server need to be in place. Not setting it, will result in authentication failure for the backend tooling used to setup the remote storage
Double check all parameters provided.
Validate you can properly communicate to Amazon S3 from the TrendMiner Host.
In case all parameters are properly set, and it still doesn't work, please try to use a S3 client (E.g. FilezillePro https://filezillapro.com/) that you can run on your Laptop/Desktop to try to access the S3 bucket, to fully validate the parameters.
In case all above is not a option, please contact TrendMiner Support.
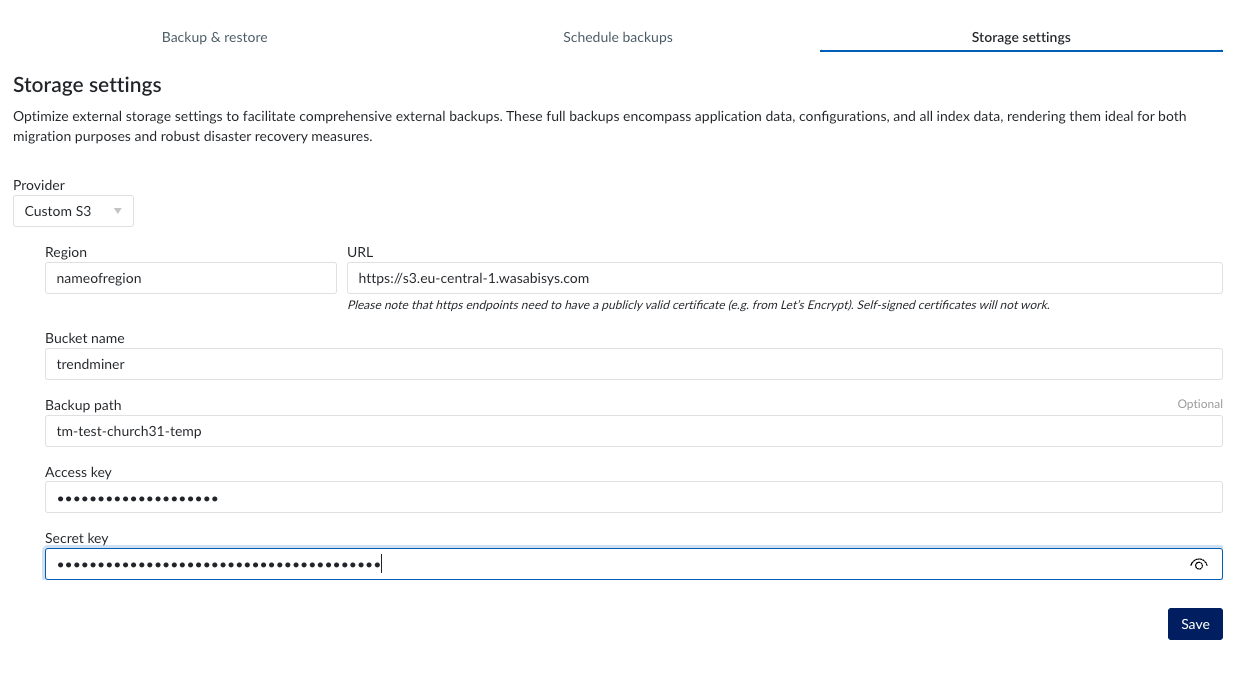
Configuring your Custom S3 provider in Edge Manager
You have a AWS S3 API (v4) compatible storage provider setup or use one of the available cloud S3 compatible storage providers.
A list of supported S3 providers can be found here: https://velero.io/docs/v1.6/supported-providers/#s3-compatible-object-store-providers
Other S3 compatible object store providers might also work but are not supported by TrendMiner.
You have the following credentials information to configure TrendMiner Backup provider with the proper permissions.
URL (in case of https, only public certificates are allowed.)
Bucketname
Access Key
Secret Key
Login to TrendMiner EdgeManager
https://url/edge or http://url:8080 (in case no valid certificate is installed)
Click “Sign In”
Navigate to “BACKUP AND RESTORE” -> Full
Click on Full
Click on Storage Settings
Select Custom S3 in the drop down menu called “Provider”. After selecting the storage provide you need to fill in all information required, as shown in the screenshot below.
You should have all the parameters for configuring, except for the backup path.
Tip
Not all of the S3 compatible solutions are providing the Region parameter. If the Region is not available, you can pick a name you prefer, e.g. customs3region or leave it empty
Important
The configured bucket needs to be empty
Wait until storage location is validated
you can click on Storage Settings tab, to refresh the page
The status should say Available before continuing with the next steps.
|
In case the status is as following
|
Tip
In case something is going wrong (Status stays on Unavailable), these are some tips you can try to fix
make sure the date and time are correct on the server. Also NTP server need to be in place. Not setting it, will result in authentication failure for the backend tooling used to setup the remote storage
Doublecheck all parameters provided.
Validate you can properly communicate to S3 from the TrendMiner Host.
In case all parameters are properly set, and it still doesn't work, please try to use a S3 client (E.g. FilezillePro https://filezillapro.com/) that you can run on your Laptop/Desktop to try to access the Storage Account, to fully validate the parameters.
In case all above is not helping, please contact TrendMiner Support.
Configuring your Minio S3 solution in Edge Manager
you have a running Minio installation that can be used for backup of your TrendMiner installation.
you have the following credentials information to configure TrendMiner Backup provider with the proper permissions.
URL (in case of https, only public certificates are allowed.)
Bucketname
Access Key
Secret Key
Login to TrendMiner EdgeManager
https://url/edge or http://url:8080 (in case no valid certificate is installed)
Click “Sign In”
Navigate to “BACKUP AND RESTORE” -> Full
Click on Full
Click on Storage Settings
Select Minio in the drop down menu called “Provider”. After selecting the storage provide you need to fill in all information required, as shown in the screenshot below.
You should have all the parameters for configuring, except for the backup path.
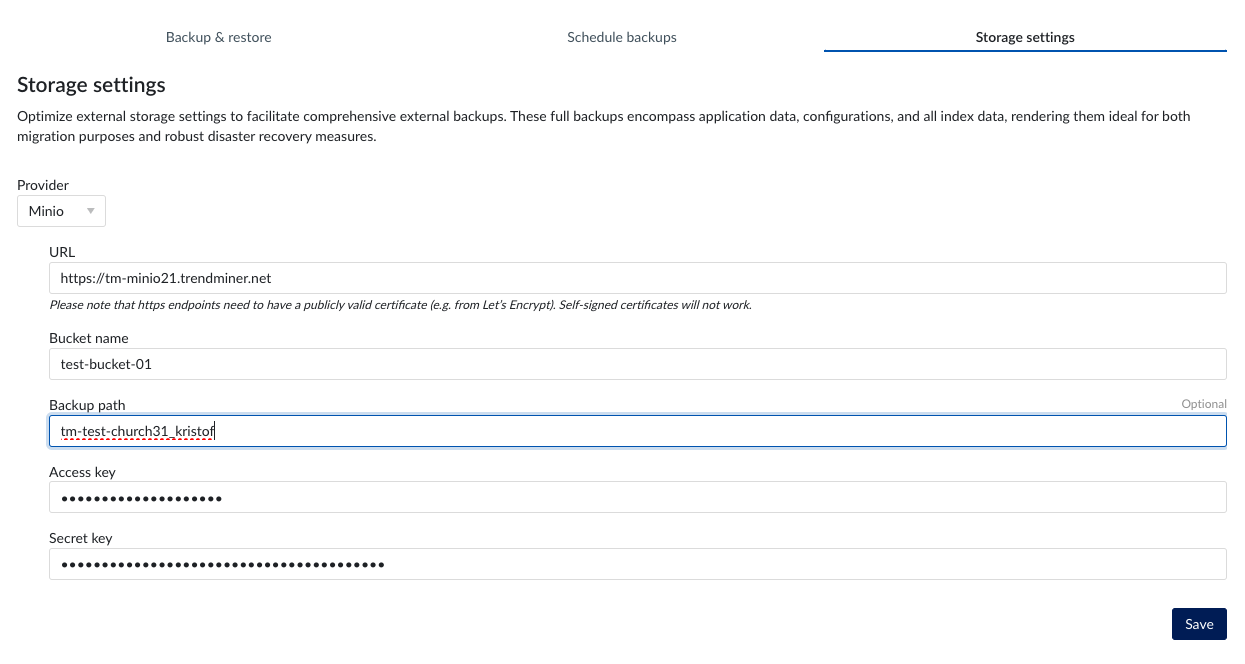
Important
The configured bucket needs to be empty
Wait until storage location is validated
you can click on Storage Settings tab, to refresh the page
The status should say Available before continuing with the next steps.
|
In case the status is as following
|
Tip
In case something is going wrong (Status stays on Unavailable), these are some tips you can try to fix
make sure the date and time are correct on the server. Also NTP server need to be in place. Not setting it, will result in authentication failure for the backend tooling used to setup the remote storage
Doublecheck all parameters provided.
Validate you can properly communicate to Minio S3 from the TrendMiner Host.
In case all parameters are properly set, and it still doesn't work, please try to use a S3 client (E.g. FilezillePro https://filezillapro.com/) that you can run on your Laptop/Desktop to try to access the Storage Account, to fully validate the parameters.
In case all above is not helping, please contact TrendMiner Support.
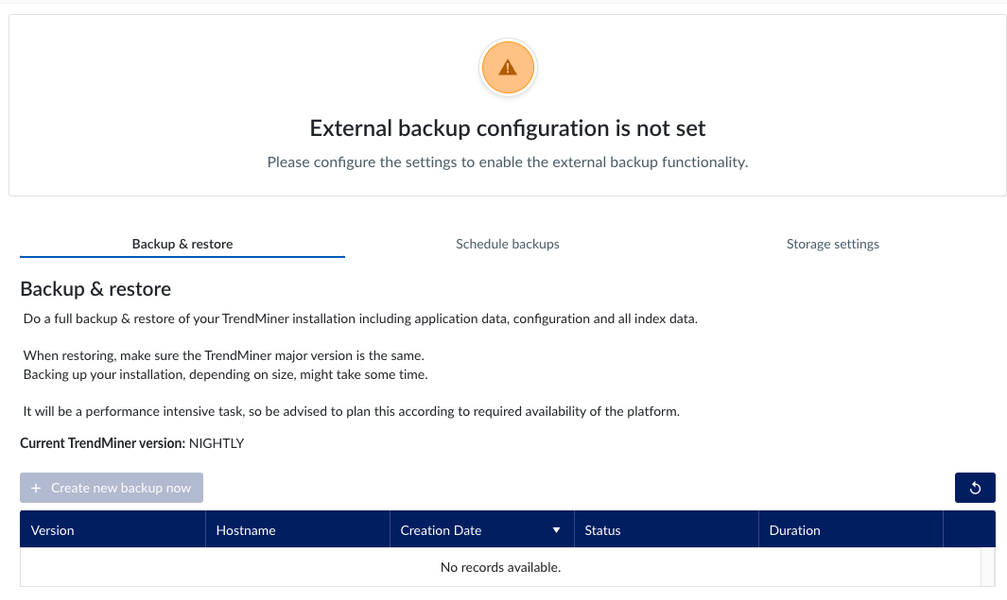
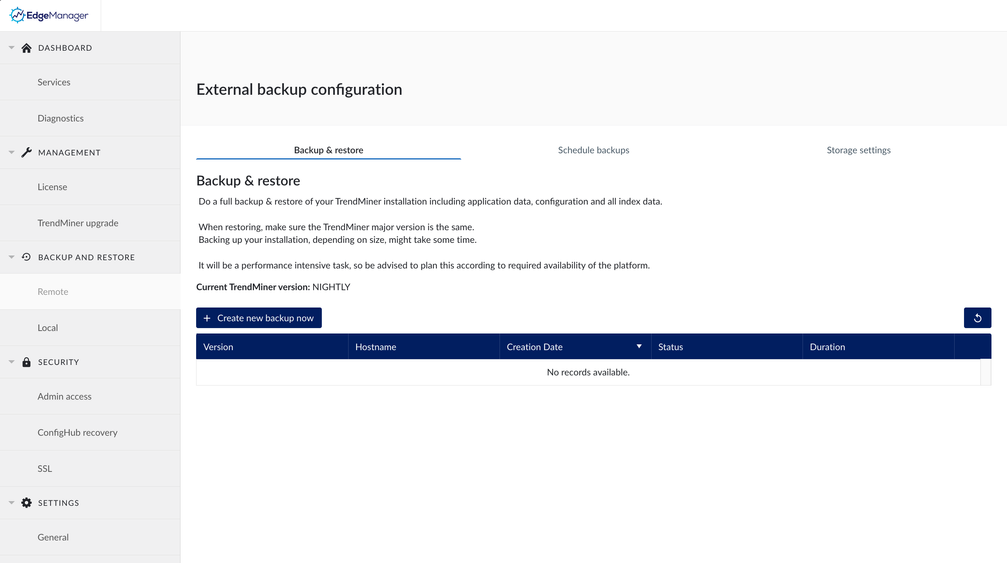
Creating Backups
Browse to https://url/edge or http://url:8080 (in case no valid certificate is installed)
replace “url” with the url of your TrendMiner installation
|
Click “Sign In”
Navigate to “BACKUP AND RESTORE”->Remote
 |
A backup will store all your TrendMiner data and settings to be able to recover on the same or another server.
Important
It is advised to run these backups during off peak hours of your TrendMiner installation, as it could result in performance degradation or inform your staff, about potential performance issues. In case needed, the scheduling functionality can be used to plan it accordingly.
A backup will take some time, especially the initial backup, as this will be a full backup. Any backup taken after the initial backup, will be increments from the previous backup, and will be more risk free related to potential performance degradations (depends on the data differences between 2 weeks).
Important
Manual backups time out after 48 hours. Successive incremental backups time out after 4 hours. When a backup process times out the status will be set to 'PartiallyFailed'. In case you run into a timeout please try a manual backup. If that still fails, please contact TrendMiner support.
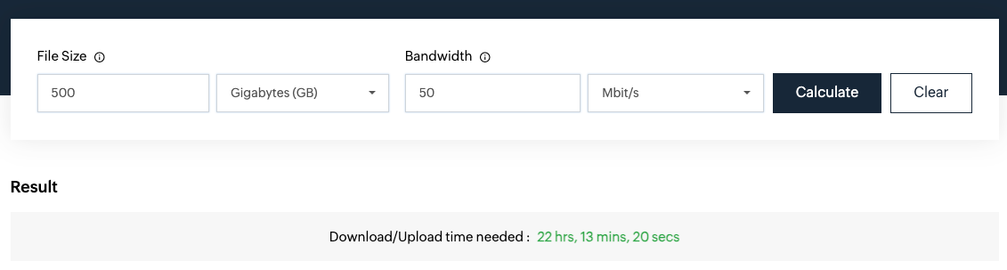
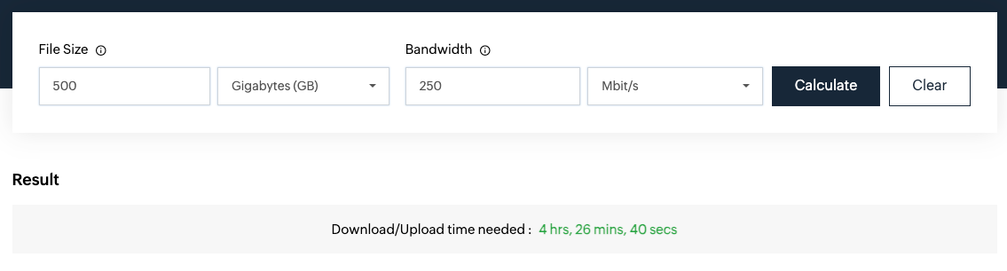
Depending on the size of the backup, and the network upload link to internet, the time it takes can differ.
A quick calculator for this can be found here: Free Download/Upload Time Calculator | Site24x7 Tools
This will not be 100% correct, as there are many other factors involved in uploading to the internet, these can be:
The specified upload speed (bandwidth) below in screenshots 50Mbit/s and 250Mbit/s are most of the time shared with other servers on your network.
Disk performance. If the disks are slow.
Other overhead on the network speed like meta data traffic from the Storage Provider.
some examples can be found here:
 |
 |
Click on “Create new backup now”
 |
You will see a notification popup in the bottom right corner, that a backup is started.
and you will also see the backup information been triggered, as following:
 |
Click the refresh button
 |
You can see the backup is in progress
 |
after some time, you will see the status change to “Completed” and you can see the time it took, to make the backup.
 |
In case something went wrong here, you will see a error “Partially Failed”. In case this happens, please reach-out to TrendMiner Support
Handling Restores
Make sure you check following items before initiating the restore procedure
You have a VM snapshot from the server you are going to restore to, so that in any case you could rollback and retry later, must there be something going wrong. Use the virtualisation tools for this.
In case no snapshot is available, a reinstall of the destination server is needed, as done before. Including its upgrade to the same TrendMiner version.
Special attention to be made in case you migrate from CentOS
make sure SSL is properly configured
make sure a proper NTP server is configured (Only needed if the server time is invalid)
make sure a mail relay is configured by default, will not be migrated from old server.
make sure the server is having the exact same version then from where the backup is taken from. E.G. 2024.R2.0-06 identical on both source & destination.
you can find the version under backup & restore → Remote → backup & restore
in case of using customer K3S ip ranges, please consult our support department, to fix this up front. They need to be exactly the same, else the restore will fail.
setup your administrator email address for monitoring emails.
The TrendMiner installation will be down during the restore. All services will be stopped.
The setup of the remote storage is completed, and identical to the source server. See here for more info
Important
If you migrate between 2 servers, it is important that the parameters from the source server are exactly the same as on the destination server, to make sure backups can be found back. You can change the backup path later to the new name.
The storage configuration page should look similar to this one, and the validation status should be “Available”
 |
Click on Backup & Restore tab, and you should see the backups taken from the source server here, as in the example below:
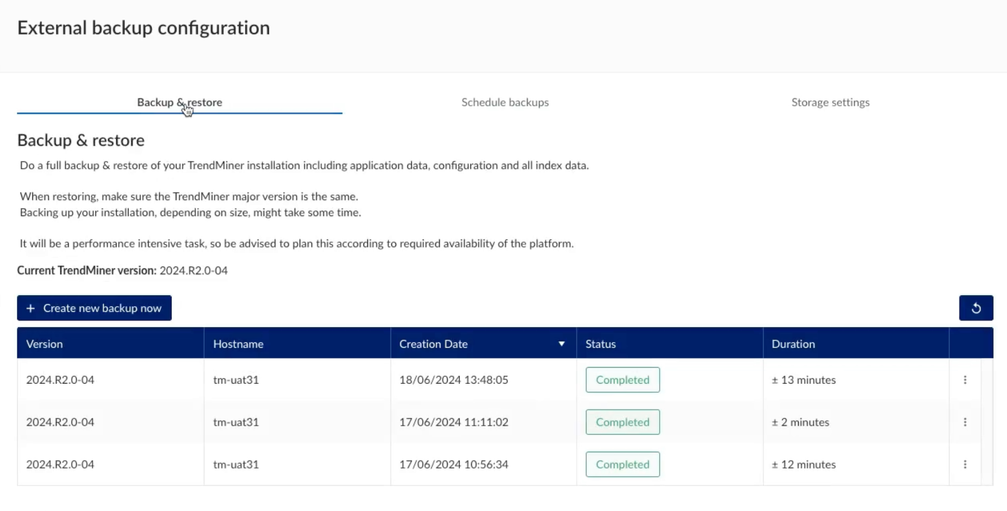 |
To initiate the restore, click on the 3 dots on the line of the backup you want to restore and then click on Restore:
 |
A popup window will show, warning you about the impact of this restore
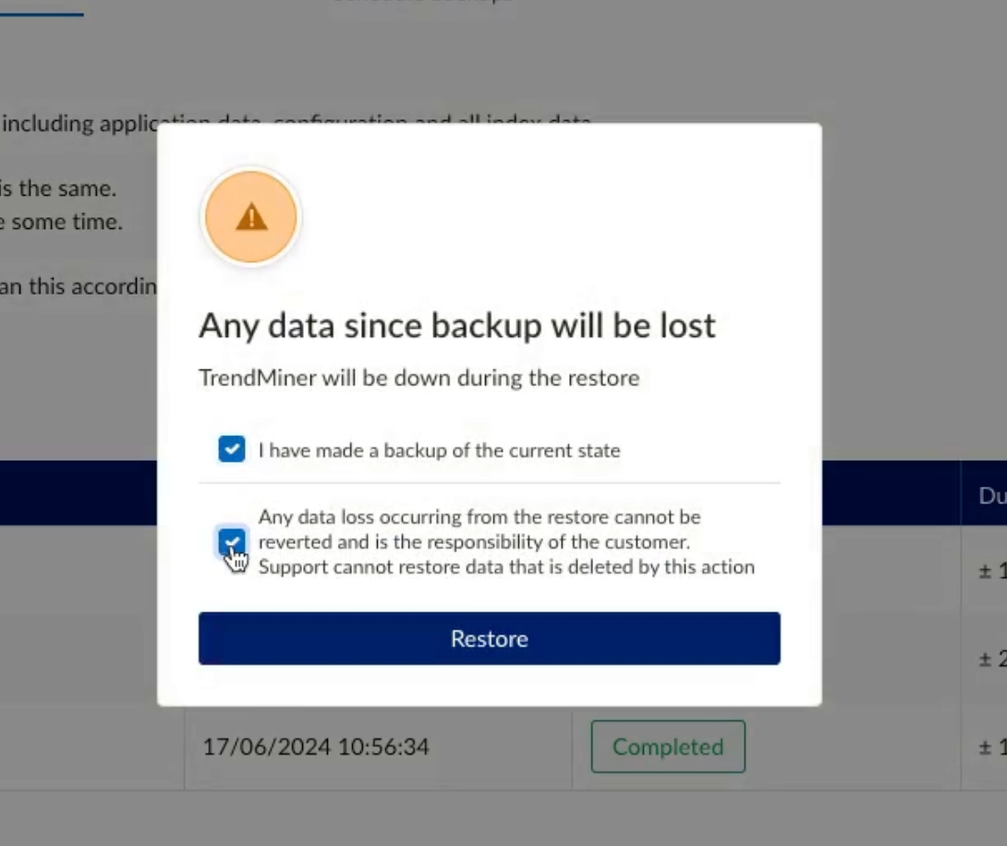 |
As mentioned in the prerequisites, you shall have already taken a backup of the current state using VM snapshot tools.
Click on Restore
Danger
Remember that the restore will wipe any existing data and configurations, and restores it back from the backup.
The status in EdgeManager is changing to Restore in progress.
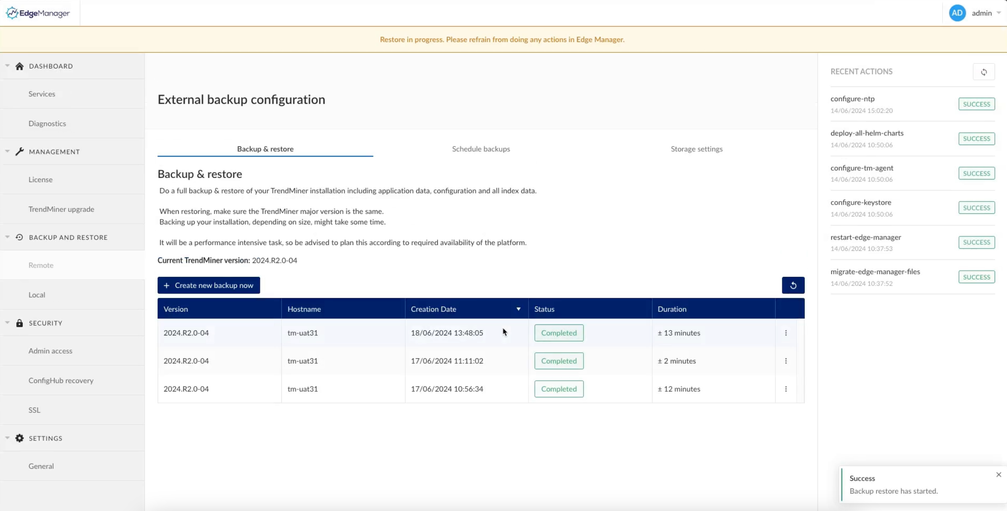 |
Warning
It is important to not interact with the TrendMiner server until the restore process is completed. The restore process times out after 48 hours so if it has not completed successfully at that point it will show a failed state. In that happens, please contact TrendMiner support.
The restore procedure will download all the files from the configured remote storage and restore its setup and configuration.
Depending on the size of the backup, and the network download link to internet, this can take some time.
A quick calculator for this can be found here: Free Download/Upload Time Calculator | Site24x7 Tools
This will not be 100% correct, as there are many other factors involved in downloading from the internet, these are:
the specified download speed (bandwidth) below in screenshots 50Mbit/s and 250Mbit/s are most of the time shared with other servers on your network.
Disk performance. If the disks are slow.
Other overhead on the network speed like meta data traffic from the Storage Provider.
The time needed to startup the different services again.
some examples can be found here:
source:
|
|
Once the Restore completes, you will see all the services on the services screen are up and running again, as in the screenshot below:
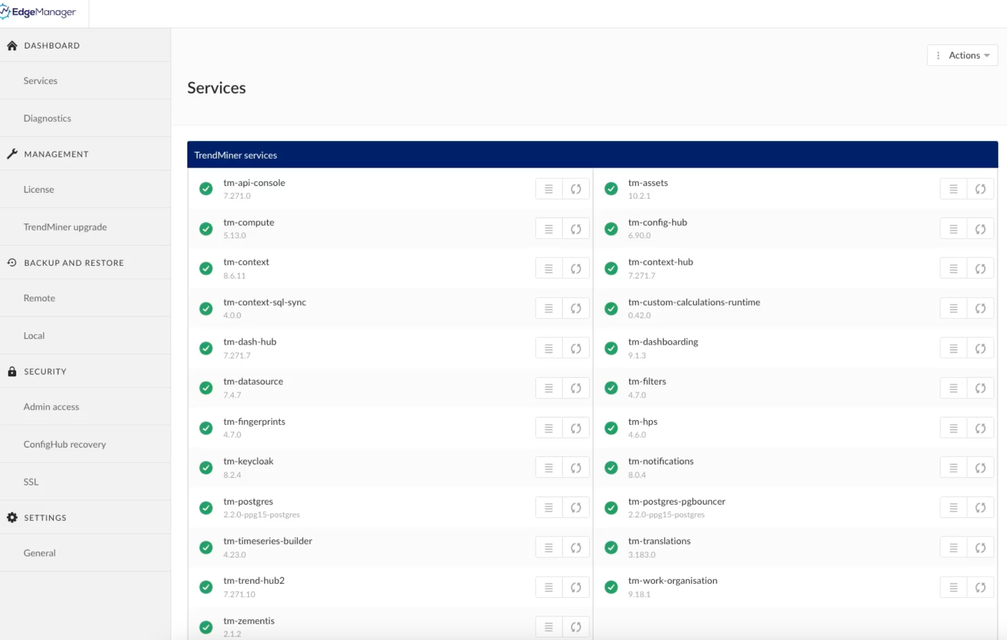 |
After the Restore is finished (Yellow banner gone) some playbooks are still running, to complete the migration. Its best to wait until these playbooks are finished. You can follow them in the right notification screen.
Restore status
A Restore process exist out of several steps to make sure the TrendMiner application is stable and up and running.
In some cases a process can take much time, like data files download from the configured Storage location.
Listed below is an overview and generic details of each of the restore steps:
(1) Initializing Restore
The system is being prepared to start the restore
(2) Stopping Application
All TrendMiner services and applications are being stopped. This so the restore can fully and completely restore the selected backup.
(3) Cleaning Old Data
Removing all existing data. Data will be restored from the backup.
(4) Preparing for Restore
Verify if the previous steps are completed and the system is ready to restore the backup.
(5) Restoring Application and Data
First, the metadata and application files from the selected backup are downloaded and the data volumes are prepared.
Next, the data is downloaded and verified for completion. Depending on the available bandwidth and disk write speed, this can take quite some time to complete.
E.g. a backup of 1,2TB (terabytes) with a bandwidth of 100Mbit/s will take 1 day, 2 hours and 40 minutes. Source:https://www.site24x7.com/tools/download-time-calculator.html
Note: this does not take into account the disk write speed.
(6) Starting Application
All data has been restored and the TrendMiner services and applications are being started again. Some time might be required, as processes and services are scheduled and executing required checks and balances.
(7) Configuring Application
All configurations from the backup are being applied. Any specific overwrites are being applied to the system as well.
(8) Success / Failure
In case a restore succeeded, this step will be skipped. The banner in TrendMiner about the migration status will be hidden.
In case of a failure, you can find a status information here in the reasoning why it failed.
Failed restores, can always be retried, for that browse again to the backups, and run another Restore.
Using Scheduled Backups
Scheduled backups are there to take on frequency based a backup of your TrendMiner installation, without the need to manually trigger it.
Currently we only support weekly backups for which the desired week day and time can be specified.
The taken backups, are always increments from the last full backup. This will also save storage space on the remote storage provider.
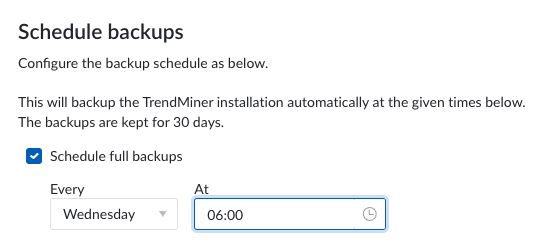
Under the menu Backup and Restore → Remote click on “Scheduled backups”

Enable the checkbox “Schedule full backups” and select the day of the week and time, when backups need to be taken.
Important
its advised to pick a time, when TrendMiner is less used, as this might bring some downgraded performance during the time of the backup. Especially if the changes between every backup are big.
Scheduled backups normally take a limited amount of time. Therefore they will timeout after 4h. Its advised to take a manual full backup initially, to avoid timeouts for your scheduled backups.
Scheduled backups will show up under backup & restore when they are completed.