How to set up an ODBC/OLEDB/SQLite data source?
Notice
As of 2023.R4.0 TrendMiner supports an easier and better way to set up data sources via ODBC. This document describes the old way which is now considered deprecated.
If you want to set up a new connection via ODBC, please consider the Generic ODBC provider.
The following sections will detail all the information needed for setting up an ODBC/OLEDB/SQLite data source in TrendMiner.
Conventional SQL servers like MSSQL, MySQL, OracleDB, and others are all supported data sources that allow you to pull data into TrendMiner. It is important to know that process historians like Aveva PI, Wonderware and others might also support ODBC/OLEDB connectivity as their back-end databases are still SQL.
SQLite is a database engine that allows the creation of a file that serves as a relational database.
Overview
Configuring your SQL data source in TrendMiner requires these actions:
Plant Integration configuration on the connector side which consists of creating necessary files on a specific location.
Creation of specific queries and configuration elements that will fetch the data in the right format for TrendMiner to digest
Adding the data source on the client-side from the TrendMiner ConfigHub page.
Note
Ensure the correct drivers compatible with the data source you are attempting to connect to are installed on the Plant Integrations server. TrendMiner will use the driver as configured in the connection string (see below). Compatibility can be related to the version of the data source (e.g. version of MSSQL server), 32-bit or 64-bit, etc. Without a compatible driver, TrendMiner will not be able to successfully connect.
Plant integration configuration (Connector)
Create folders
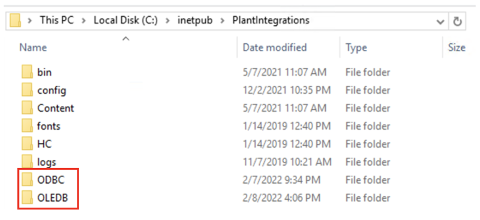
First step is to browse to the Plant Integration folder you have created during installation. This folder will most likely reside inside the inetpub folder on the c drive of your connector server, which is the default location:
c:/inetpub/PlantIntegrations

Create a folder (not case sensitive) that will host all your ODBC/OLEDB/SQLite configuration files. All configuration files for ODBC connections will go into the ODBC folder, for OLEDB connections into the OLEDB folder and so on.
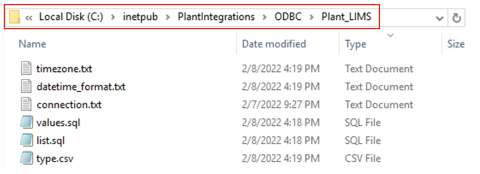
Create a subfolder for each data source you want to configure inside the correct ODBC/OLEDB/SQLite folder, depending on which connection type you are using. In the following example we will configure an ODBC data source called “Plant_LIMS”, so we create the "Plant_LIMS" subfolder in the recently created "ODBC" folder.

Create Configuration files
Create the following configuration files needed to configure the generic data sources.
For ODBC/OLEDB:
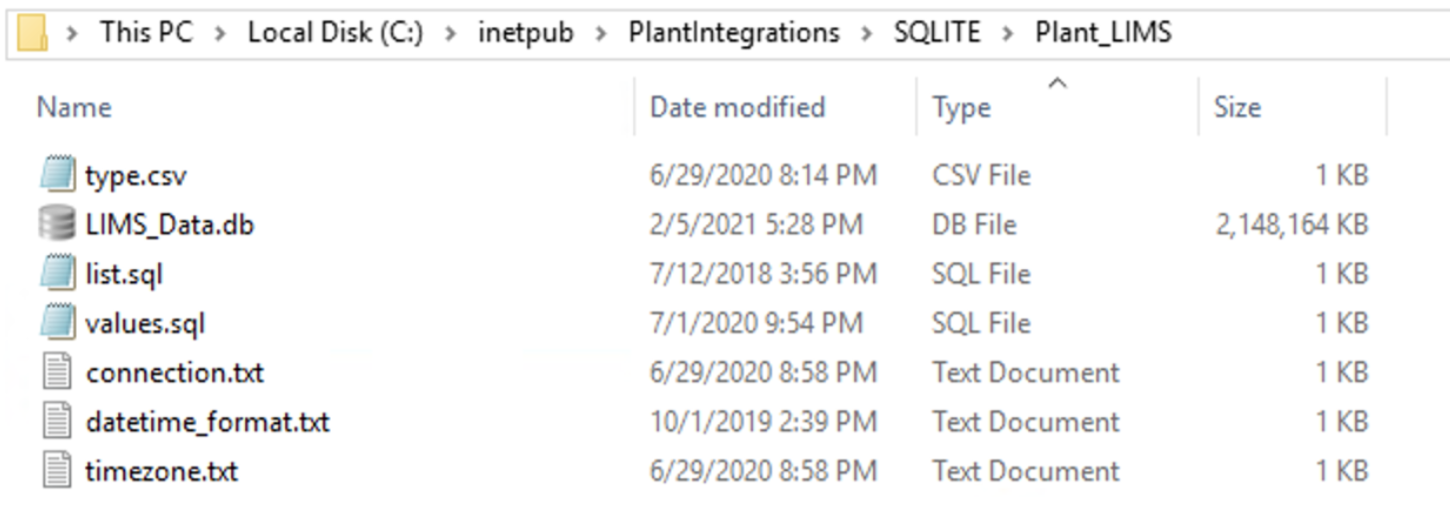
For SQLite:
File name and type
Description
Required / Optional
sqlite.db (only for SQLite)
This is the sqlite.db file created that contains the data.
Required
connection.txt
Will contain the necessary information (e.g. full connection string) to establish the connection with the data source.
Required
list.sql
Query select statement that returns the list of tags with additional metadata.
Required
values.sql
Query select statement that returns the timestamps and values for a given tag.
Required
values-STRING.sql
Query select statement that returns the timestamps and values for a given string tag. Only include if necessary. If any string tags are not in the same database, you could use the query here or decide to join with your values.sql query.
Optional
type.csv
Specifies information for mapping all tag types available in the data source to those recognized by TrendMiner.
Required
datetime_format.txt
Specifies the date-time format of the timestamps returned by the values query
Optional
timezone.txt
Specifies the timezome associated to the timestamps if not already in UTC.
Optional
Connection.txt file
The information provided to establish the connection with the data source can be provided as part of a full standalone connection string or by referencing a ‘data source’ already identified as a data source name using the ODBC drivers. Independent of the option that is chosen, the details should be added to the connection.txt file.
The following article contains additional information on the required format of a valid connection string and examples depending on the type of database being used:
https://www.connectionstrings.com/
Note that only one connection string is necessary to connect to a database. Different tables within one database will be accessible through the same connection.
Standalone Full Connection Strings
ODBC example:
Driver={ODBC Driver 13 for SQL Server};Server=<ipAddress,port>;Database=<database_name>;Uid=<myUsername>;Pwd=<myPassword>;Encrypt=yes;TrustServerCertificate=no;Connection Timeout=30;As a minimum requirement, you shall specify the Server, Database, Uid, and Pwd.

OLEDB example:
Provider=iHOLEDB.iHistorian.1;Persist Security Info=False;USER ID=<myUsername>;Password=<myPassword>; Data Source=<data source>;Mode=Read
SQLite example:
For SQLite, the connection string shall contain the full path to the sqlite.db file as shown below.
 |
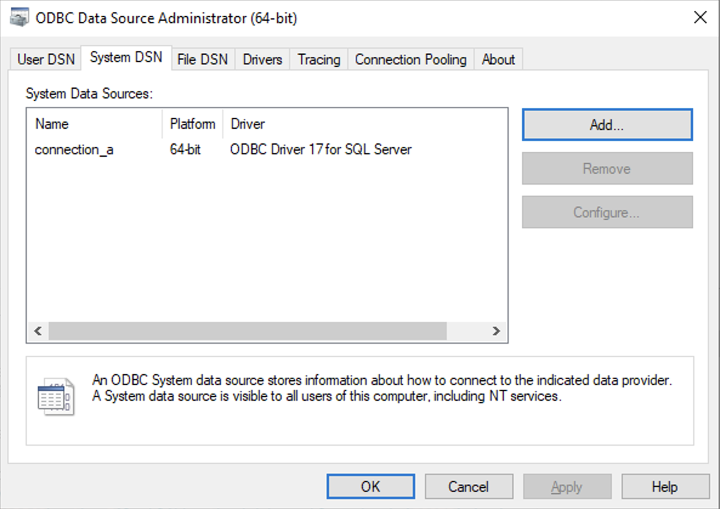
Connection via named data source using System ODBC drivers
Set up a new System Data Source using the corresponding SQL Server driver.
Note
Make sure the username being used to access the SQL database has read access.
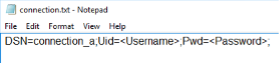
Once the System Data Source is configured, create a “connection.txt” file and make reference to the System Data Source as shown below.
Note
The username and password must be included in the file.
You can find additional information in the following article:
Configuring the queries
The data contained in your datasource now needs to be fetched in a way that TrendMiner can understand, to correctly digest and present back to the end users. There are a few steps required to make this work.
The first step is a query that will return unique tagnames (to identify the time series), its datatype, and optional metadata such as description and units. This query goes into the list.sql file.
The second step is a query that will return an ordered series of timestamp and value pairs for a given tagname, start date, and end date. This query goes into the values.sql file.
The third step is to map any custom datatypes to the TrendMiner datatypes. This mapping goes into the type.csv file.
The fourth step is to configure the returned timestamp format from step 2 so TrendMiner can parse it correctly. This step is optional and only required if the timestamp format returned in step 2 is not "yyyy-MM-dd HH:mm:ss.fff”
The fifth step is to configure the timezone of the returned timestamps from step 2 so TrendMiner can align it correctly. This step is optional and only required if the timestamps returned in step 2 are not in UTC. This is also important to correctly handle Daylight Savings Time (DST).
Details about all steps are documented in the sections below.
list.sql query
The list.sql file will contain a SQL SELECT statement and shall return all the tags with additional metadata as shown below. All your returned types should be mapped onto one of the supported tag types with the type.csv file.
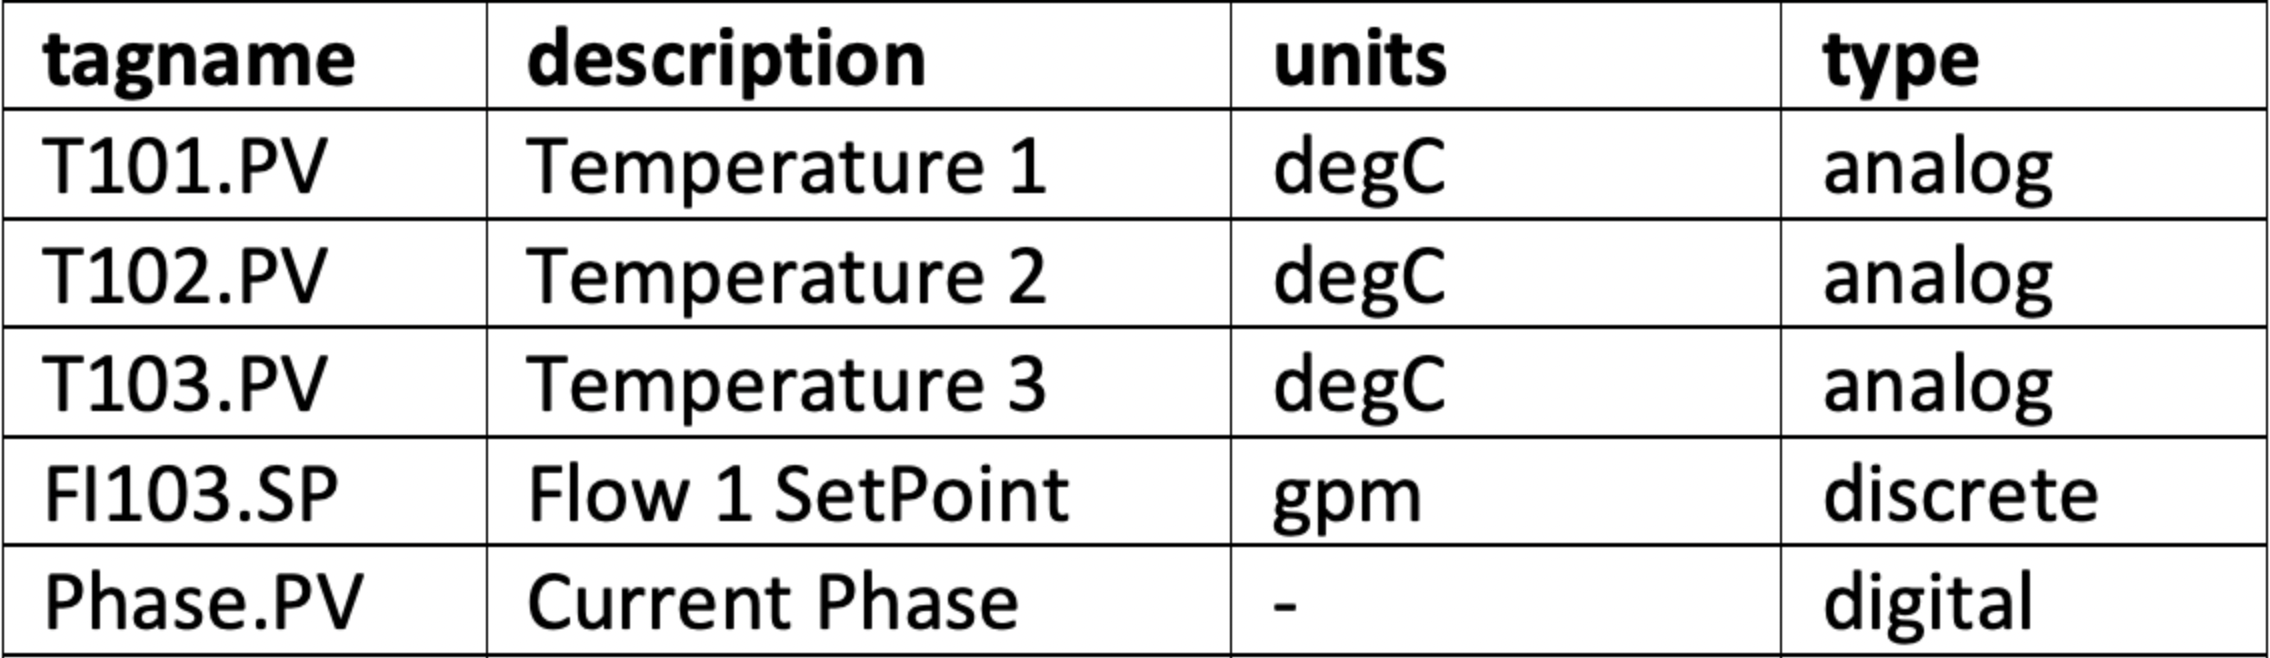
The query should return a result with column names "tagname" (mandatory), "type" (mandatory), "units" (optional), and "description" (optional). All values for the tagnames returned by the query should be unique. Duplicates will lead to synch errors later on when connecting the datasource to TrendMiner in later steps. Stored procedures can be used for retrieving tags as long as they return a result set.
An example of a very simple query is given below. Note that the type has been hardcoded to be "analog". For additional examples, refer to the following article: Examples of SQL queries for ODBC connections.
SELECT
    tagname, description, units, "analog" as type
FROM Table_1
A correct output of the query is shown below:
values.sql query
The values.sql file will contain a SQL SELECT statement and shall return all the values and timestamps for a given tagname and date range. Note that these parameters (tagname, start date, and end date) will be automatically passed on by TrendMiner when in production as binding parameters.
These binding parameters are specified in the query by using question marks "?". If binding parameters (?) are not supported then .NET string formatting can be used, so use '{0}', '{1}', and '{2}' (include single quotes) instead of the question mark.
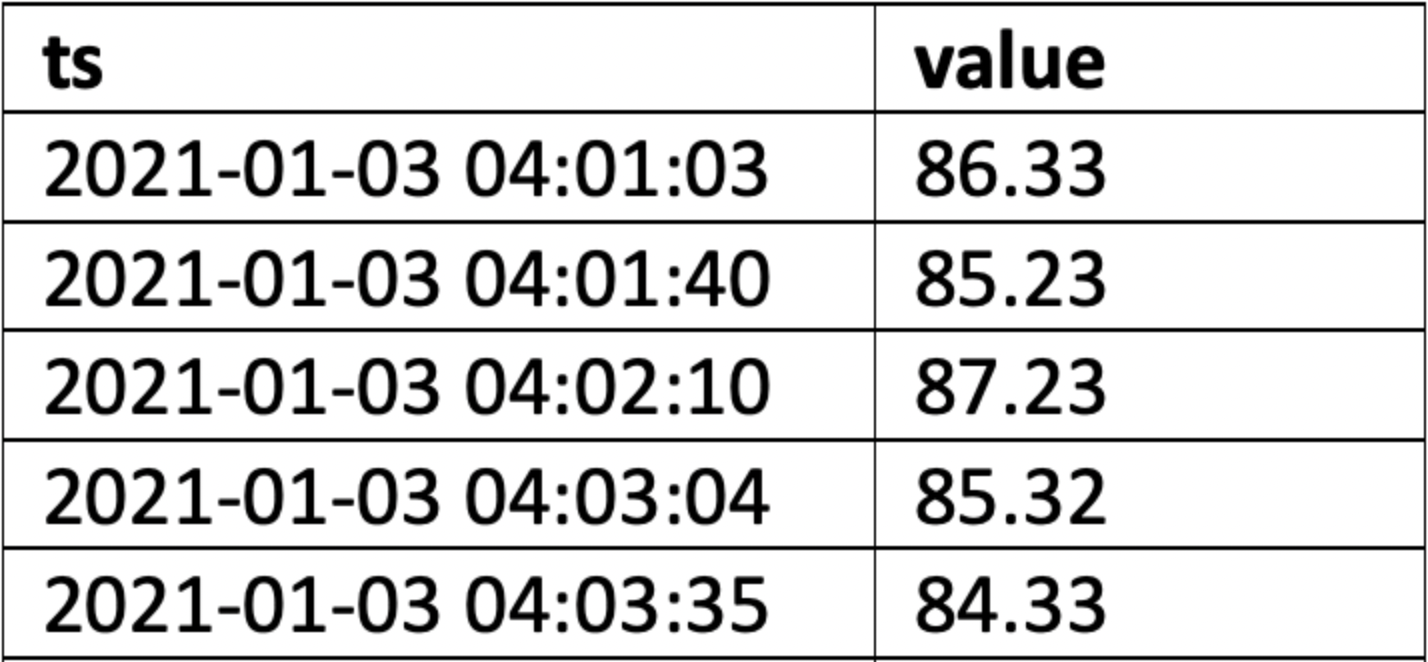
The query should return a result with column names "ts" (mandatory) and "value" (mandatory). The timestamps in the ts column should be ordered in ascending order (oldest point first, newest point last). Stored procedures can be used for retrieving tag data as long as they return a result set.
Since this is a crucial step, here is a summary of the output requirements:
The columns returned should be named "ts" (for the timestamp) and "value". Timestamps should be in ascending chronological order, meaning oldest first, newest last.
All timestamps that are returned should fall inside the requested time interval. If they don't, then indexing will fail later on.
The complete response should be returned within a reasonable timeframe. Typically recommended is +- 1 second per month of data, with user experience noticeably dropping off when response time exceeds 5 seconds per month of data. The response time can be influenced somewhat by tweaking settings such as the index granularity in ConfigHub, although a slow datasource will always lead to bottlenecks, no matter the settings. Check the user documentation for more info.
An acceptable amount of data points within the given timeframe. The number of data points returned can be influenced by tweaking the query, or by tweaking settings such as the index granularity setting in ConfigHub. Check the user documentation for more info.
An example of a simple query is given below. For additional examples, refer to the following article: Examples of SQL queries for ODBC connections.
SELECT
    ts, value
FROM Table_1
WHERE tagname = ? AND ts IS BETWEEN ? AND ? ORDER BY ts ASC
An example of the correct output is shown below.
 |
type.csv mapping
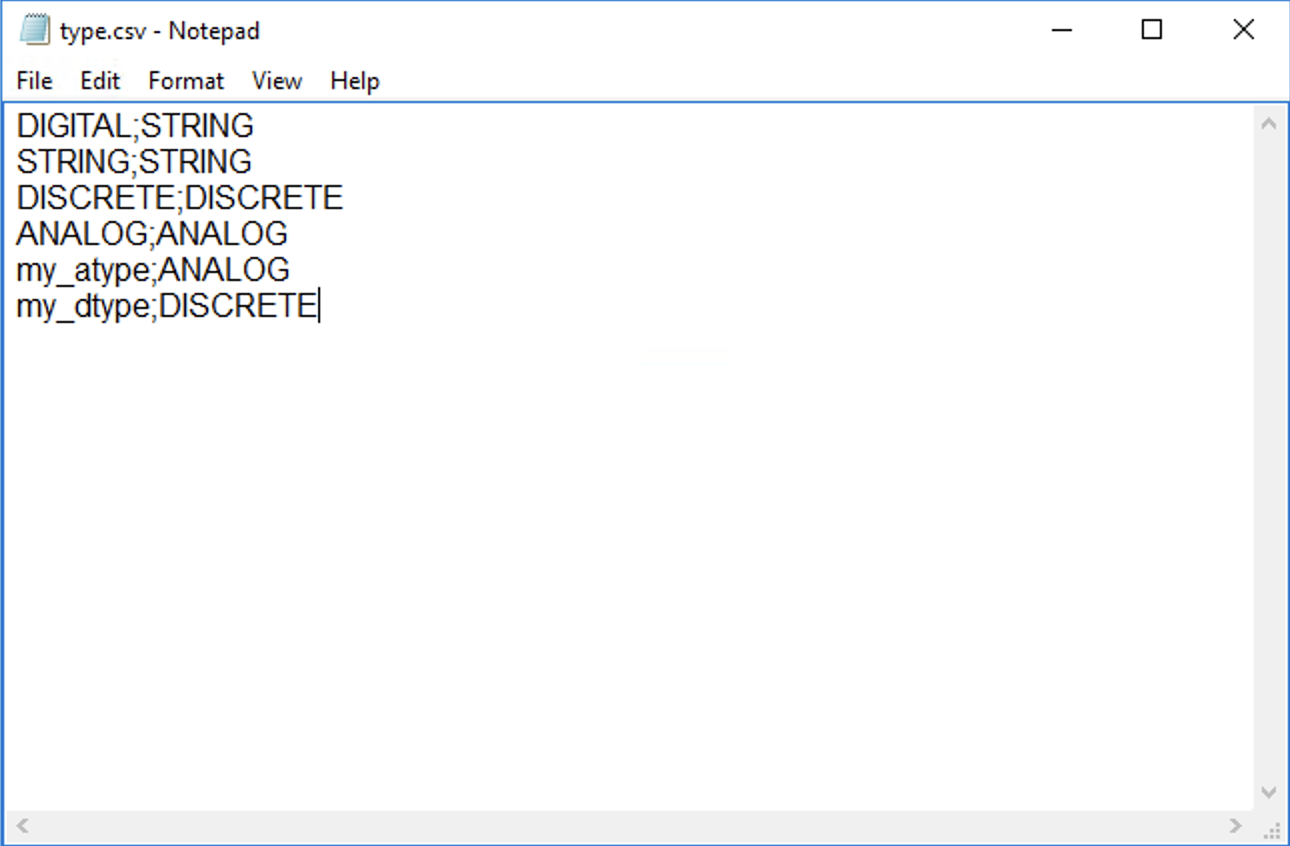
The types returned in the list.sql must be mapped to the types supported by TrendMiner, also if the returned type is the same as a TrendMiner supported type. You need to generate your own mapping. It is best practice to explicitly map each possible type returned by list.sql to one supported by TrendMiner. If no mapping/type.csv is provided all tags types will default to analog.
In the type.csv file, create one line per data type, with the output of the list.sql types as the first value, followed by a semicolon (";"), followed by one of the supported datatypes in TrendMiner. The example below ensures the results are returned in the right case, and a DIGITAL result is explicitly returned as a STRING result.
 |
datetime_format.txt configuration
In case the timestamps returned in the values.sql query are not in the format "yyyy-MM-dd HH:mm:ss.fff” (e.g. 2022-12-03 14:28:23.357), then the format can be configured by setting it in the datetime_format.txt file. Simply edit the txt file and paste the format in the file. The format is interpreted following the .NET formatting specification.
Alternatively, the file can contain the string “EPOCH”, in which case dates are converted to the equivalent number of seconds since the Epoch and the converted values are used in the query.
Some examples are specified below.
Without timezone (UTC) | MM/dd/yyy HH:mm |
DDMMYYY HH:mm:ss | |
With timezone | yyyy-MM-ddTHH:mm:ssZ |
yyyy-MM-ddTHH:mm:sszzz |
timezone.txt configuration
It is advised to always use timestamps in UTC. This will avoid confusion when troubleshooting, especially when datasources from different timezones are connected since TrendMiner uses UTC by default. If timestamps are stored in the datasource in local time, it is necessary to provide the timezone information.
Specify the time zone name in the timezone.txt file, using "Time zone name" as listed on https://docs.microsoft.com/en-us/previous-versions/windows/embedded/gg154758(v=winembedded.80).
Timezone |
|---|
Eastern Standard Time |
Pacific Standard Time |
Central Europe Standard Time |
Important
When the database stores date/times in a timezone which uses DST, but the timezone is not stored along with the date/time, then a 1 hour gap in the data will occur when entering summer time and 1 hour of data may be discarded when entering winter time.
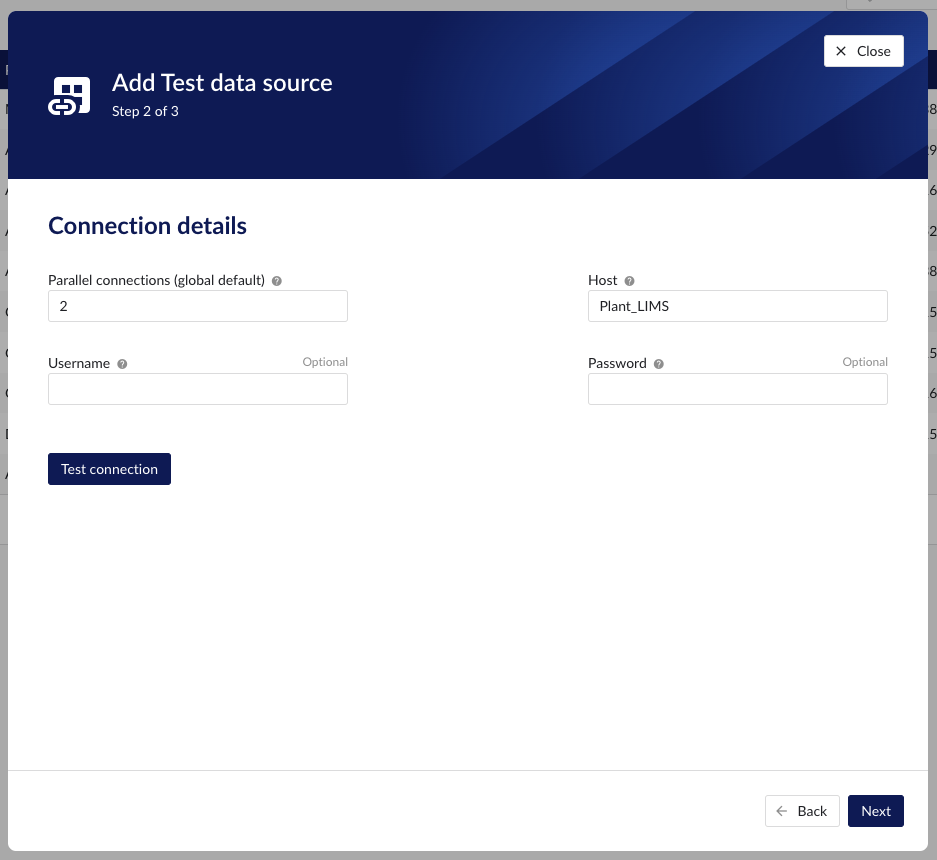
Adding data source in ConfigHub
Follow the steps for adding a new data source as detailed in the user documentation.
The “Host” name will be the name of the folder previously created containing all the configuration files as in the example below. The data source name is free to choose.
TrendMiner will consider the username and password provided in the “connection.txt” file and not the one provided through the interface. You do not need to provide the username and password here.