How to connect to Aveva PI?
TrendMiner's standard connector supports 4 native connection options to connect to a PI Data Archive:
PI AF SDK
PI AF SDK, using Active Directory authentication
PI OleDB
PI OleDB, using Active Directory authentication
The preferred way to connect to the data archive is using the PI AF SDK. To set up this connection:
Install the installation kit for PI Asset Framework (AF) Client 2017 or newer (TrendMiner uses the PI AF SDK which is part of this installation kit) on the Plant Integrations server. In case you want to use active directory authentication please make sure the PI system is integrated with AD.
Note
PI AF SDK 2010.R3 or higher is supported but TrendMiner strongly recommends to install PI AF SDK 2017 or newer for code compatibility. Also note that PI AF SDK 2017 or newer is required for AF (Asset Framework) and EF (Event Frame) connections from Aveva PI.
Once the PI Asset Framework (AF) Client installation kit is downloaded, copy the file to the Plant Integrations Server. Start the installation kit and wait till it finishes successfully.
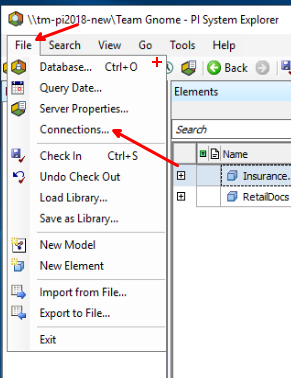
Start the PI System Explorer application. Navigate to File -> Connections
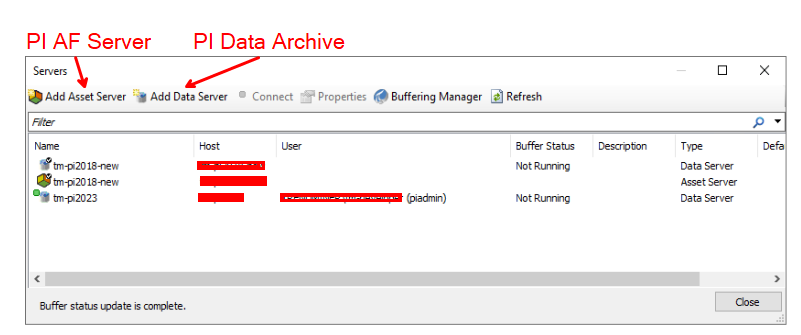
Add a desired PI Data Archive connection or verify that the server is in the list. Click "Add Data Server" button and specify the hostname, ip address or FQDN for the PI Data Archive.
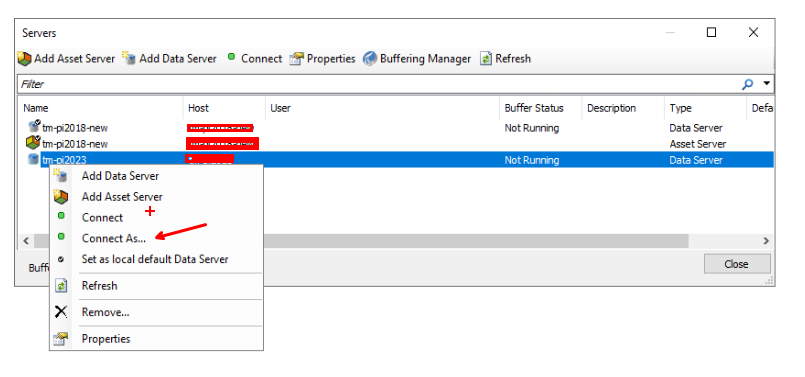
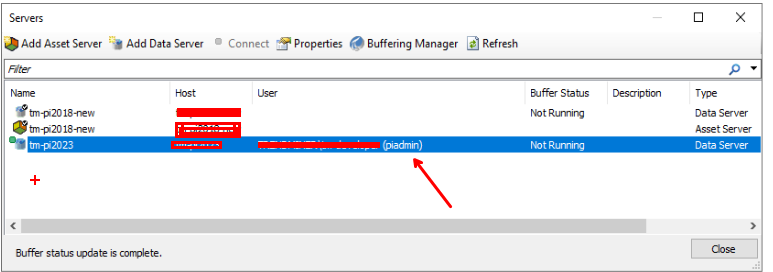
If you are planning to use Service Domain Account, you can try to connect with this account by doing the right click on the desired PI Data Archive entry and using "Connect as..." option.
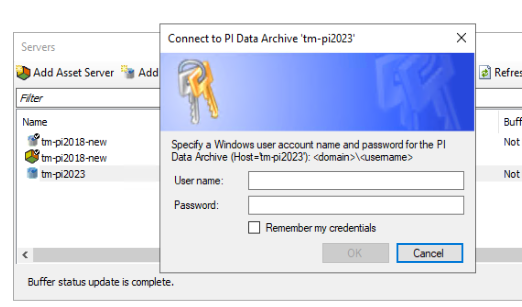
After entering the credentials, you will be able to see the permissions in the User column.
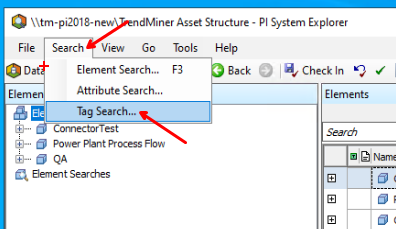
Once the connection is established, you can verify which tags are accessible on the PI Data Archive. Navigate to Search -> Tag Search...
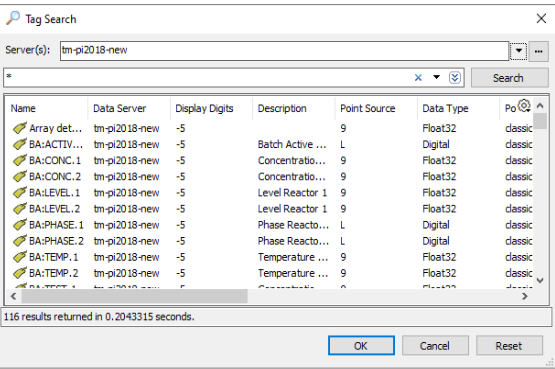
Pick the correct PI Data Archive, use *(asterisk) as a filter and click Search button. The list of all available tags for the current user will be shown.
Follow the instructions on How to connect to time series data sources?
Supported authentication options are:
PI Trust: the PI Trust needs to be set up between the servers on the PI historian.
A local PI account with read permissions: a local PI account needs to be setup on the PI server and then filled in the data source setup in ConfigHub.
Active directory user account with read permissions: for the Active directory user you need to fill this in in the data source setup. You will need to add the user in the following format: domain\user
Where to download the Aveva PI AF SDK?
Log into the OSIsoft Customer Portal Products page with your credentials.
Navigate to the Products tab
Find the entry for Asset Framework and select the Download Installation Kits and Documentation icon


A list of installation kits appears. Find the installation kit for PI Asset Framework (AF) Client. If you want an older version of the installation kit, first click All Versions. When you find the correct version, click Download.

The licensing agreement appears. Click I agree on the licensing agreement and click Download.
When prompted to run or save the executable setup file, click Save and click OK.