Installing a self-hosted Plant Integrations
This article describes how to install, configure, and secure the self-hosted (AppHost) version of Plant Integrations.
System Requirements
This section contains the minimum system requirements of Plant Integrations.
Operating system:
Windows Server 2016, 2019, 2022, 2025 (Standard or Datacenter) with Desktop Experience
Windows 10 or Windows 11
A minimum of 2 CPUs
A minimum of 2 GB available memory
A minimum of 500 MB of available disk space
Prerequisites
The installer does not bundle the .NET dependencies required to run the application. Install the following components before running the installer:
.NET Framework 4.8 Runtime (Download .NET Framework 4.8 Offline Installer)
ASP.NET Core Runtime 8.0 (Hosting Bundle) or later (Download ASP.NET Core 8.0 Runtime (v8.0.17) - Windows Hosting Bundle Installer )
.NET Desktop Runtime 8.0 or later (Download .NET 8.0 Desktop Runtime (v8.0.17) - Windows x64 Installer)
The installer will detect whether these components are installed. If they are not, an error message will be displayed indicating which components are missing.
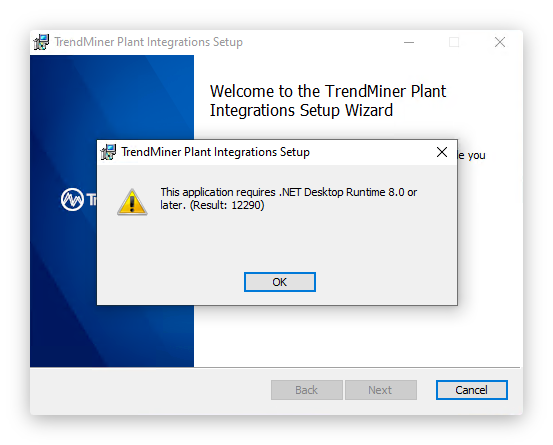
For reference, the .NET compatibility check (DotNetCompatibilityCheck) can return the following result codes:
Code | Meaning |
|---|---|
0 | Successful compatibility check |
13 | Platform is not compatible with OS |
12289 | No runtime is installed |
12290 | Required runtime is not installed |
12291 | Failed to get hostfxr exports |
12292 | Invalid arguments |
12293 | Failed to construct temp JSON file path |
12294 | Failed to create temp JSON file |
Installation Process
Tip
Choosing x64 vs. x86: There is an installer for both x64 and x86 Plant Integrations. It is recommended to use the x64 version. The x86 version should only be used when a provider specifically requires it. The following providers must run using Plant Integrations x86:
Yokogawa Exaquantum
Honeywell PHD 3.x (PHD 4.x and later require x64)
Aveva System Platform (Wonderware)
All other supported providers work with either x86 or x64.
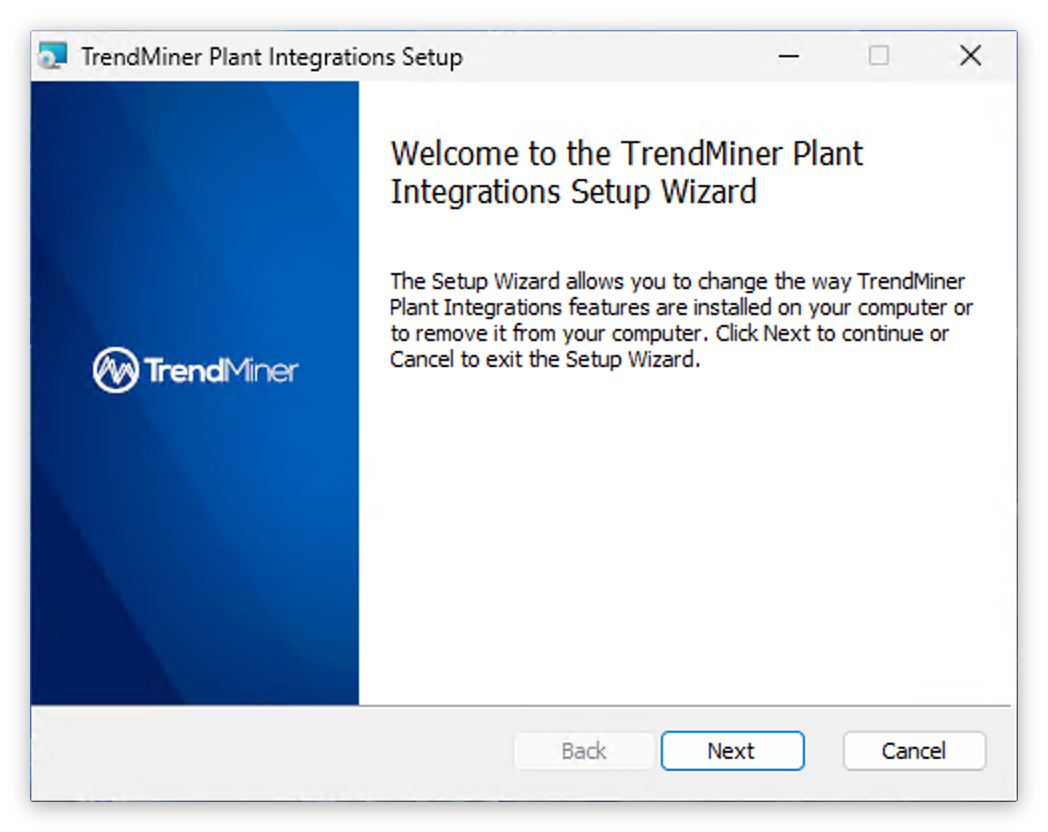
The installation process is straightforward. Run the MSI installer and follow the on-screen wizard.
 |
Accept the license agreement.
Optionally specify a custom installation directory. By default, the software is installed in
C:\Program Files\TrendMiner\Plant Integrations\directory.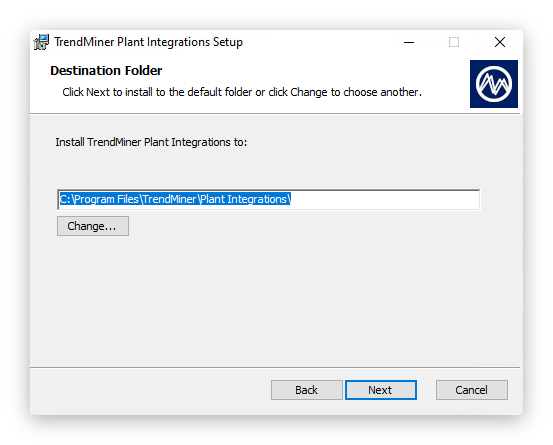
Complete the wizard.
The installer will perform the following steps during the installation of Plant Integrations:
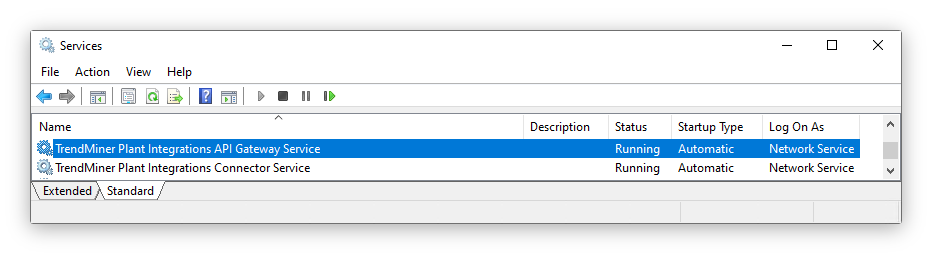
Install TrendMiner Plant Integrations API Gateway Service as a Windows Service running under
NT AUTHORITY\NetworkServiceInstall TrendMiner Plant Integrations Connector Service as a Windows Service running under
NT AUTHORITY\NetworkServiceAdd Windows Firewall rule allowing external connections to the API on port 8001 (default)
<FirewallException Name="TrendMiner Plant Integrations (HTTP)" Port="8001" Protocol="tcp" Scope="any" />Start all the services
Validation
After installation, open the Services management console (services.msc) and verify that the following services are running:
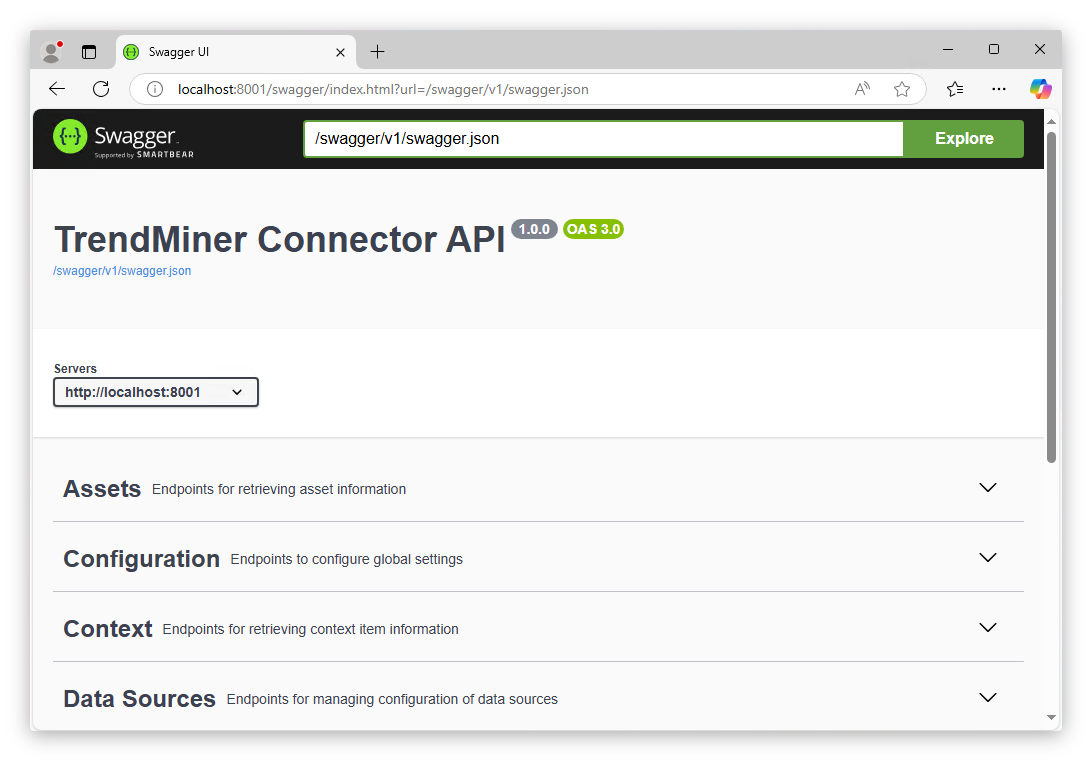
You can also browse to the Swagger endpoint to confirm the API is responding:
Plant Integrations API, default URL:
http://localhost:8001/Swagger UI, default URL:
http://localhost:8001/swagger
Application Data & Binaries
The data of the application is stored separately from the binaries of the application. This translates into two directories on the filesystem:
Application binaries: configurable during installation, default
C:\Program Files\TrendMiner\Plant Integrations\. Separate subdirectories exist for x86 and x64 connectors.Application data:
\%ProgramData%\TrendMiner\PlantIntegrations\
Important
The application data folder is not removed when the application is uninstalled or updated. However, migration scripts may modify the databases within this folder during upgrades.
Note
For users upgrading from versions prior to 2026.R1: The data folder location has changed from \%LOCALAPPDATA%\TrendMiner\PlantIntegrations to \%ProgramData%\TrendMiner\PlantIntegrations. The installer will automatically migrate your data to the new location during the upgrade. No manual action is required.
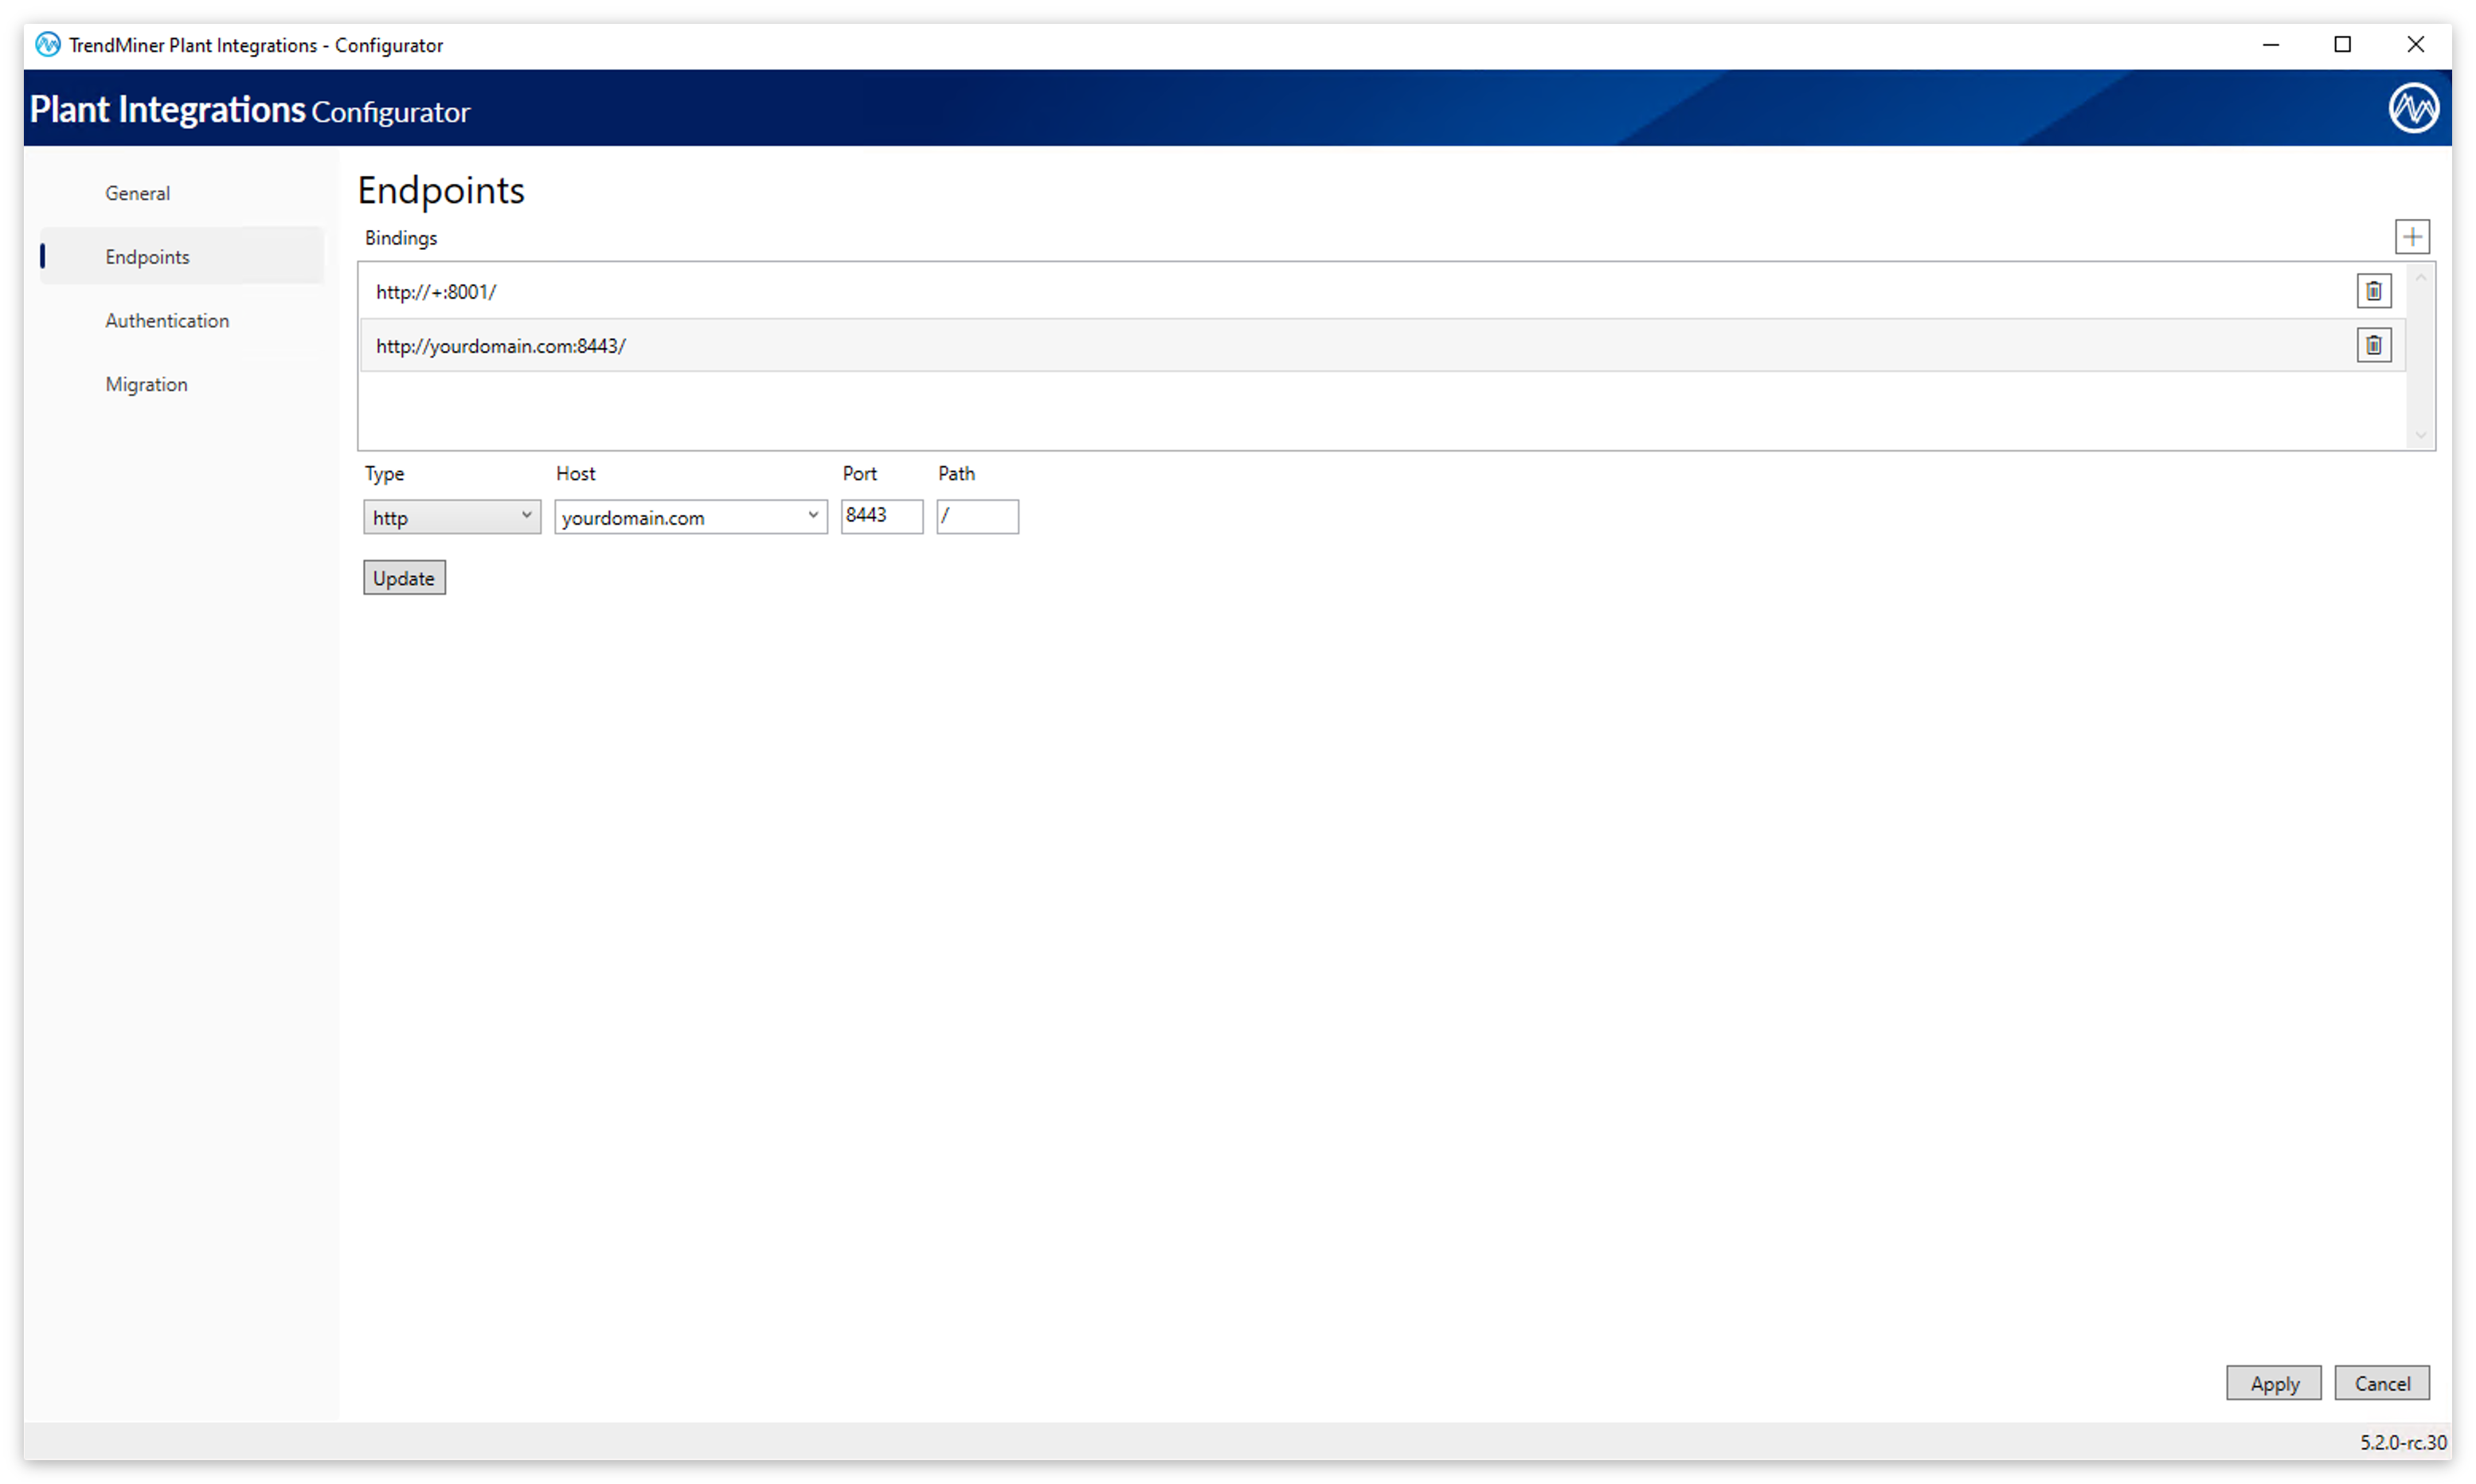
Configuring Plant Integrations with the Configurator
Plant Integrations include a Configurator tool that allows you to manage endpoint settings, HTTPS certificates, and basic authentication from an interface. The Configurator is installed automatically alongside the main application. To open it, launch the Configurator application.
Important
The Configurator must be run with Administrator privileges, as it modifies Windows URL reservations, firewall rules, and service configurations.
Configuring HTTP Endpoints
By default, Plant Integrations listens on http://+:8001/. You can change the port and URL prefix using the Configurator:
Open the Configurator.
Go to the Endpoints configuration screen.
Set the desired URL Prefix and Port for the HTTP endpoint.
Click Update to confirm the new endpoint entry.
Click Apply to save the configuration.
The Configurator will automatically update the URL reservation and the Windows Firewall rule to match the new settings.
Important
When you save an endpoint configuration, the Configurator attempts to create a Windows URL reservation (URL ACL) for the specified URL prefix. If another application on the machine already has a reservation for that same prefix (for example, http://+:8001/), the reservation will not be overwritten. Currently, the Configurator will not display an error indicating that the URL prefix is already registered.Even though existing reservations are not replaced, it is still recommended to verify that the chosen URL prefix and port are not already in use by other applications. You can review all existing URL reservations by running: netsh http show urlacl from an elevated command prompt.
Configuring HTTPS (TLS)
Documentation on how to configure HTTPS (TLS) can be found here: How to enable HTTPS/SSL connection to the Connector?
Configuring Basic Authentication
Documentation on how to configure HTTPS (TLS) can be found here: How to enable basic authentication for the connector?
Firewall Rules
The installer creates a default firewall rule named "TrendMiner Plant Integrations (HTTP-In)" that allows inbound TCP traffic on port 8001. When you change the endpoint configuration using the Configurator, this firewall rule is automatically updated to reflect the configured ports. Only one firewall rule is maintained regardless of how many endpoints you configure.
When you uninstall Plant Integrations, the associated firewall rule is automatically removed.
Service Accounts
The Windows service runs under the built‑in account NT AUTHORITY\NetworkService. The installer automatically assigns a service‑specific SID (NT SERVICE\<ServiceName>) that enables the Service Isolation security model. Using this SID, you can grant permissions directly to the service itself rather than to all services running under the same logon account. This makes custom service accounts unnecessary. Microsoft explicitly discourages custom service accounts in favor of built‑in or managed service accounts, which avoid manual credential management and provide tighter security controls.
When the service runs under a built‑in account, the installer preserves the configured service account during updates. The update process does not modify the service’s logon account, ensuring consistent behavior across upgrades.
Vendor Assemblies
Some providers require third-party libraries of SDKs to function correctly. If these libraries cannot be automatically resolved during runtime, place them alongside the application binaries. Default location: C:\Program Files\TrendMiner\Plant Integrations\Connector
After copying vendor assemblies the TrendMiner connector services need to be restarted!