Establishing a connection to Canary
You can connect to the Canary server using two options: via TM-Connect (TrendMiner Connect Agent) or without TM-Connect. Follow the respective steps for the method you choose:
Option 1: Connecting via TM-Connect
TM-Connect should be used for the communication between TrendMiner SAAS solution and the on-prem Canary server in a secure way, without the need to open incoming ports on the public facing Firewall at your data centers. Please make sure to:
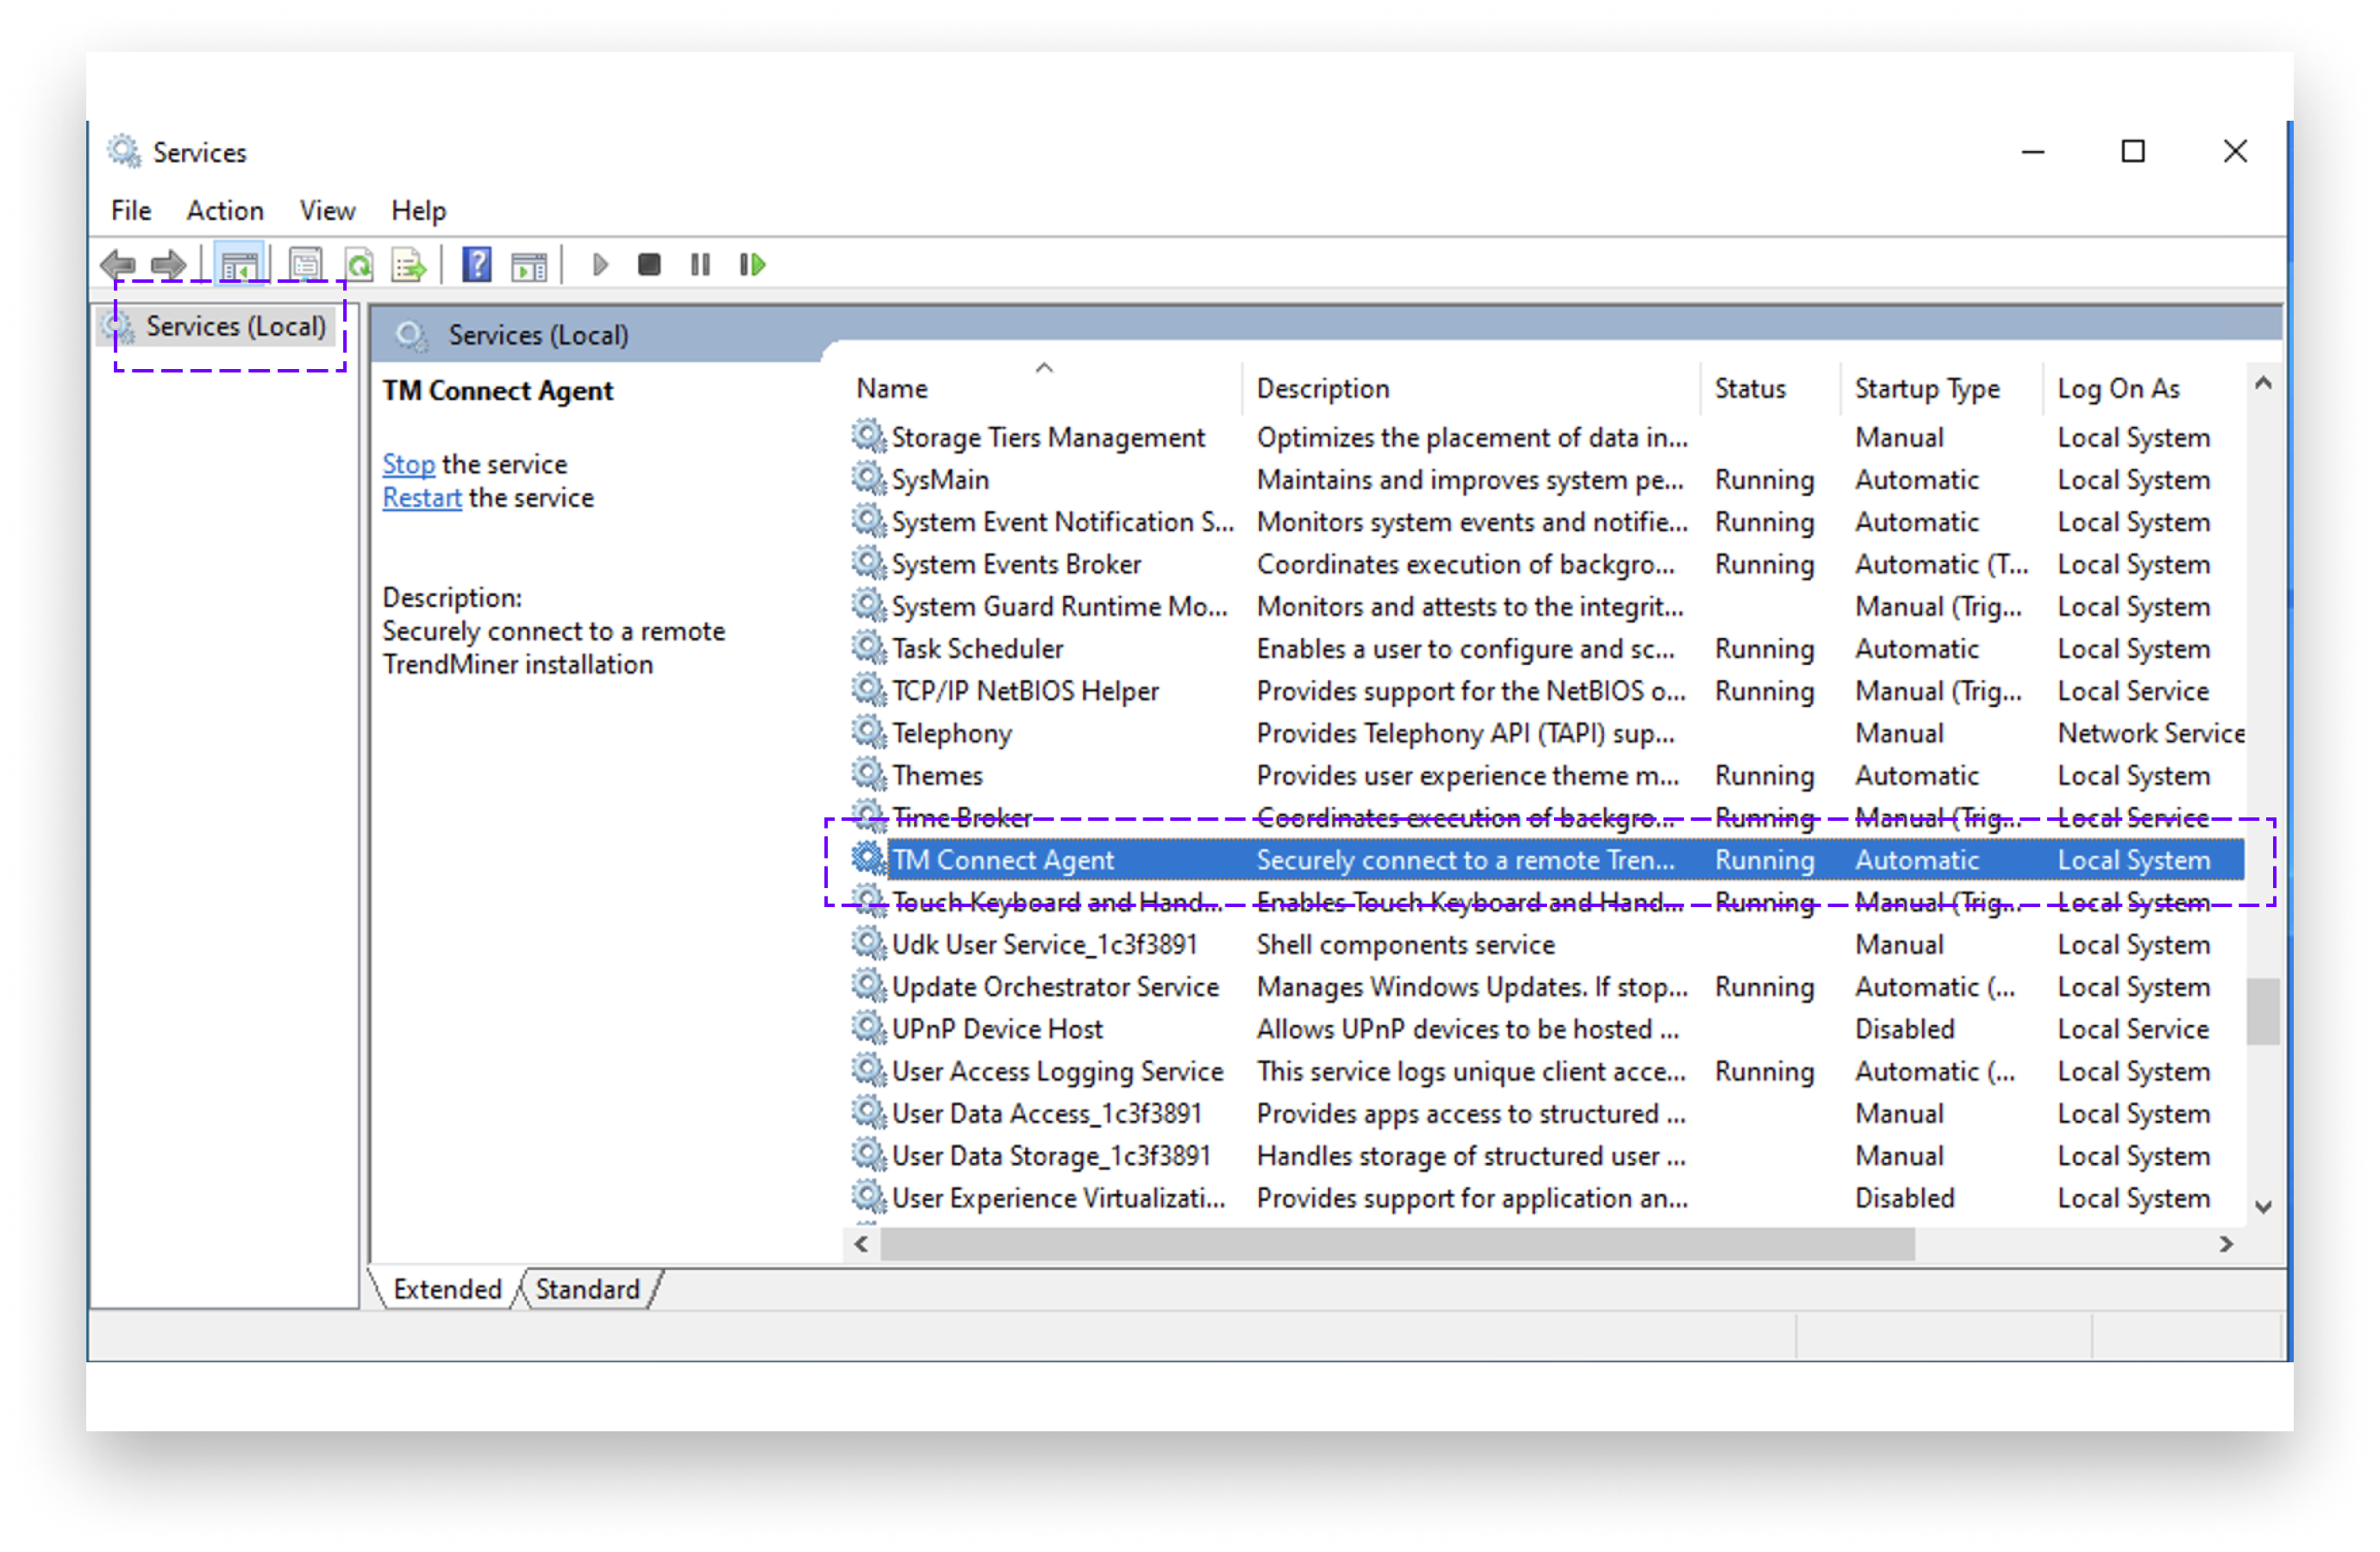
Install TM-Connect:
See Agents for more details.
Note
If everything went well, you will see the TM Connect Agent service with status “Running” in Services.
Configure the connection in TrendMiner:
Ensure you connect to the Canary server using the HTTPS port (it needs to be configured in the Canary historian).
Host needs to be the dns name or the IP of the target server.
Port needs to be the port where the views of Canary historian are exposed on.
Option 2: Connecting without TM-Connect
You have two options if you decide not to use TM-Connect: connecting via HTTPS or HTTP (not recommended). To ensure secure connection, always choose HTTPS when not using TM-Connect.
Notice
This option is not available for our AWS SaaS customers since these installation do not allow to upload the Canary certificate in ConfigHub. AWS SaaS customers should always use TM-Connect instead.
Connecting via HTTPS
Notice
Extra configuration rules for the firewall on the windows server needed:
Rule "File and Printer Sharing (Echo Request - ICMPv4-In)" enabled, this allows the server to be pinged
New Rule with the name "Canary", that allows TCP on port 55236
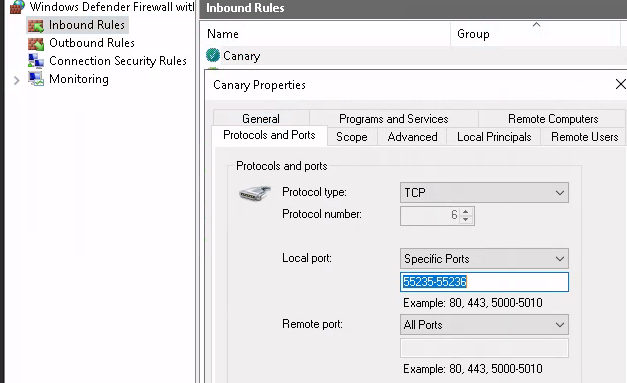 |
If you wish to make a secure connection (55236), the Views service must be configured to use a valid certificate in Canary.
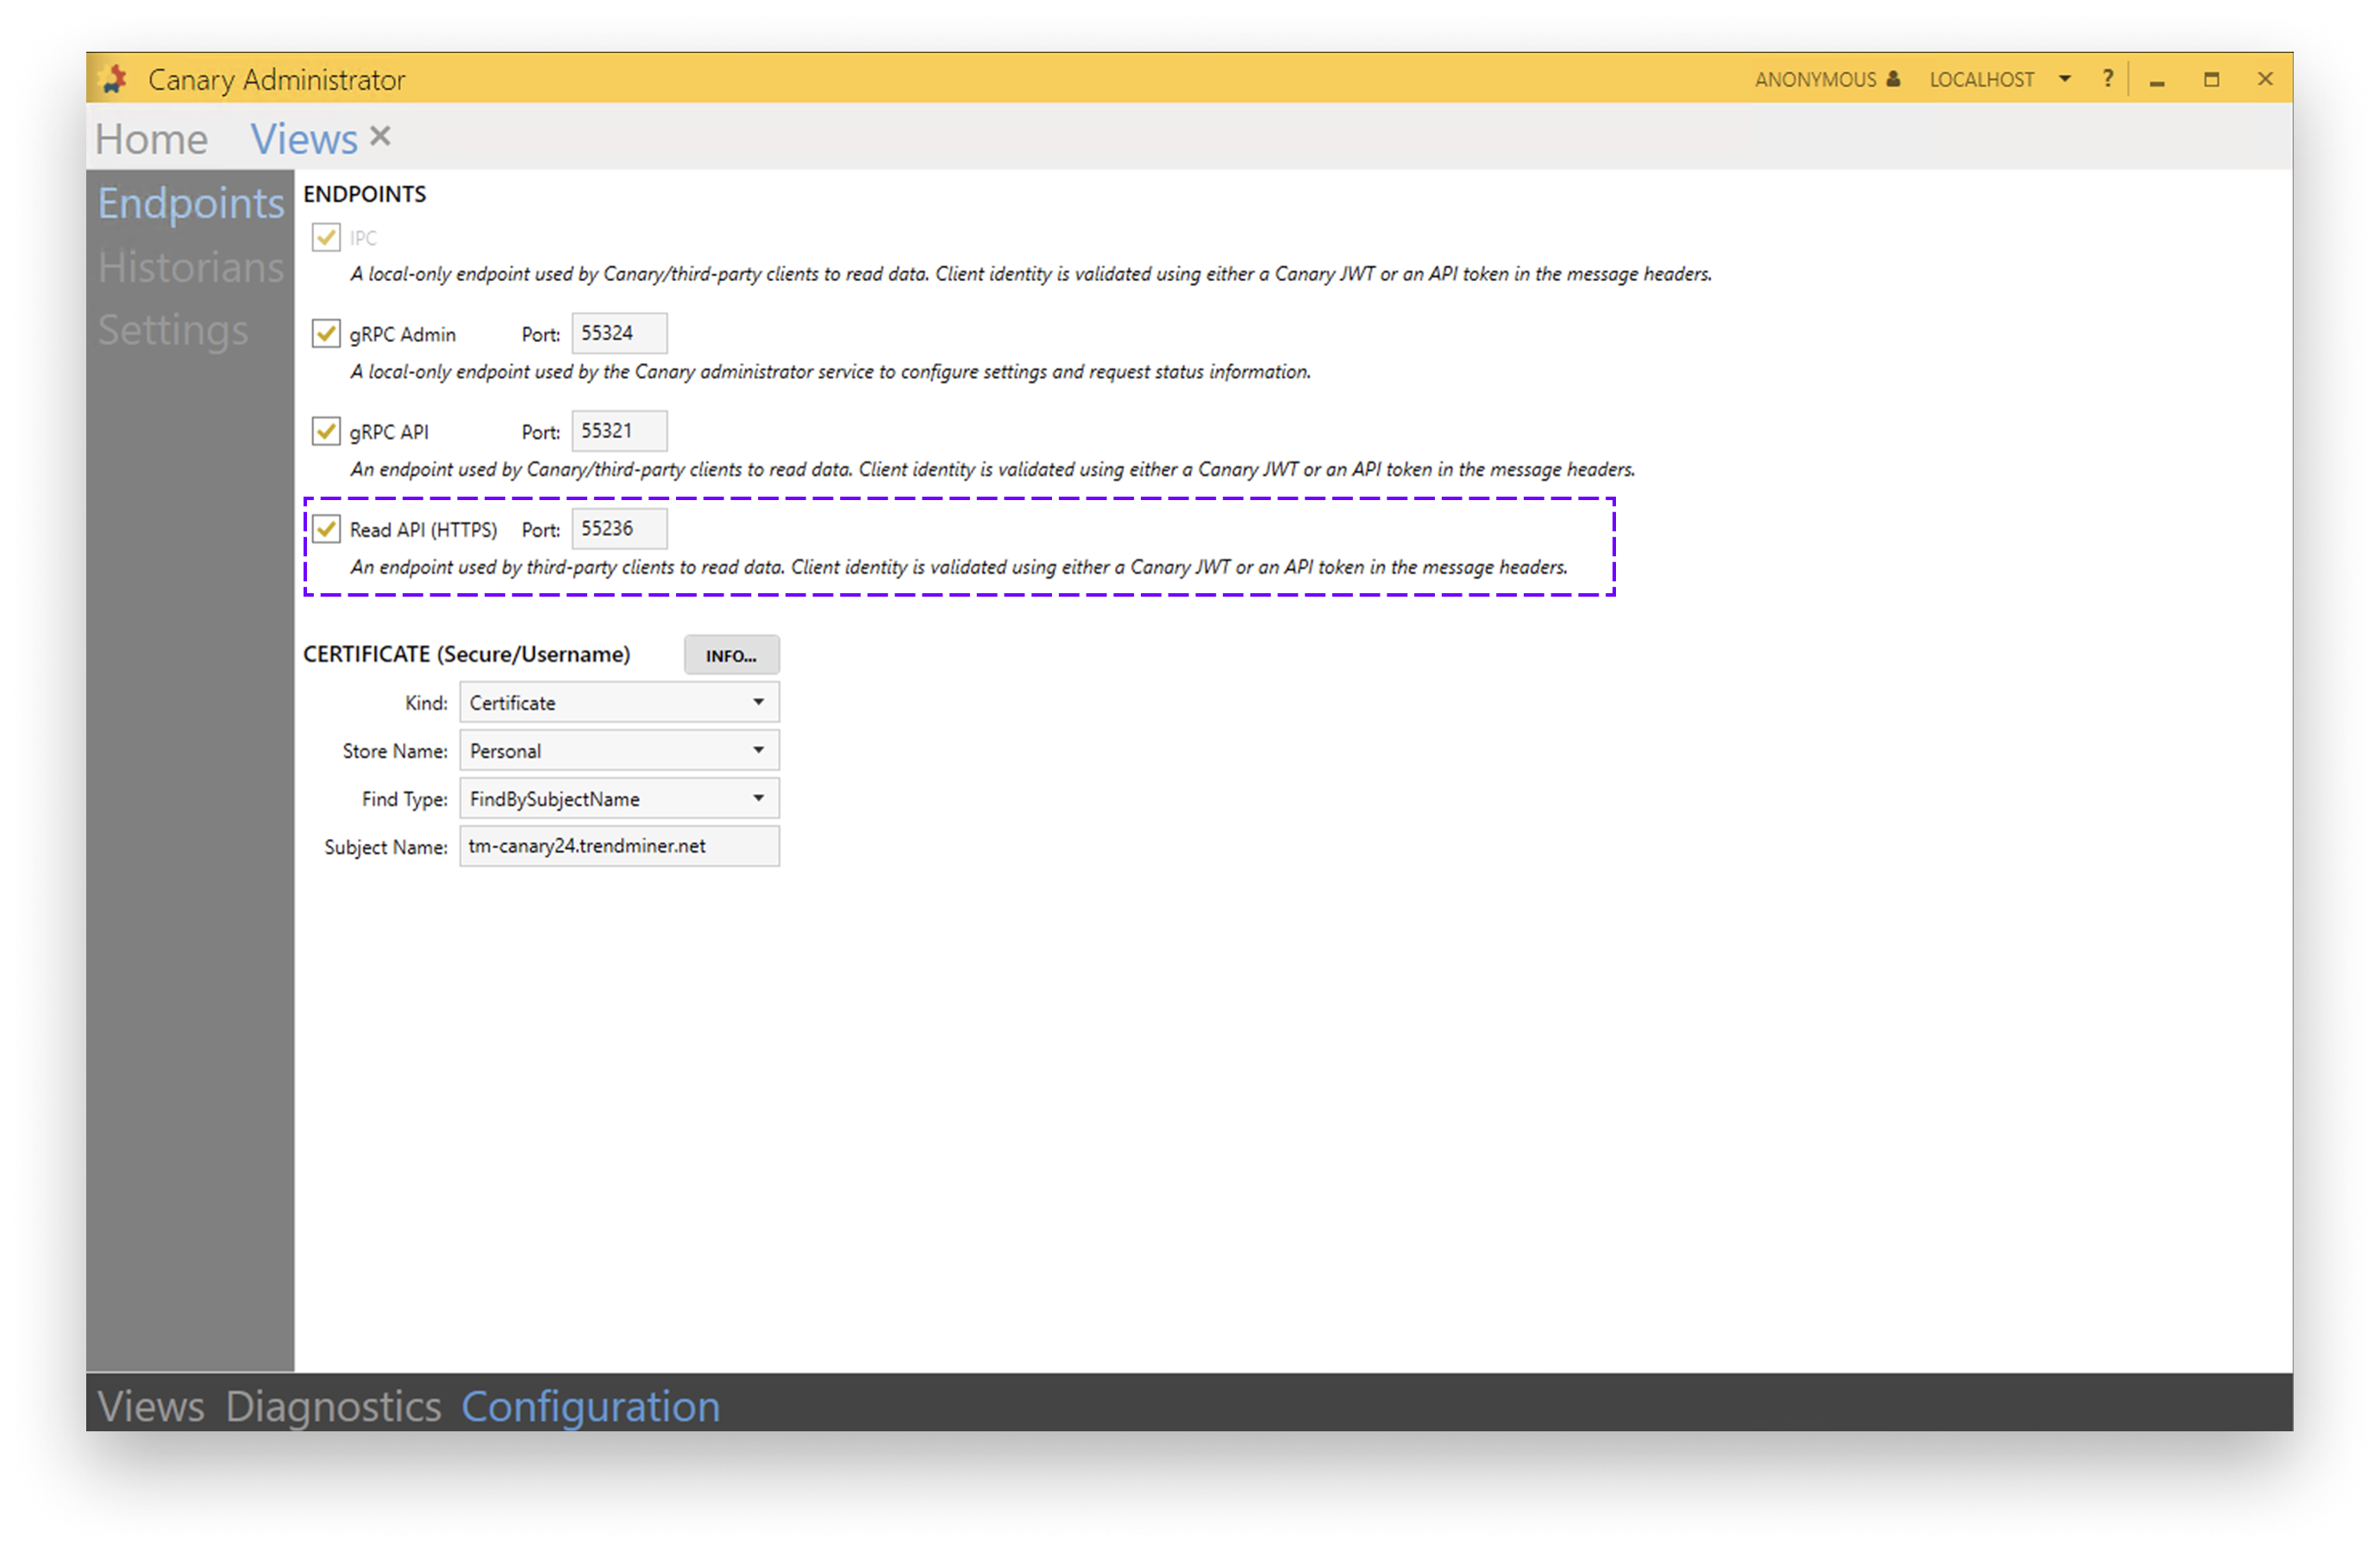
Configure Canary port
Before the API is reachable, the port needs to be opened under the Views section of the Canary admin. In Canary Administrator go to Views (Configuration tab) → Endpoints
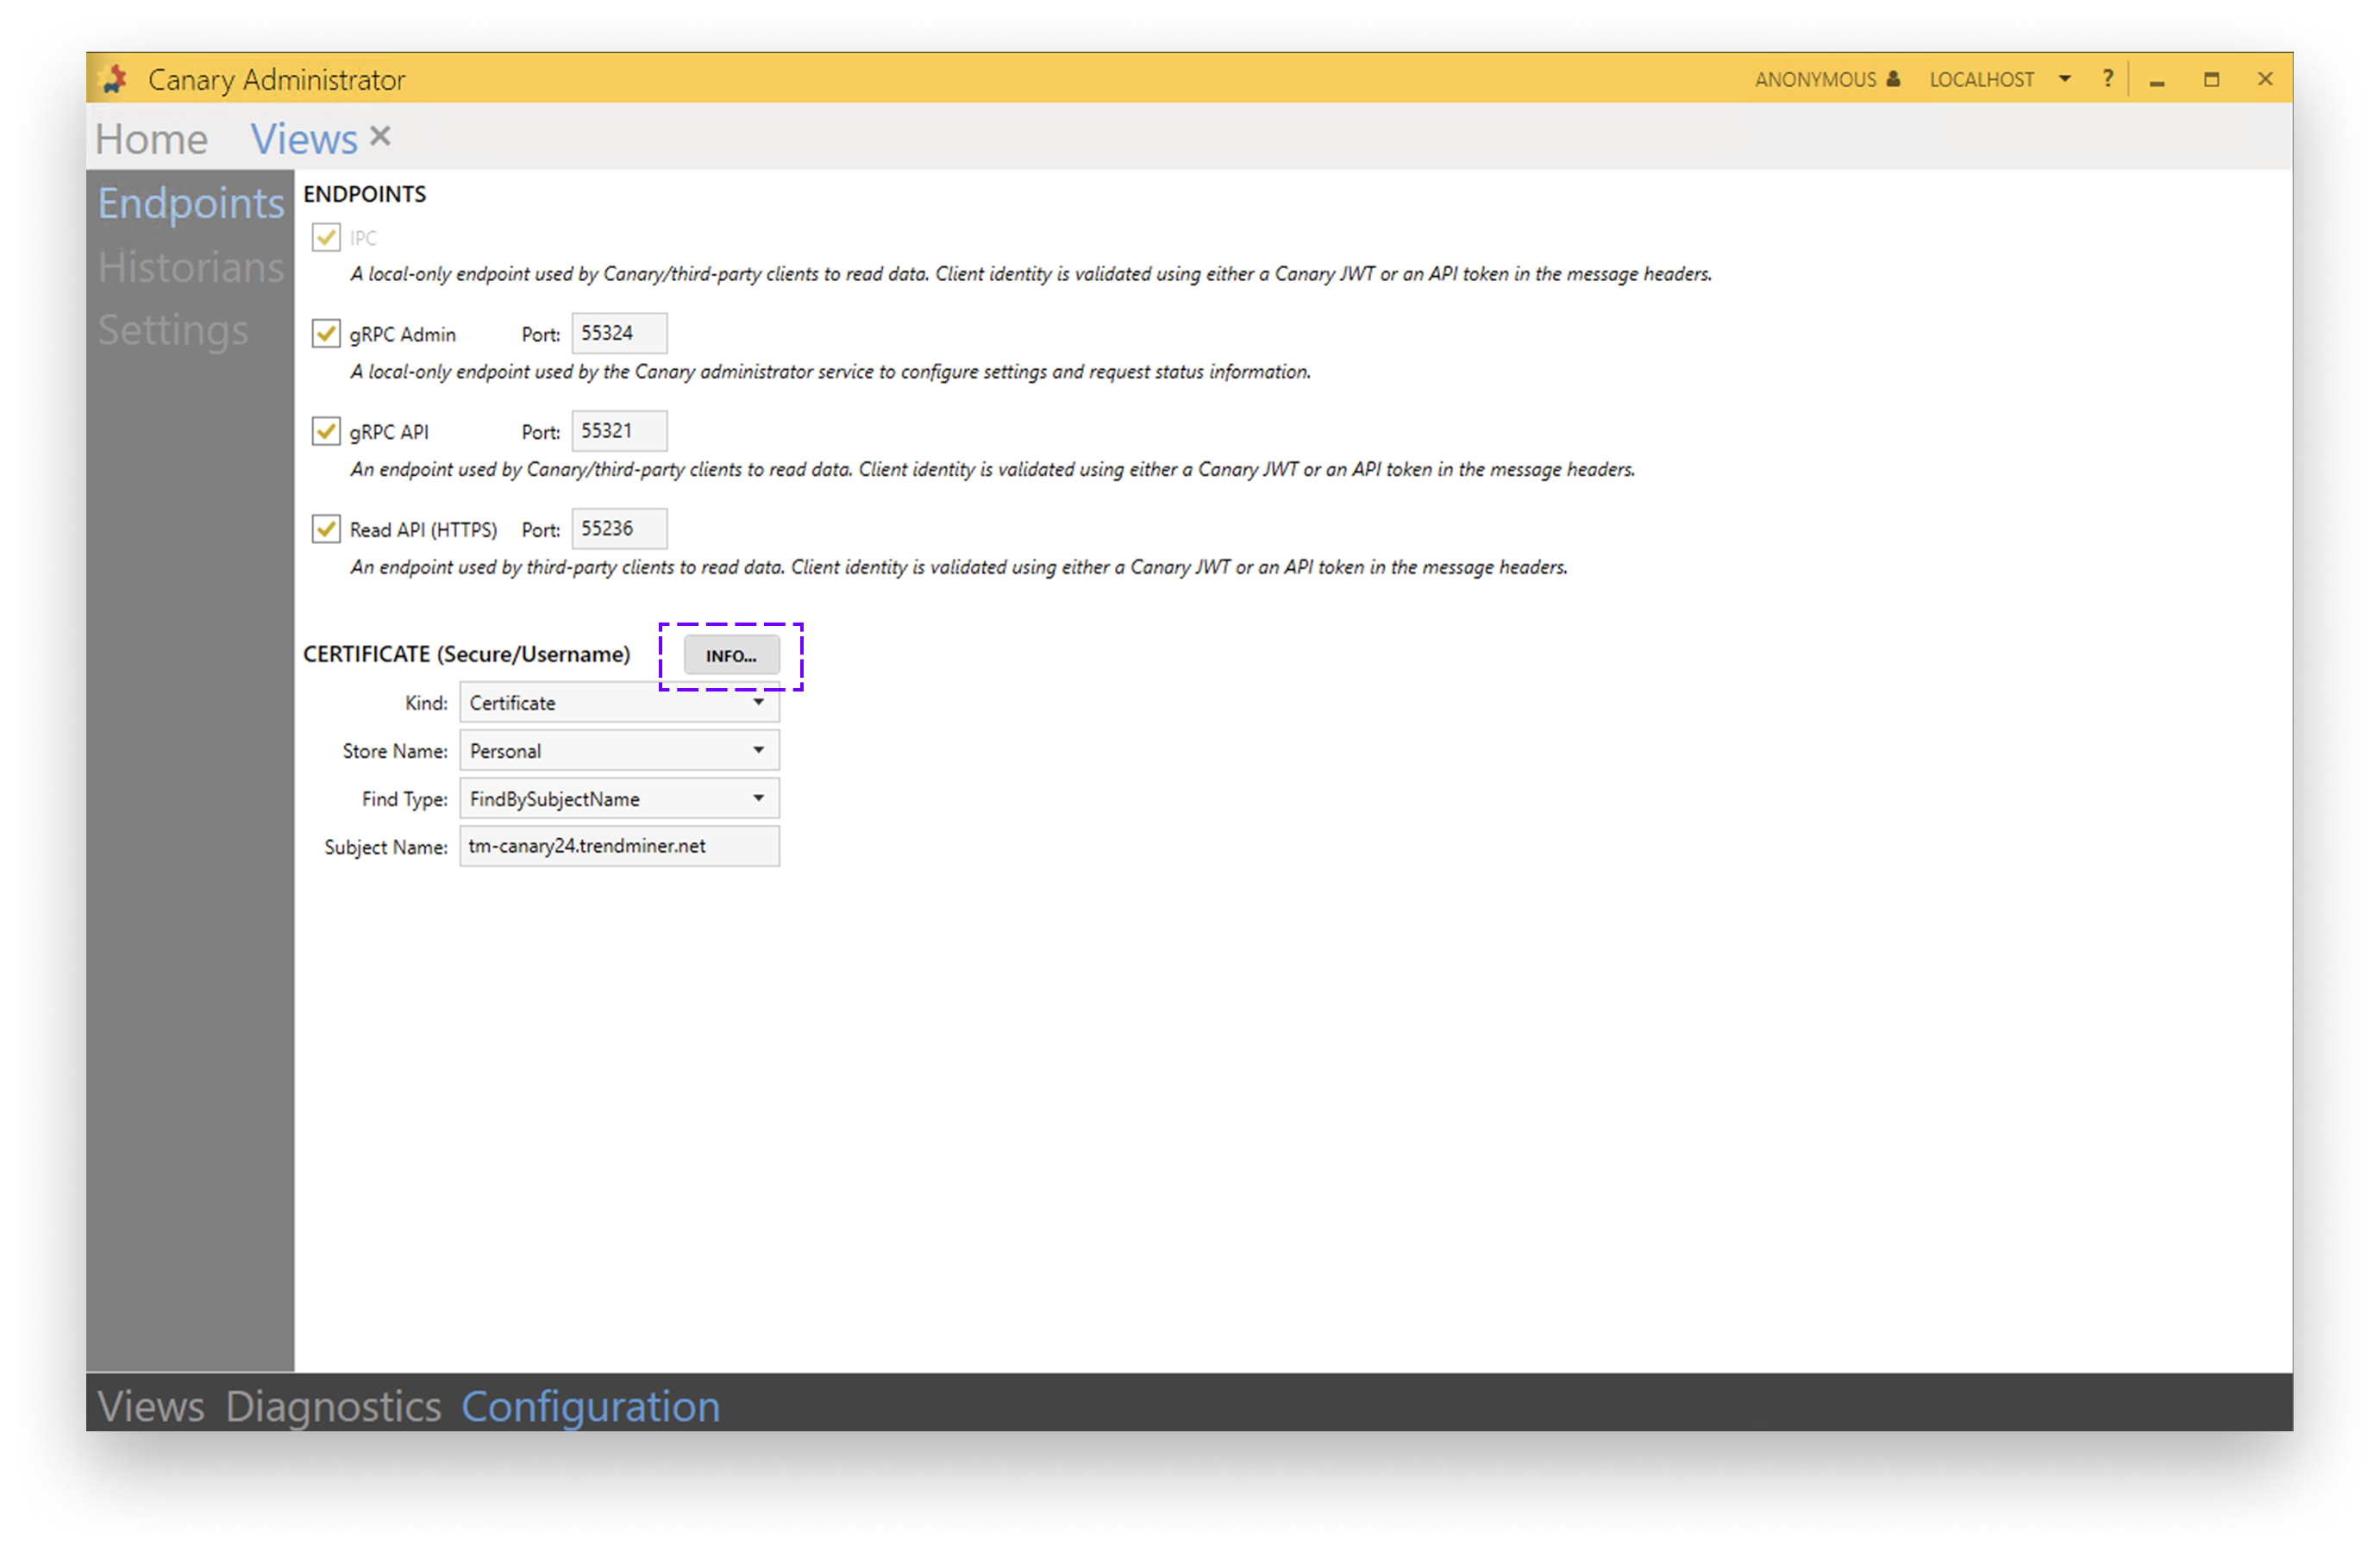
Add Canary certificate in ConfigHub
Canary certificate needs to be added to the truststore on the client (TrendMiner). You can add it in ConfigHub -> Security → Certificates → Trusted certificates → Upload certificate (button)
To export the certificate in Canary Administrator go to Views (Configuration tab) → Endpoints → CERTIFICATE [INFO…] (button)
Make sure the Subject Name matches the DNS name, otherwise you will get runtime exceptions when using the certificate later on
Do not export private key
Select Base-64 encoded X.509 format
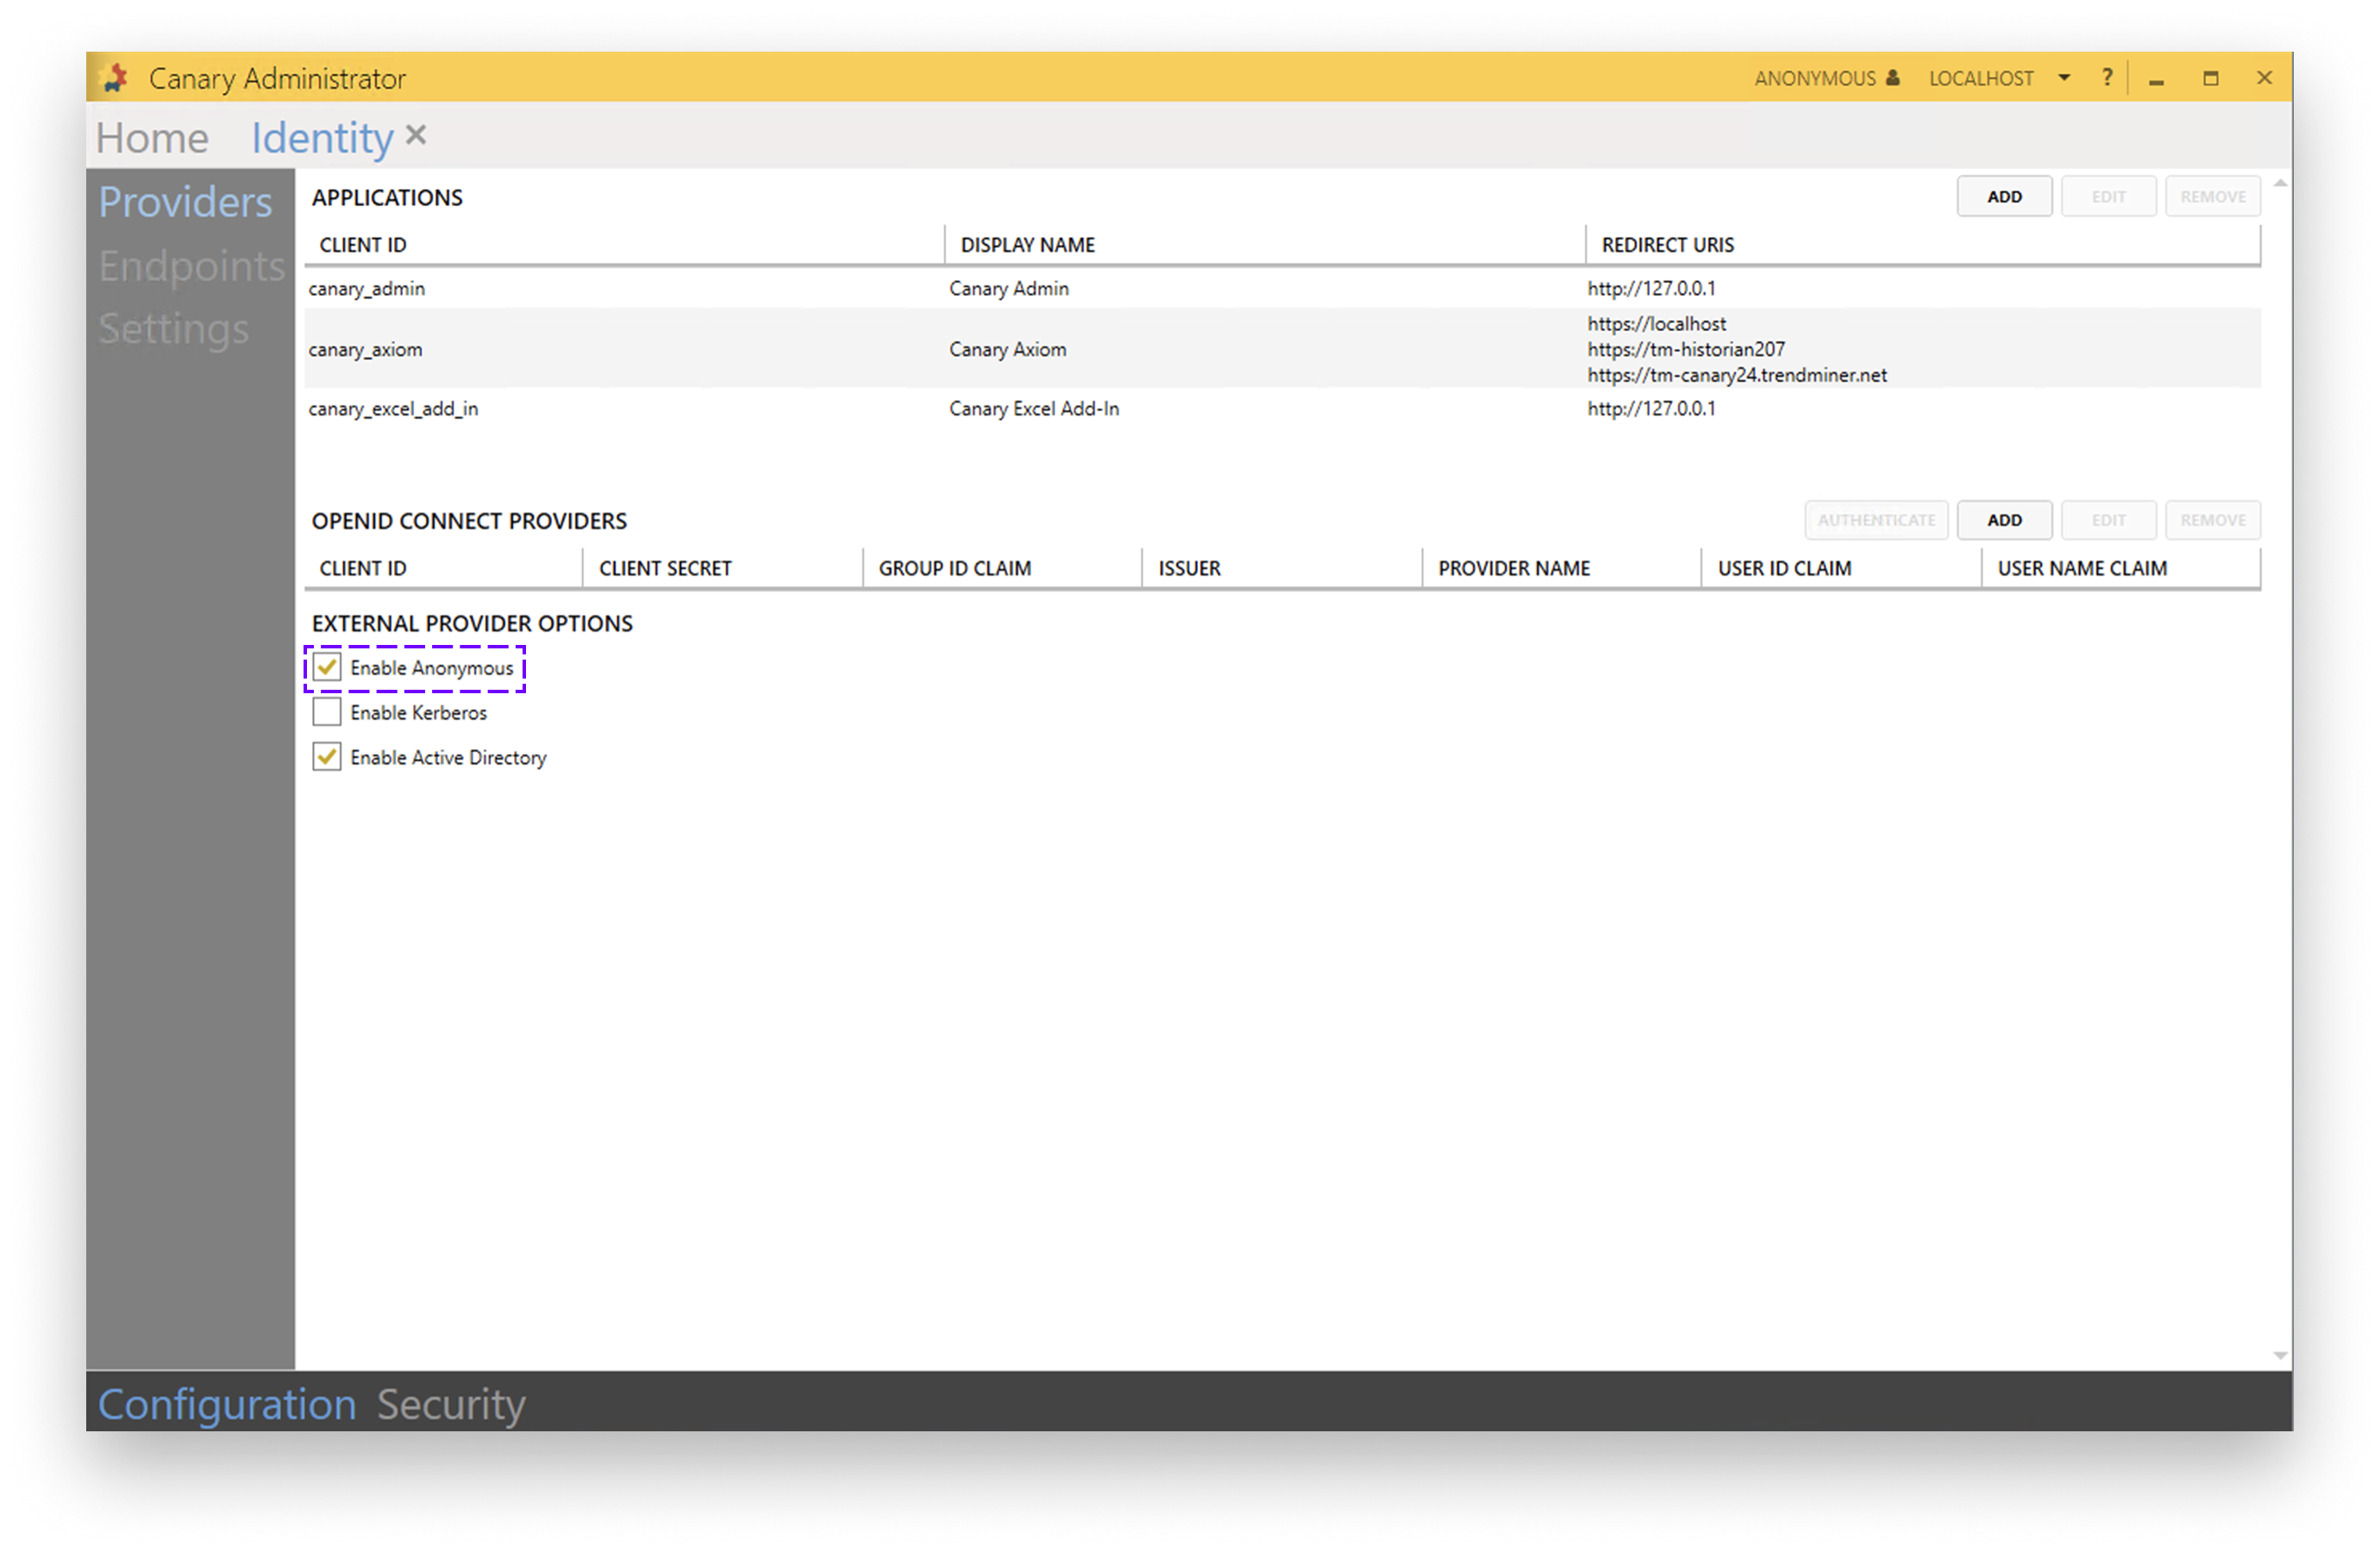
Select the checkbox Enable Anonymous in External provider options
To enable the checkbox go to Identity (Configuration tab) → Providers
Configure the connection in TrendMiner