Deployment
Download the Plant Integrations installation file
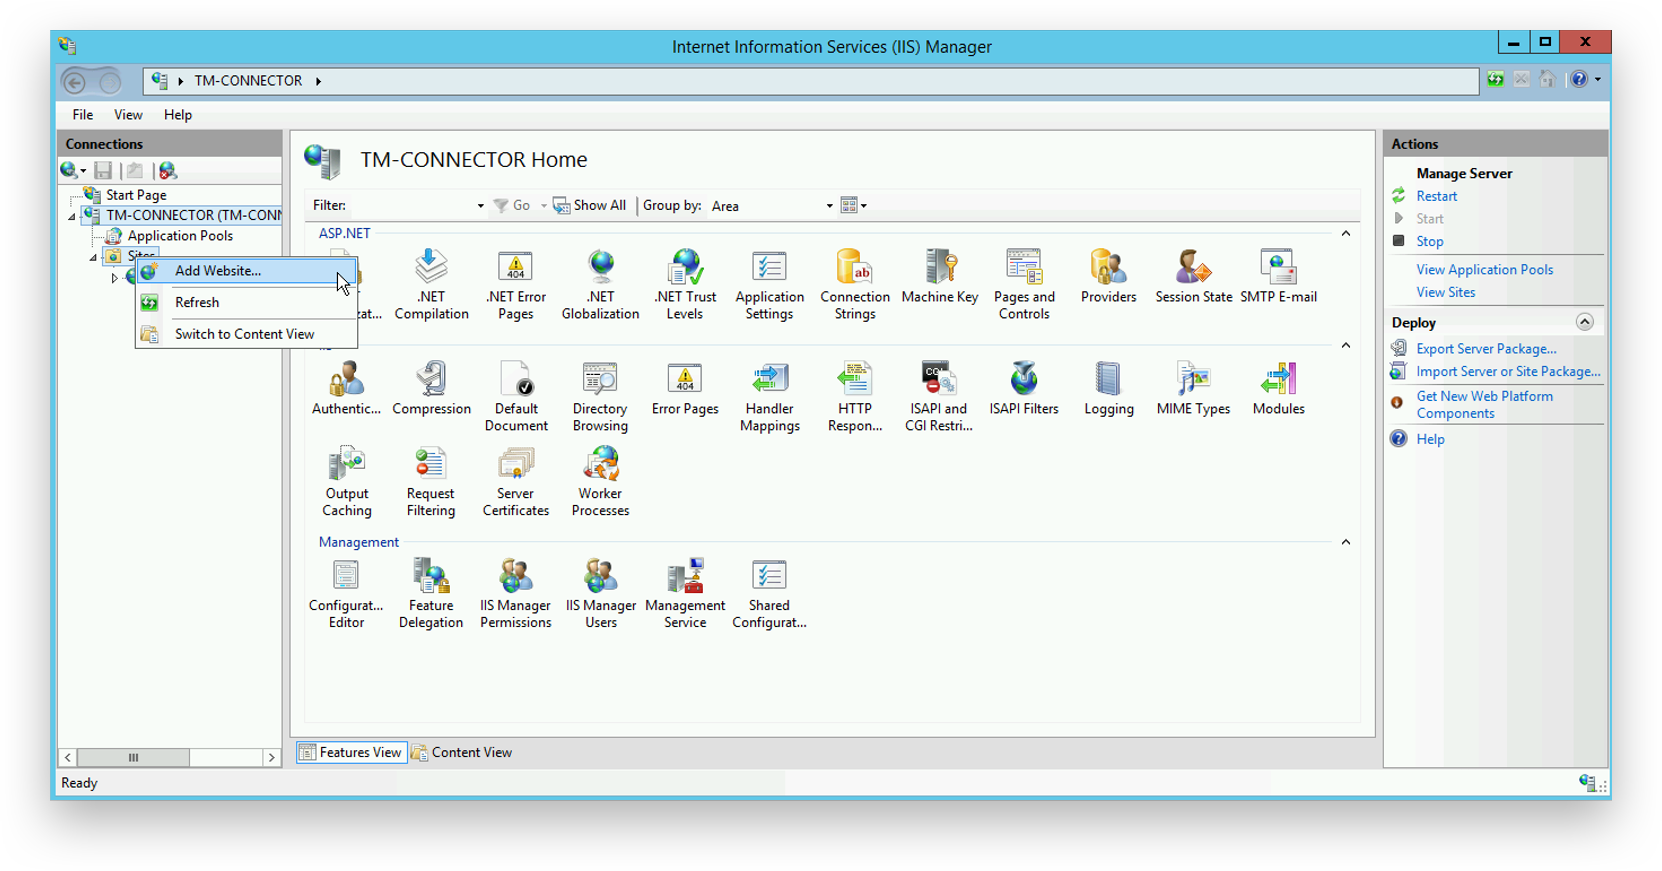
<trendminer-hc-X.Y.Z.zip>from the TrendMiner download site.Start the IIS Manager and 'AddWebsite'
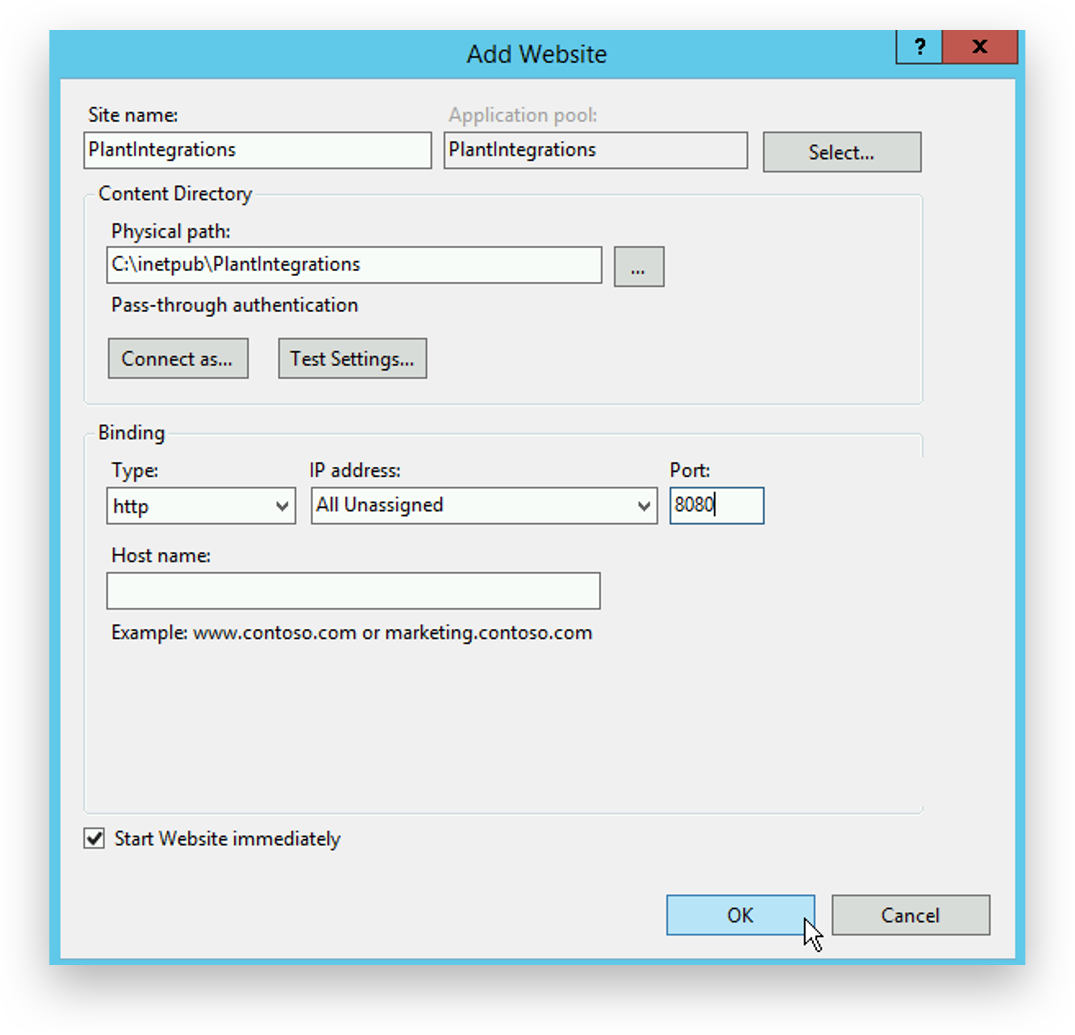
Complete the form as directed:
Provide the website a readable name.
Create and select a path to store the Plant Integrations files.
Choose a port for communication between TrendMiner and Plant Integrations.
Ensure that the chosen port is accessible from the TrendMiner application. Open the port in Windows Firewall and any other networking devices.
Click 'OK'
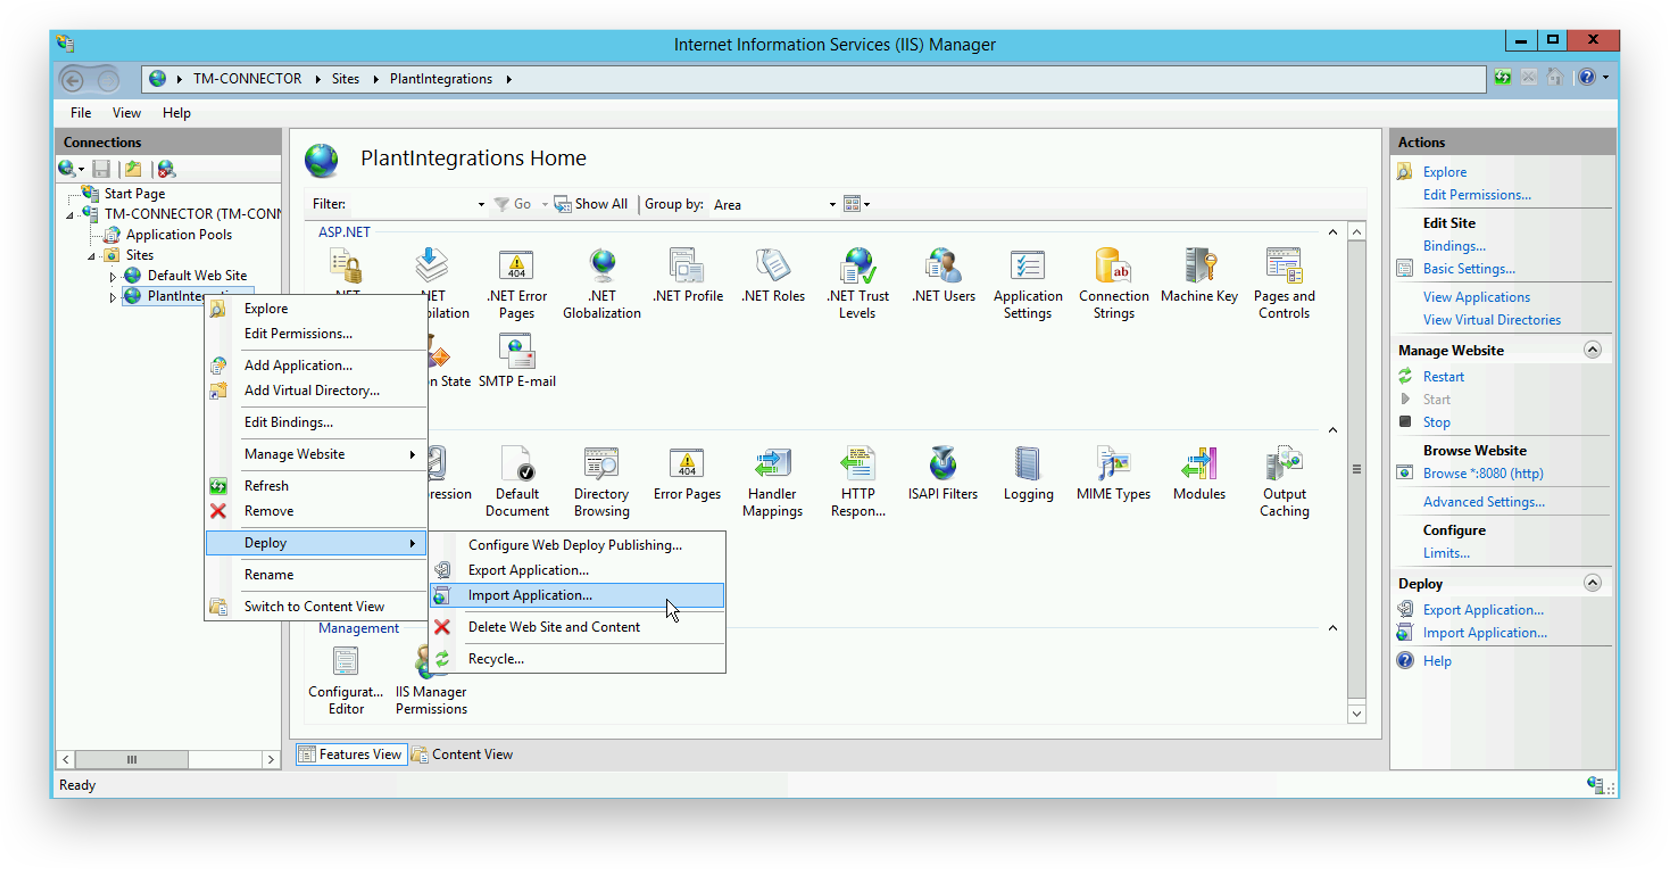
Right click on the newly created site and choose 'Deploy’ - ‘Import Application'.
Note
If the 'Deploy' option is not available, please go back and:
verify all roles and features have been correctly selected during installation
verify Web Deploy is installed correctly. If it was already installed, please do the installation again and make sure to restart the server after the installation.
Note
Note: In case the server is running on a language different to English, please ensure that the security group ‘Users’ is available on this server. If it is not, it needs to be created upfront and the necessary permissions to be assigned.
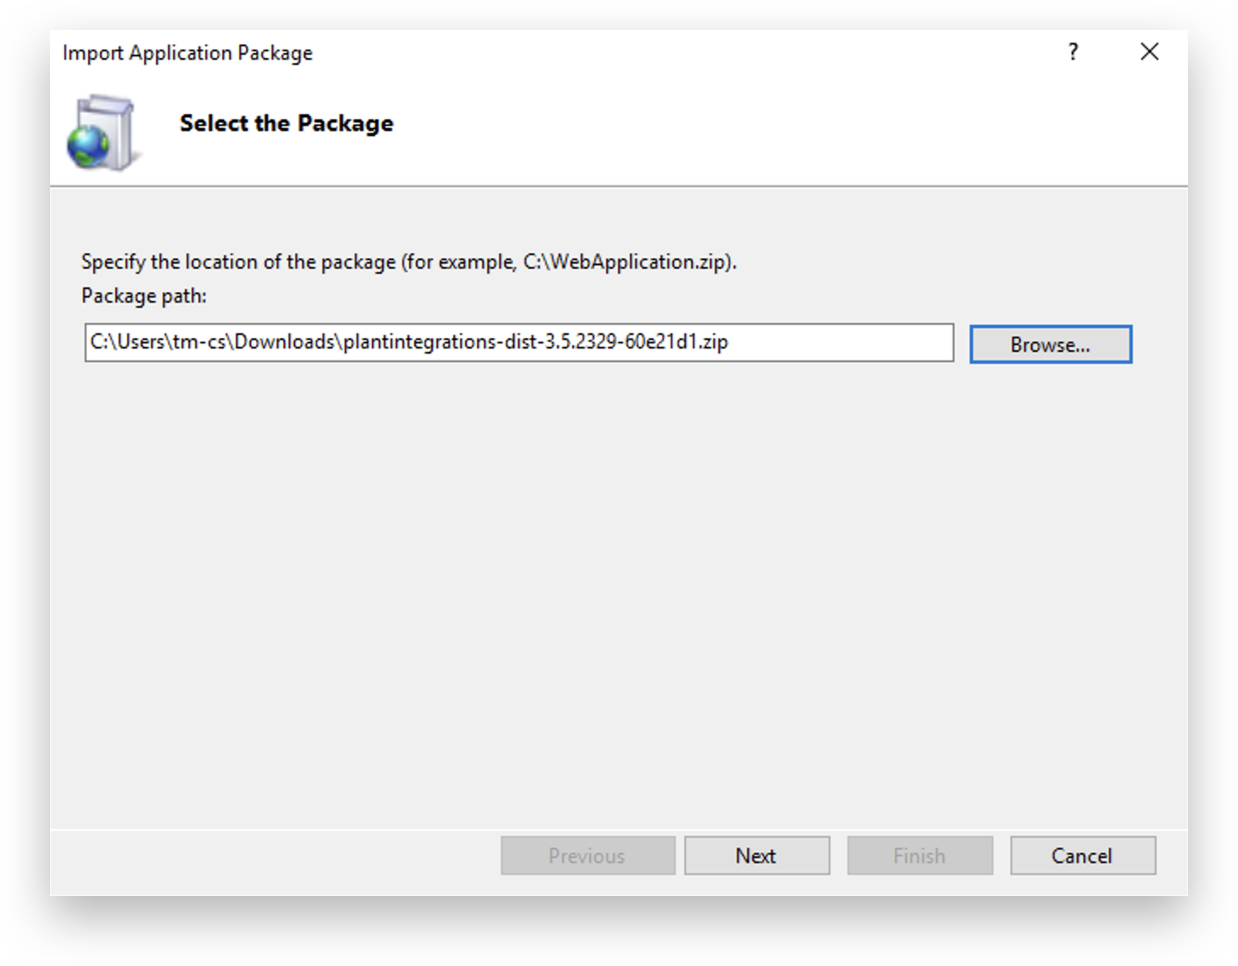
Select the TrendMiner Plant Integrations zip archive and click 'Next'.
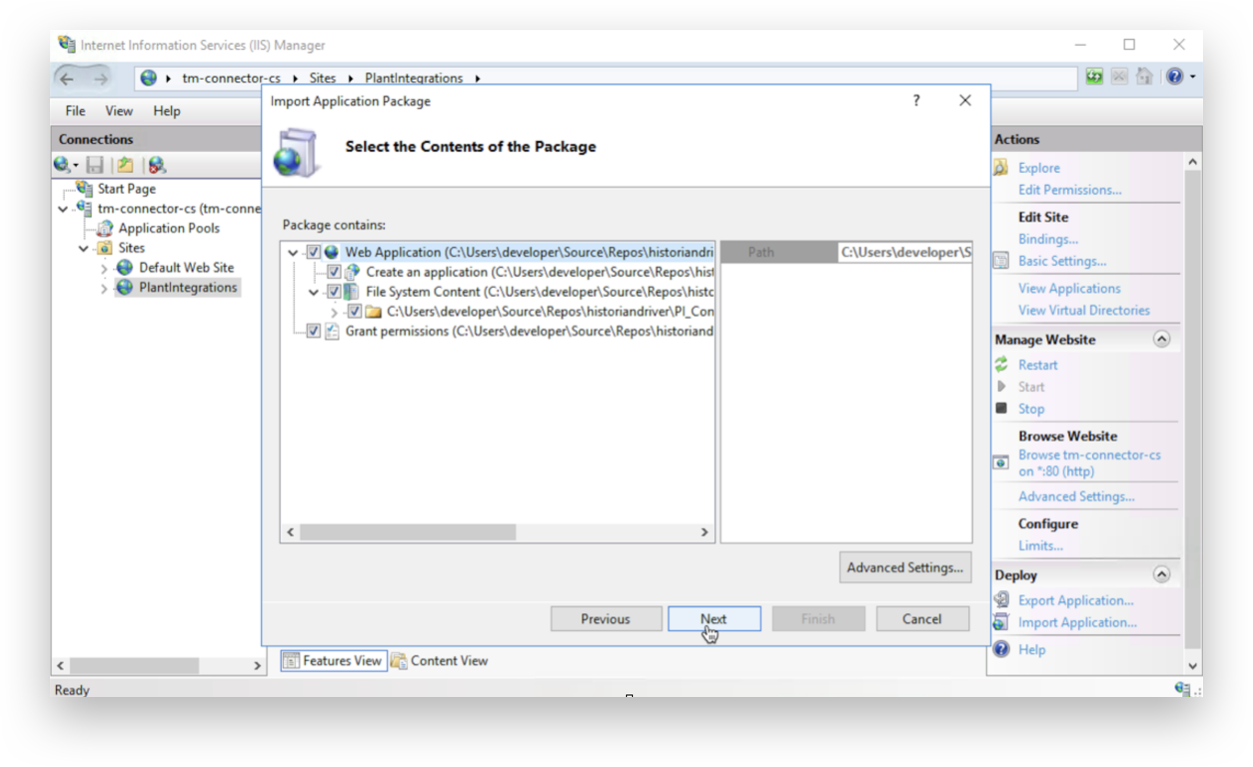
Click 'Next'.
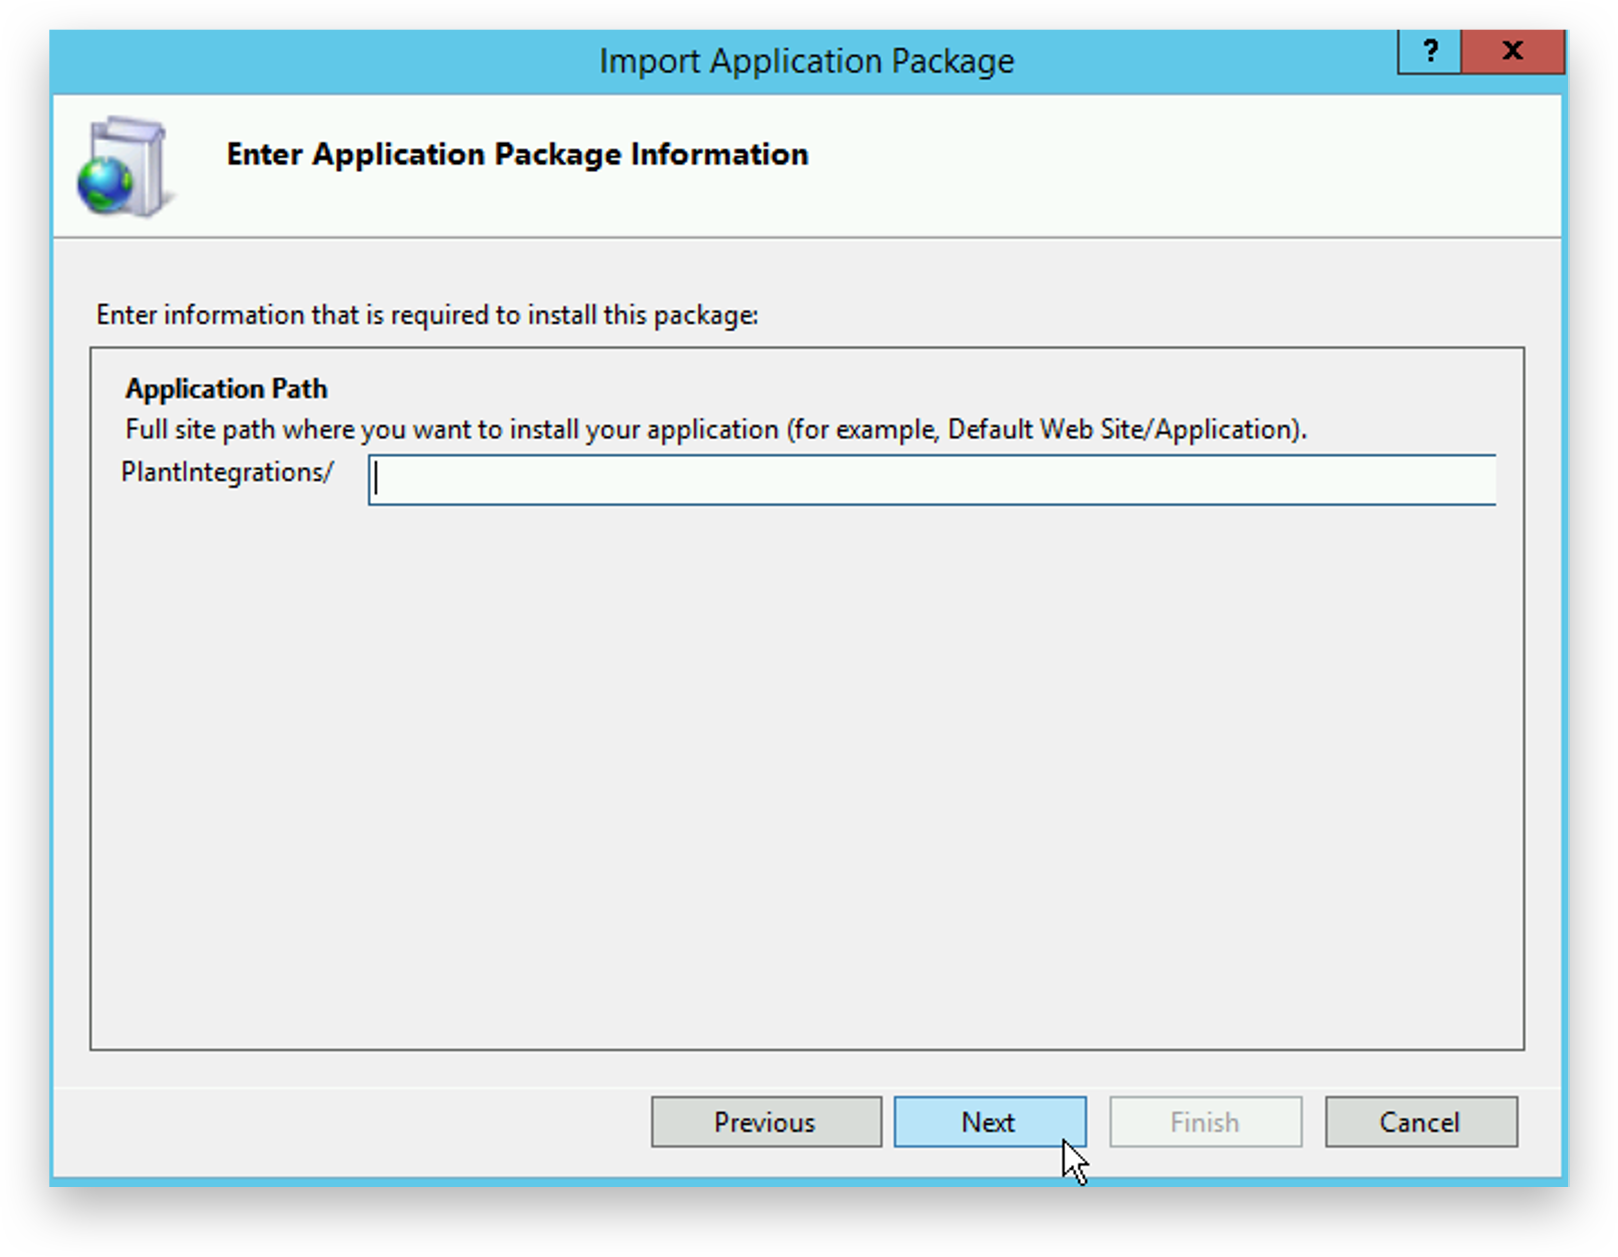
Remove the autocomplete path of HC and click 'Next'.
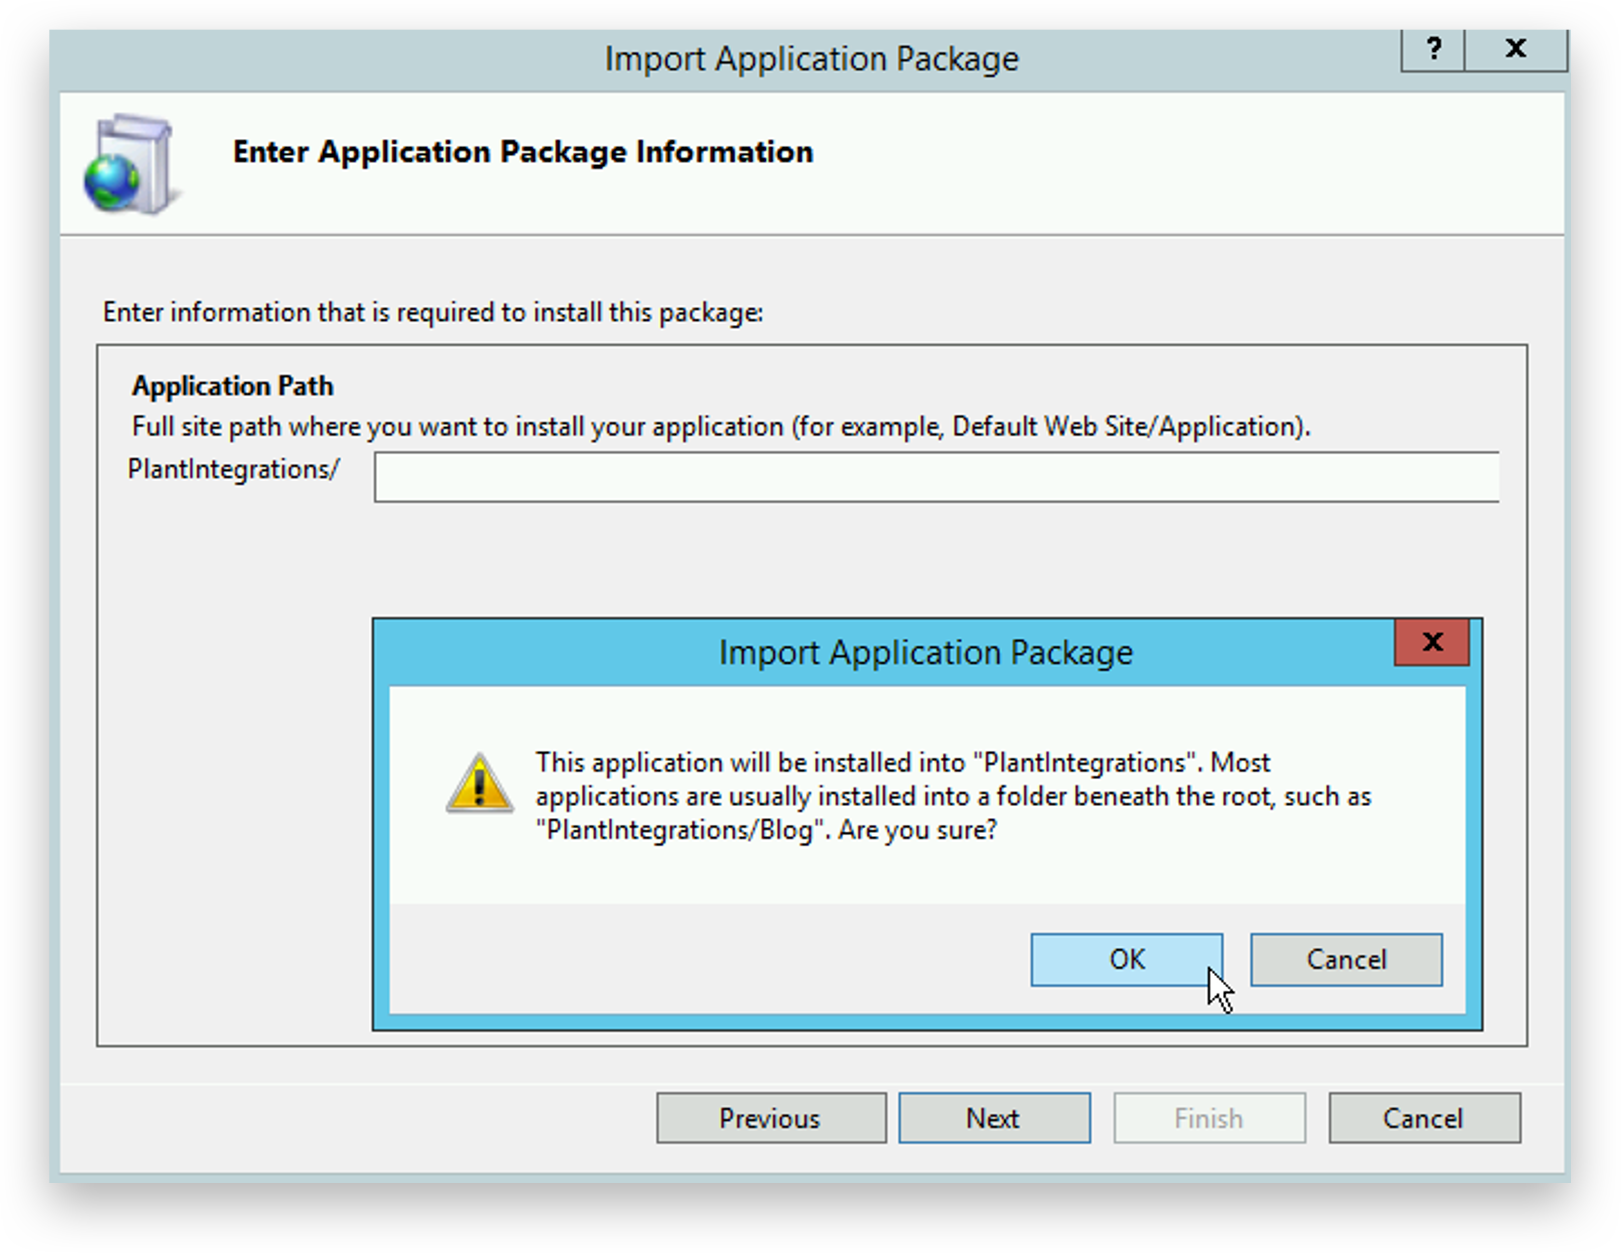
Click 'OK' to continue. If this error message does not appear, go back to the previous step.
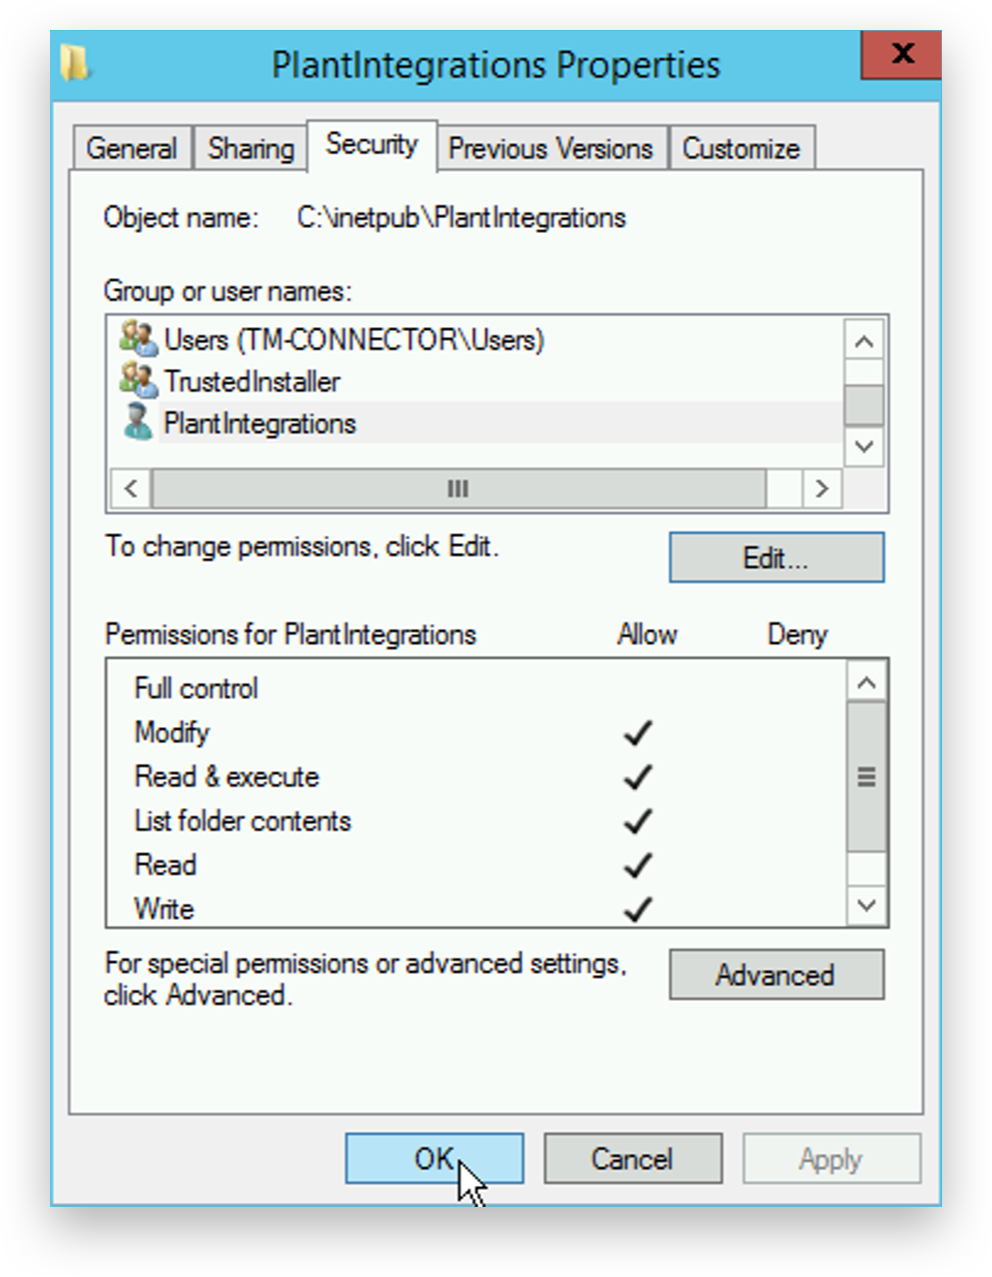
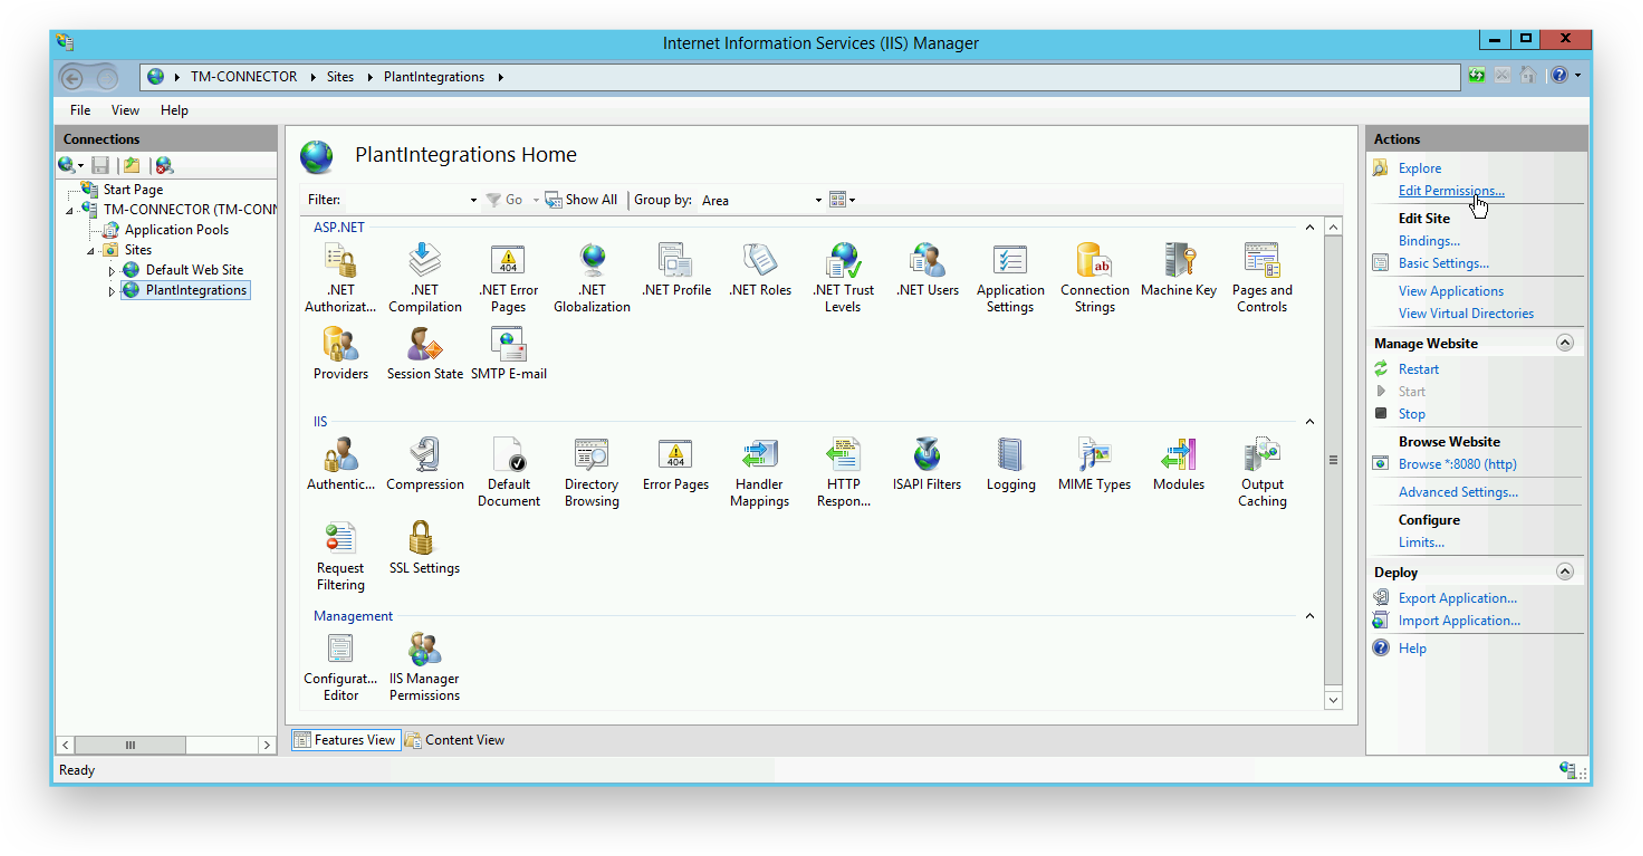
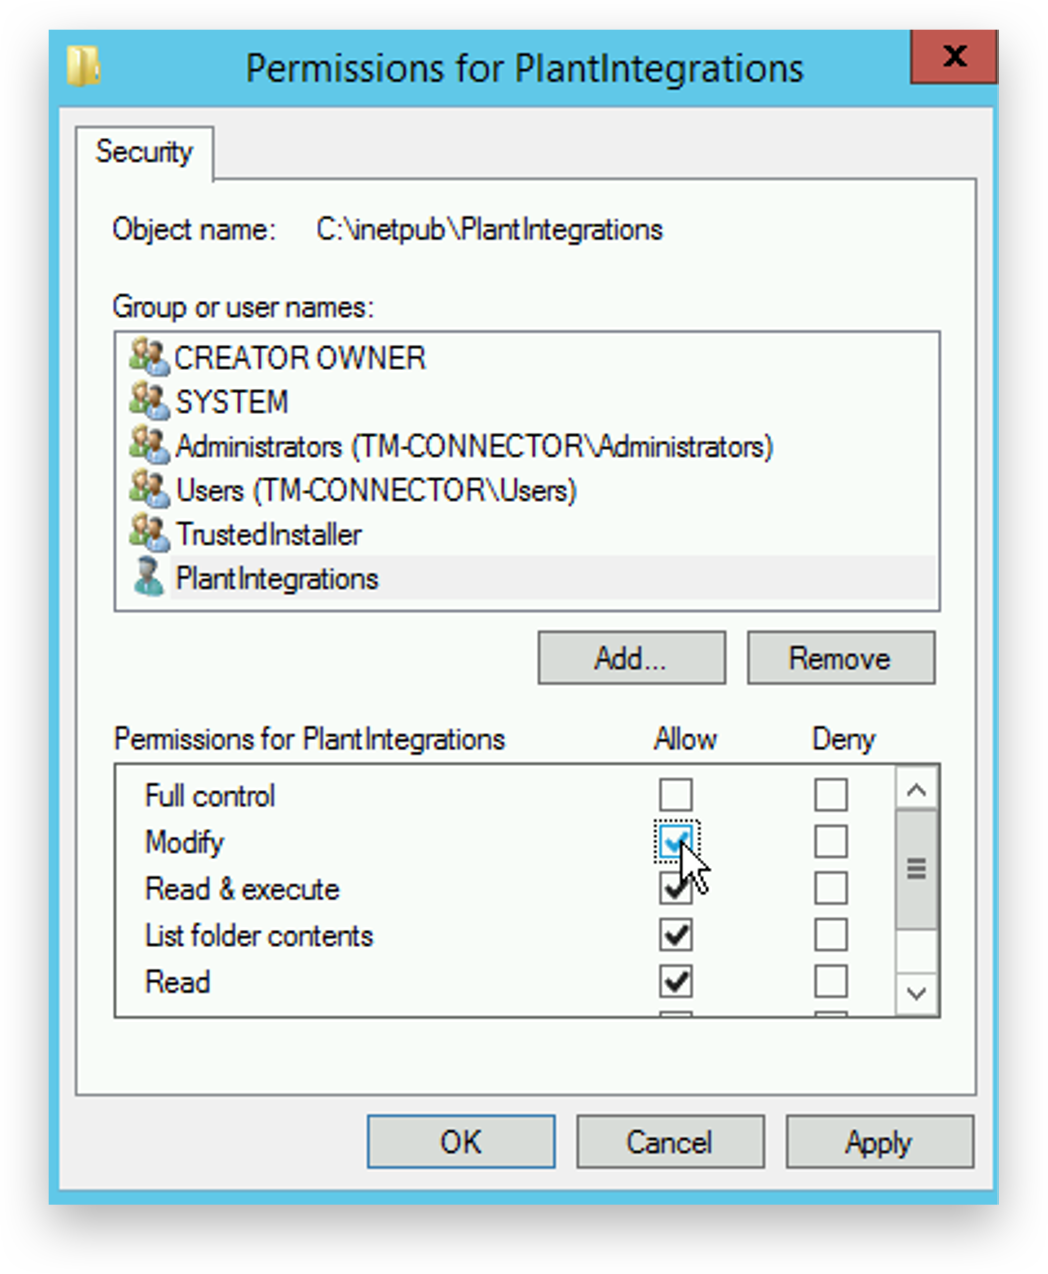
Edit the permissions of the newly created site.
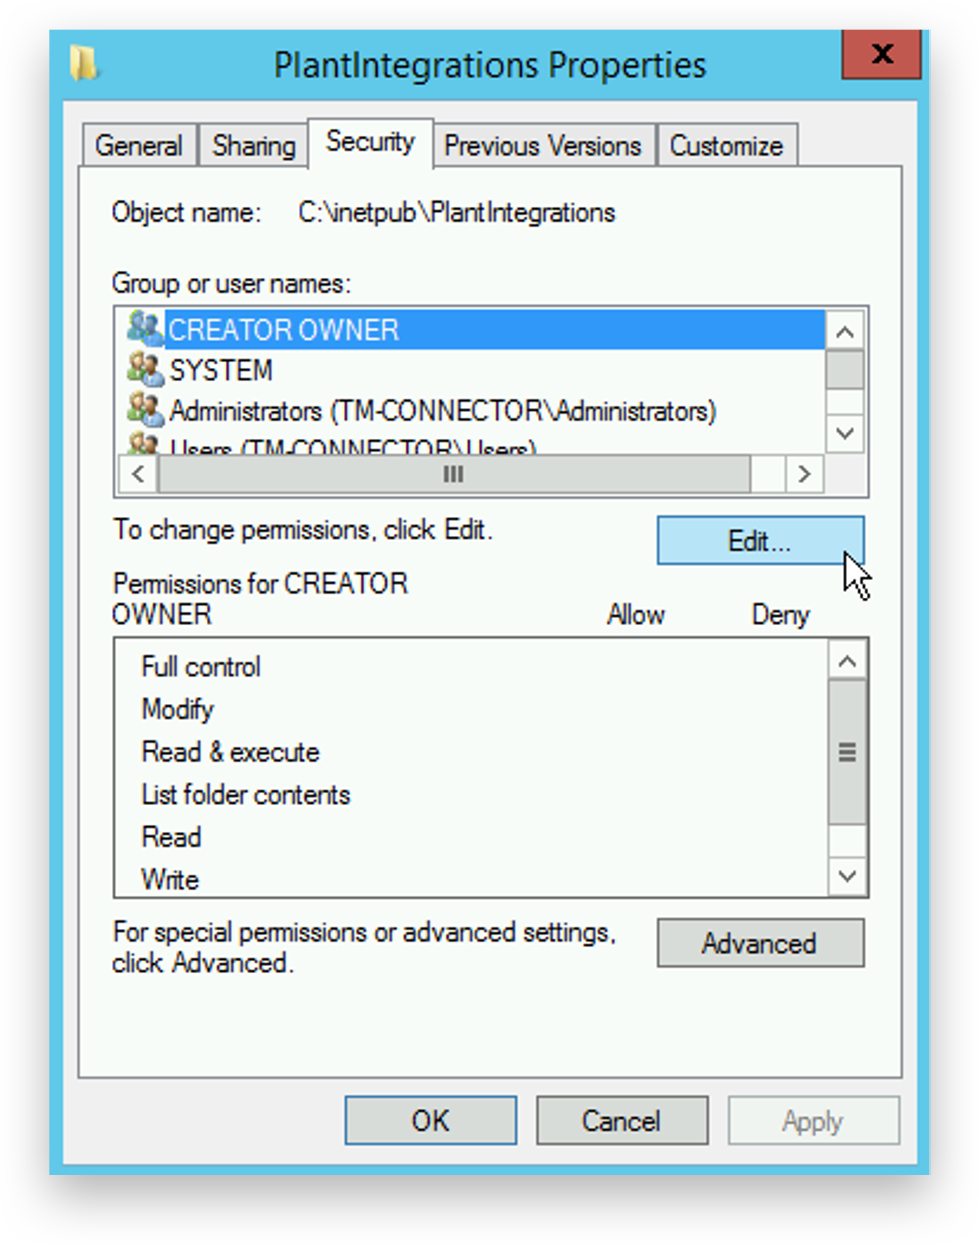
Click 'Edit'.
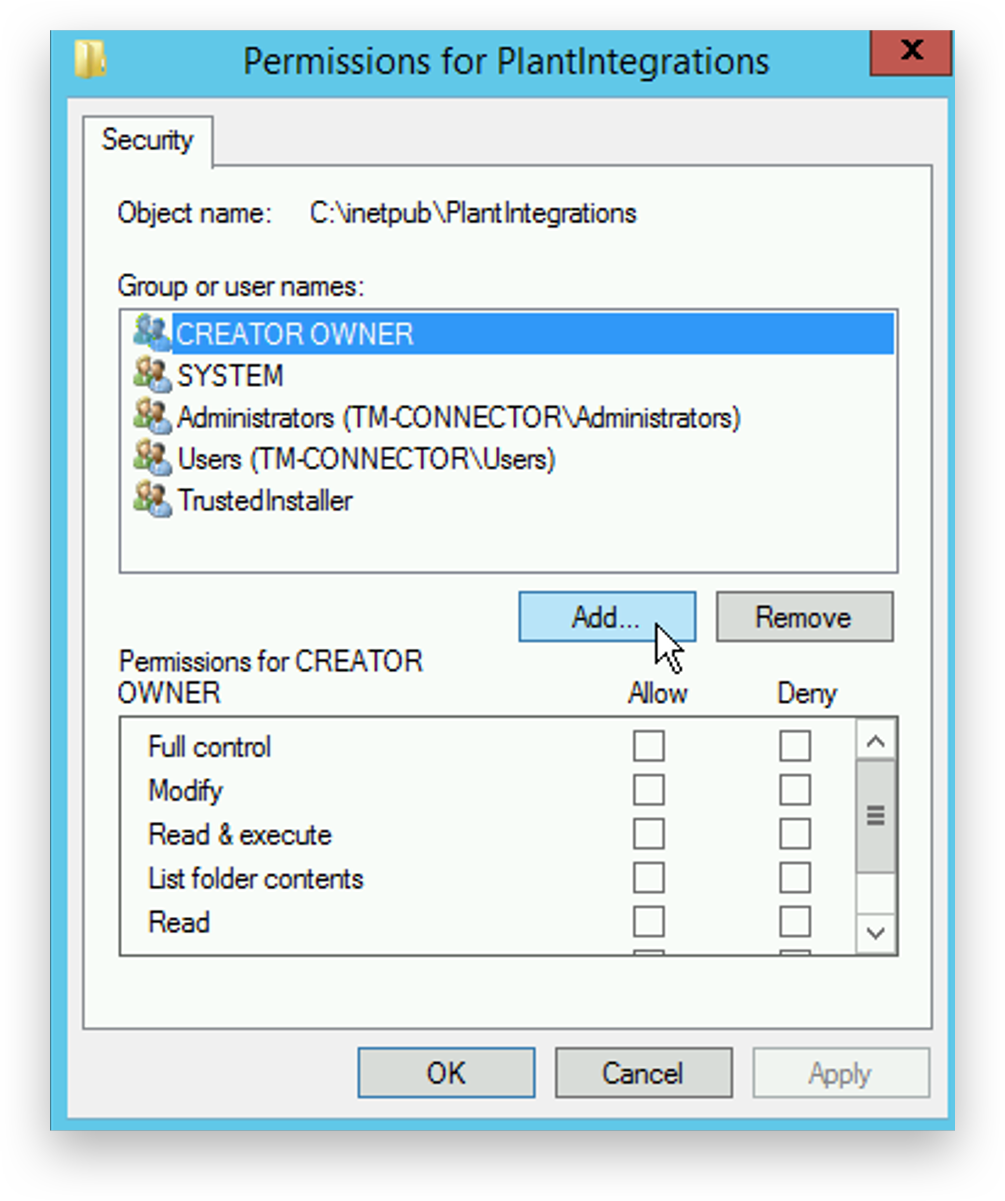
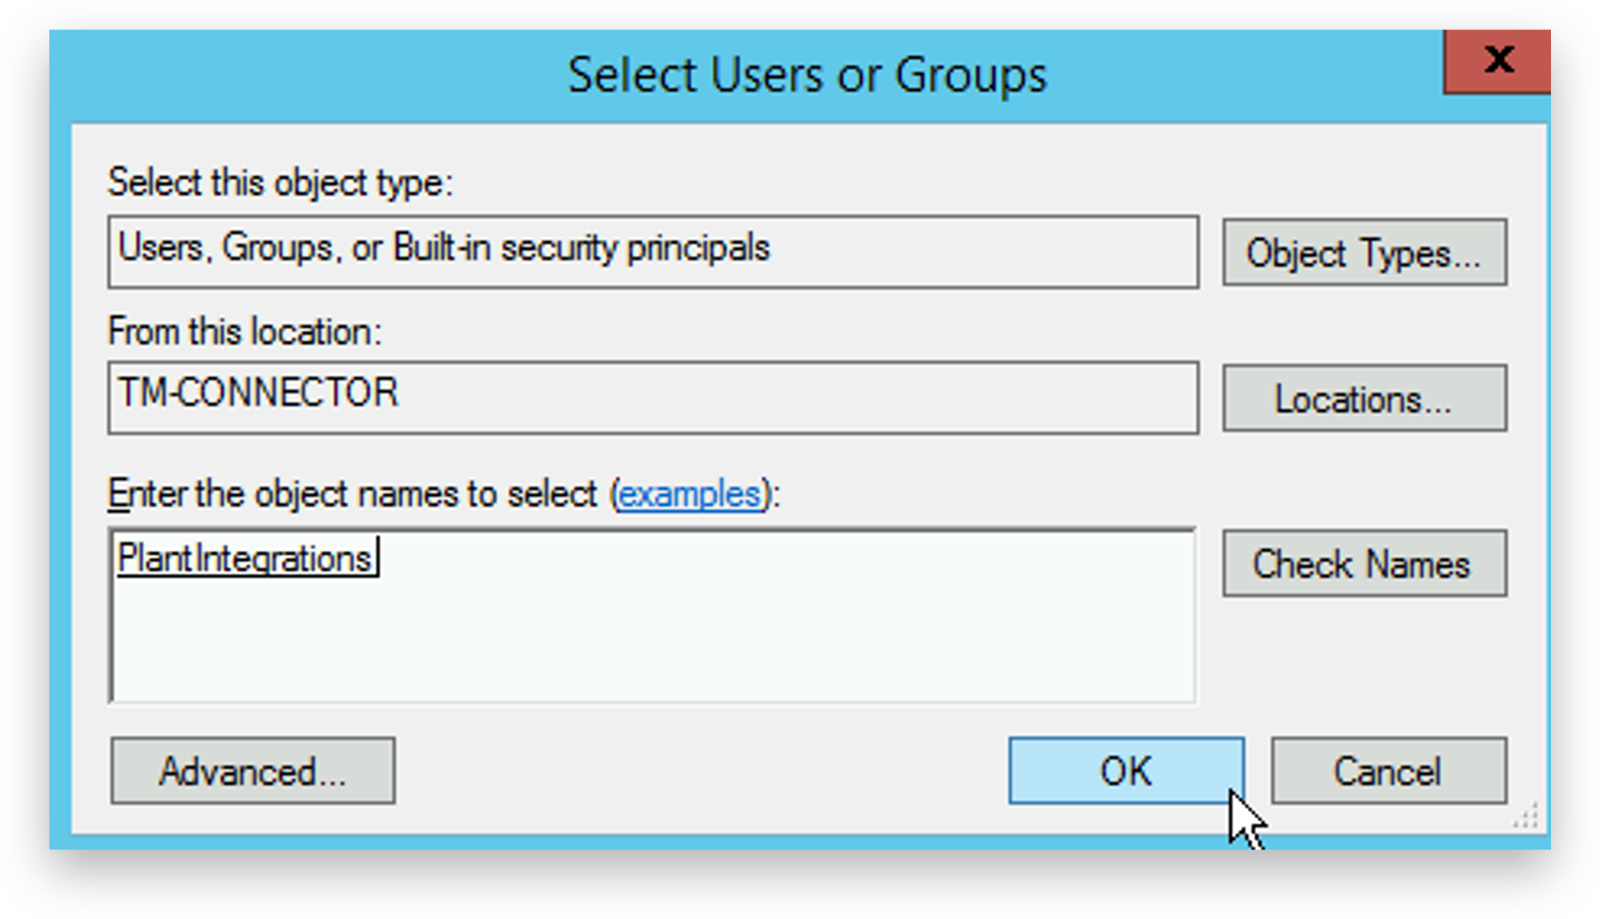
Click 'Add'.
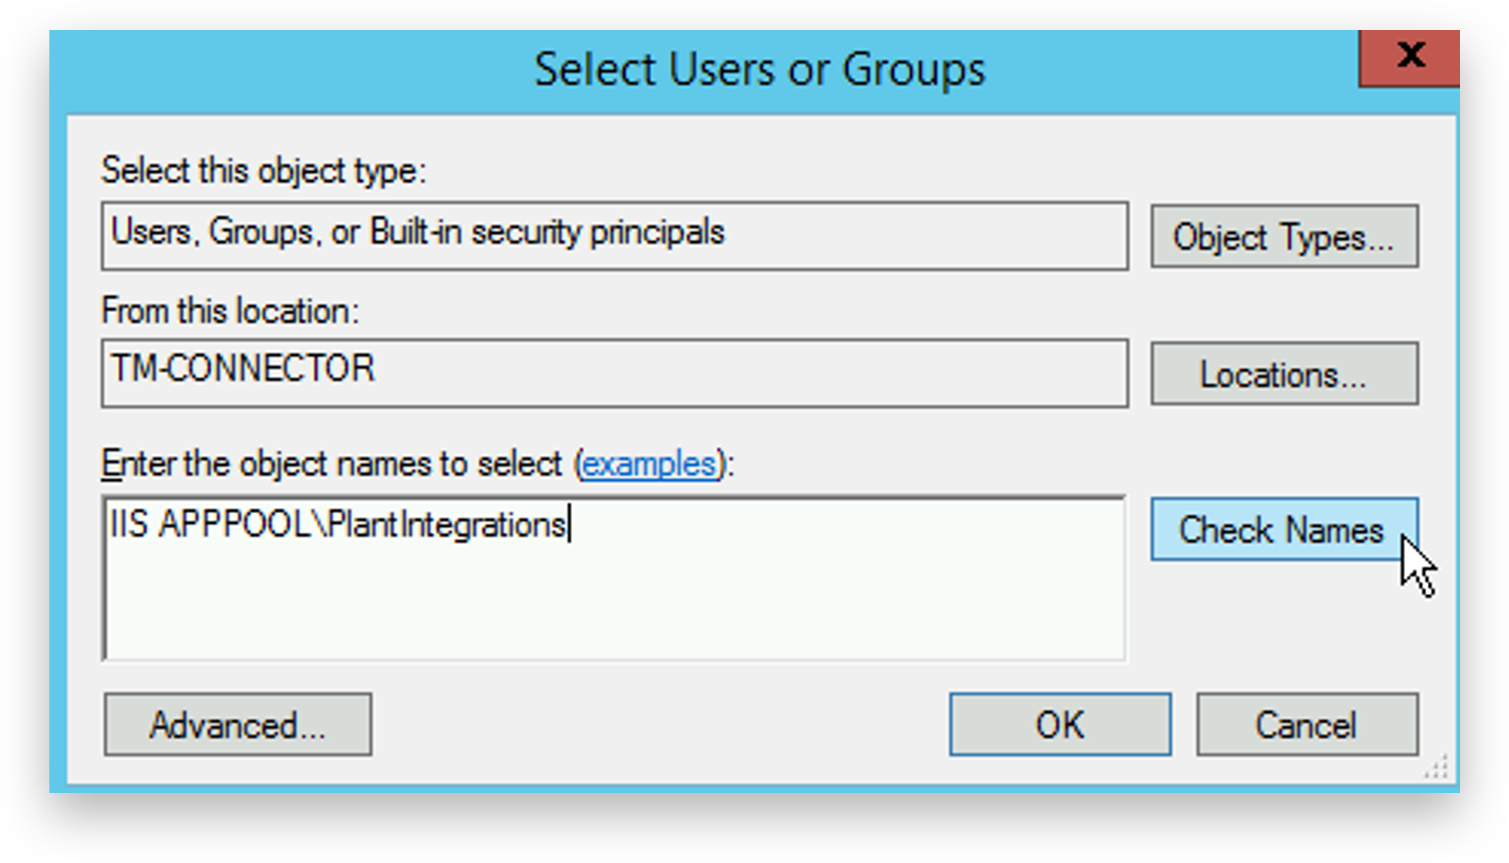
Ensure the location is the current server. If this is a domain, select the current server in 'Locations'. Type IIS APPPOOL\<pool name> and click 'Check Names'.
Click 'OK'.
Give the new user 'Modify' permissions.
Click 'OK'.
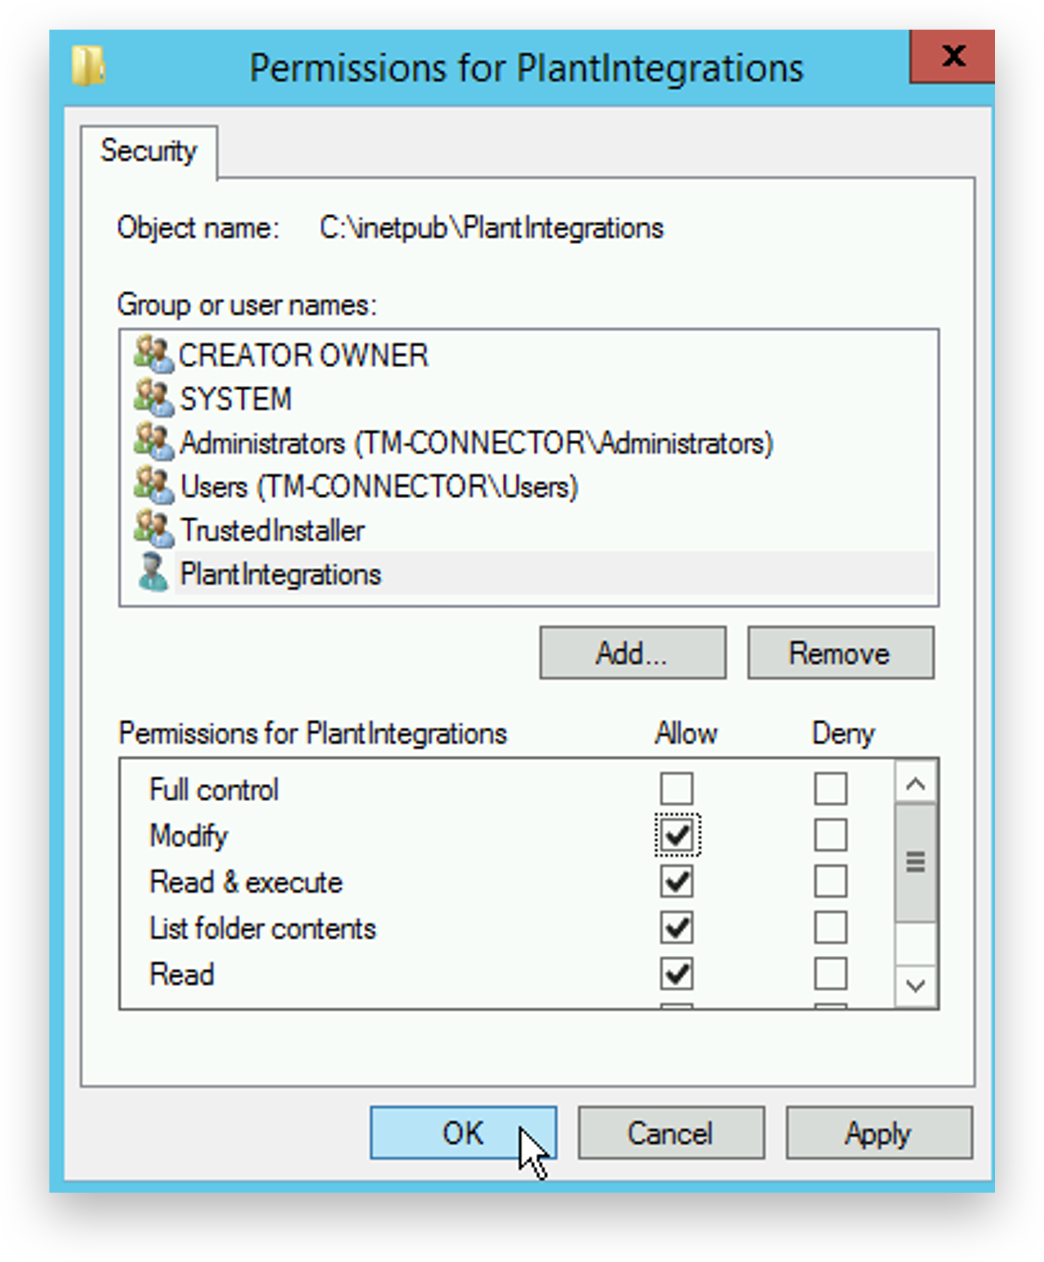
Accept the new settings by clicking 'OK'.