PI Vision
Login
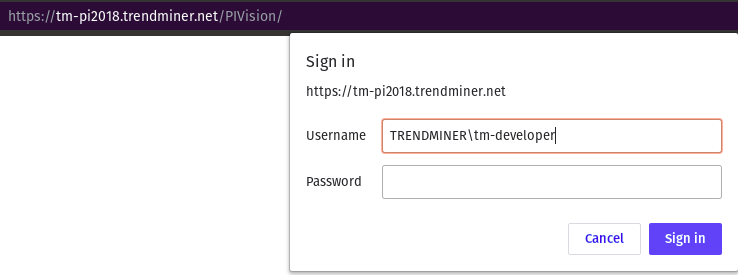
Visit https://[THE URL]/PIVision/#/
Replace [THE URL] with the actual URL/domain on which PI Vision is installed. E.g. https://tm-pi2018.trendminer.net/PIVision/#/
Login with the credentials for a domain user that has access to the server on which PI Vision is installed.
Anmerkung
The URL, domain and user will be different compared to this image
Make database visible
Go to https://[THE URL]/PIVision/Admin and login
Replace [THE URL] with the actual URL/domain on which PI Vision is installed. E.g. https://tm-pi2018.trendminer.net/PIVision/Admin
In the left panel, click on 'Configuration'.
Choose the 'Asset Servers' tab.
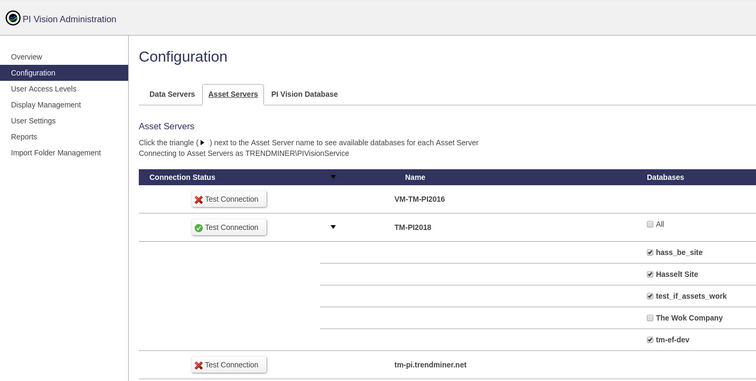
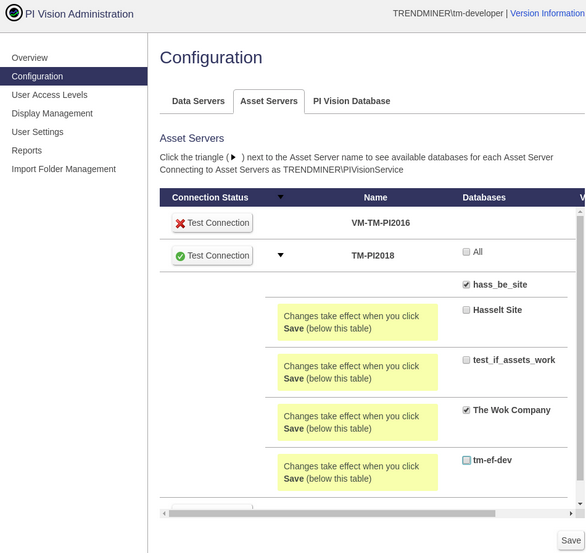
In the 'Databases' column, toggle on the databases you want to be visible in PI Vision and hit Save (bottom right).
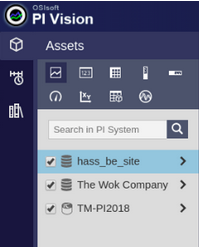
Visit https://[THE URL]/PIVision/ and login.
Replace [THE URL] with the actual URL/domain on which PI Vision is installed. E.g. https://tm-pi2018.trendminer.net/PIVision/
Click on:

in the top bar.
In the left panel the database is now visible to use.
Re-index
In adding tags and attributes assets and attributes/tags got added to a database.
In Make database visiblethe database was made visible to use in PI Vision.
This indexed the assets and attributes/tags.
In the scenario where you decide to add more assets or attributes/tags to the database that has already been indexed, a re-indexing of the database is required.
1. Go to https://[THE URL]/piwebapi/admin/search/database.html and login.
Replace [THE URL] with the actual URL/domain on which PI Vision is installed. E.g. https://tm-pi2018.trendminer.net/piwebapi/admin/search/database.html
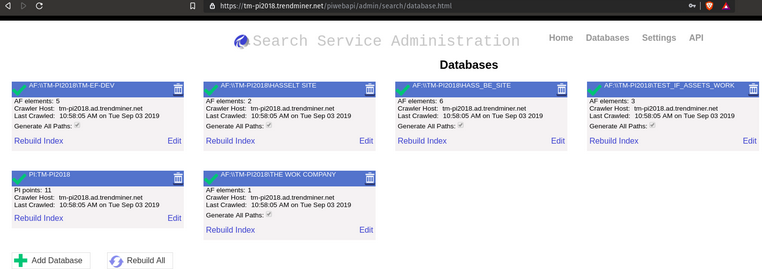
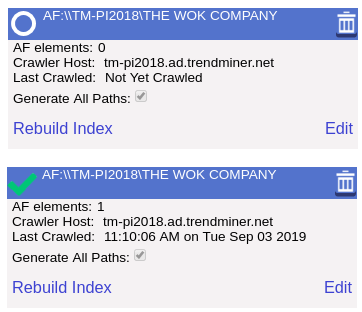
Click on 'Rebuild Index' of the database and wait until it has a green check mark again, this can take a while.
Anmerkung
The AF elements did not change, because in this scenario I added 2 extra attribute/tags and 0 assets.
Go to https://[THE URL]/PIVision and click:

in the top bar.
Replace [THE URL] with the actual URL/domain on which PI Vision is installed. E.g. https://tm-pi2018.trendminer.net/PIVision
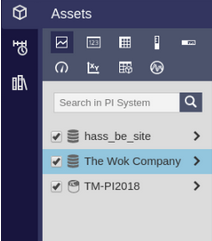
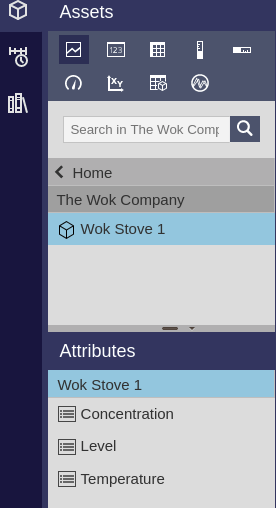
Navigate in the database.
Select the asset, this will now show the indexed attributes.
PI Vision & PI Web API & PI Web Crawler - Troubleshooting
In any of the following scenarios:
Able to see the database in PI Vision, unable to access PI Web API (Unauthorized).
Unable to see the database in PI Vision, able to access the database through PI Web API.
Re-indexing does not add assets and attributes/tags to PI Vision.
Use the following steps to make sure everything is configured correctly:
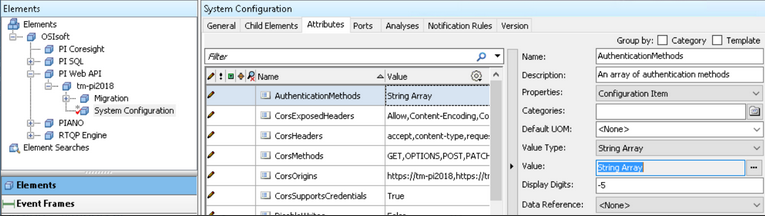
PI System Explorer - Attributes must be of type 'Configuration Item'
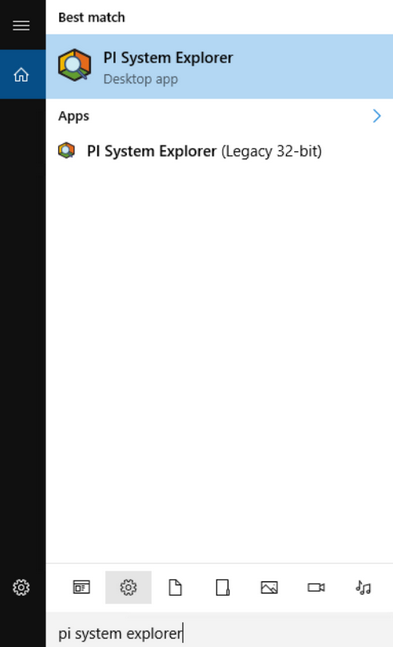
Open PI System Explorer and drill down to the System Configuration in the left panel.

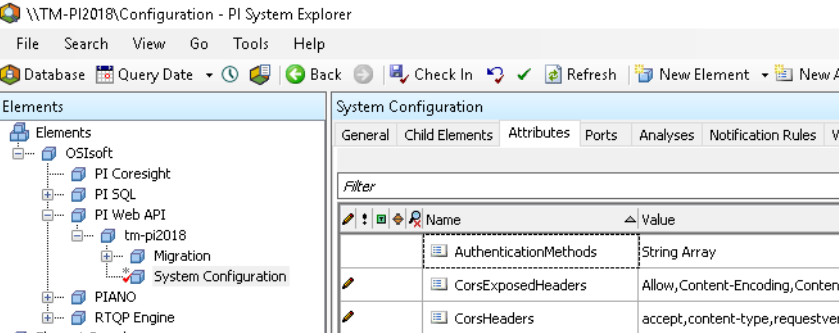
Open the Attributes tab and check that all the attributes are a 'Configuration Item' in the right side panel.
WRONG (Properties has the value '<None>')
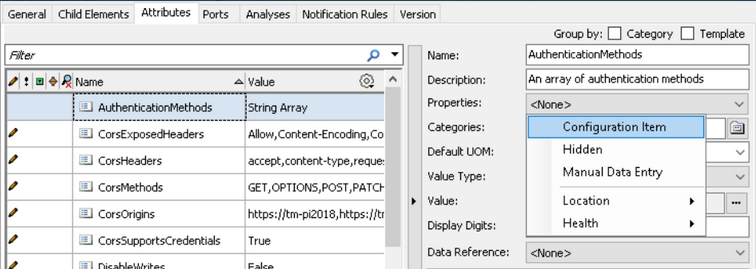
RIGHT (Properties has the value 'Configuration Item'.
Authorization
Normally the Authentication of PI Vision and the PI System Explorer are configured to use 'Windows Authentication' and 'Kerberos'. However, in a situation (like ours) where devices other than a Windows system need to authenticate, another option needs to be available. There are two options that would work. The first option is Basic Authentication and the other option is Anonymous Authentication. Because Anonymous Authentication does not require any credentials, it is preferred to use Basic Authentication.
Anmerkung
Windows Authentication + Kerberos is necessary for PI Vision and both the PI Web services to work properly. Never delete Kerberos as an authentication method.
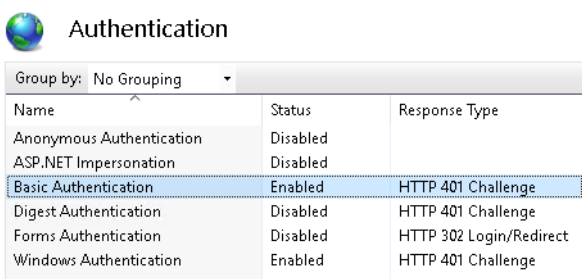
IIS Manager - Verify Authentication settings
Open IIS Manager and in the left panel drill down to 'Default Web Site' and double click on 'Authentication' in the right side.
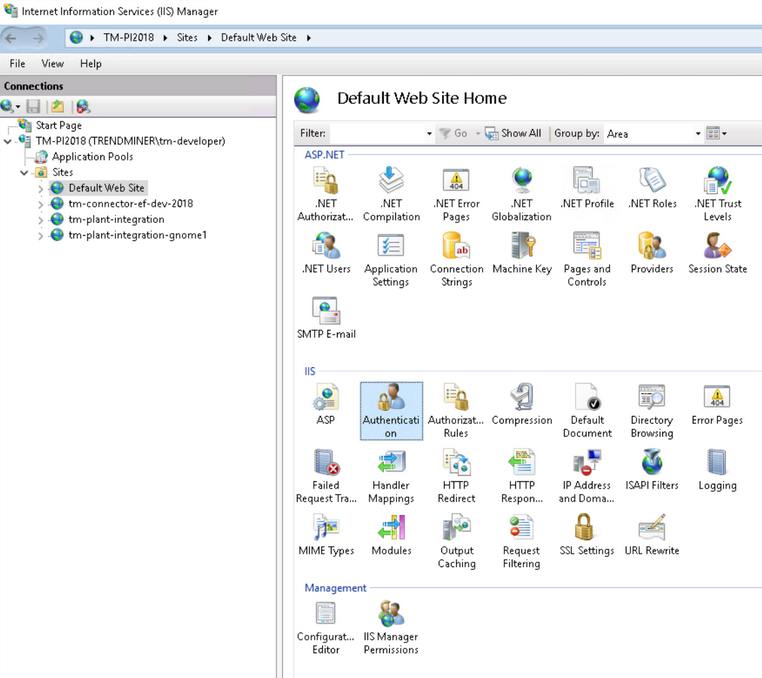
Verify that both Windows Authentication and Basic Authentication are Enabled.
Anmerkung
To set the status to 'Enabled', right click on 'Disabled' and click on 'Enabled'.
PI System Explorer - Verify Authentication settings
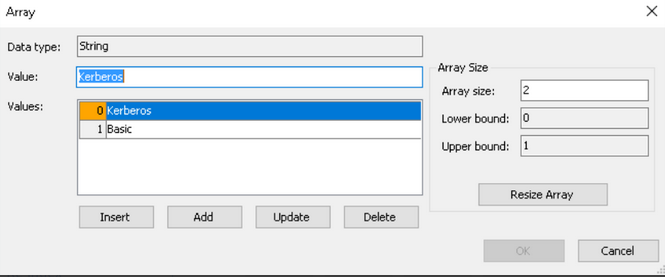
Open PI System Explorer, drill down to the System Configuration in the left panel. Select the 'Attributes' tab.
In the right side panel click on

at the end of the 'Value' property.
Verify that both Kerberos and Basic are in Values.
Anmerkung
Kerberos must always be in here!
Anmerkung
If Basic is not in here, click on 'Add' and change the Value in the field next to 'Value'.
Anmerkung
Check In your changes!
Verify user attached to PI Web Crawler and PI Web API service is a domain user
Open Services.
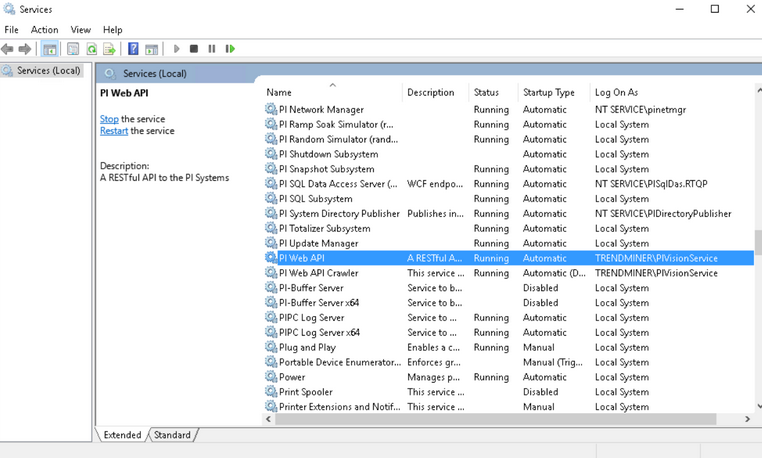
Verify that the user in the 'Log On As' column, is a Domain User, for both the PI Web Crawler as well as the PI Web API.
Open up User Accounts and click on 'Manage User Accounts'.
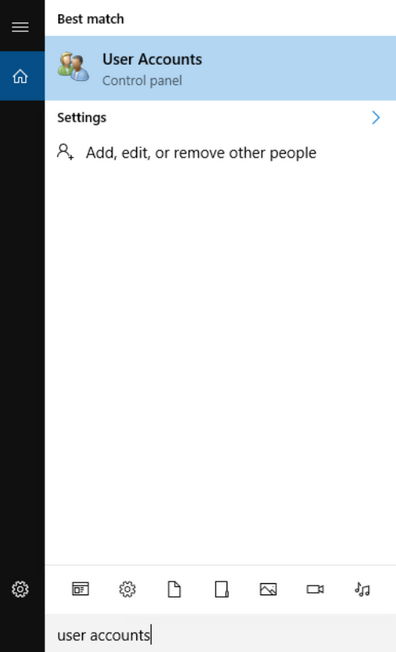
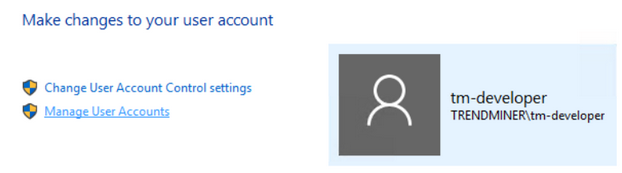
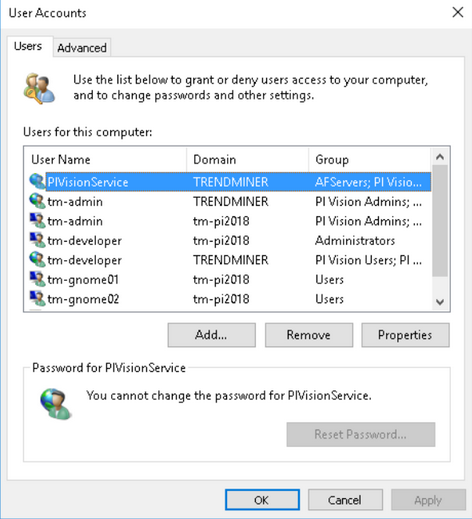
Confirm that the user has the following icon, this means it is a Domain User.

Anmerkung
The following image is the icon for a Local User:

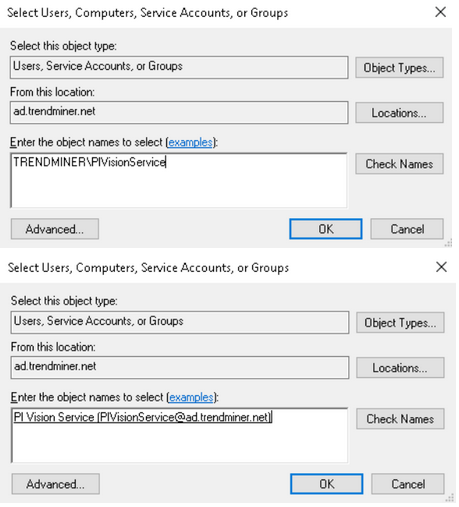
For this example, we can see that TRENDMINER\PIVisionService is the user attached to both the PI Web Crawler and PI Web API and that it is a Domain User.
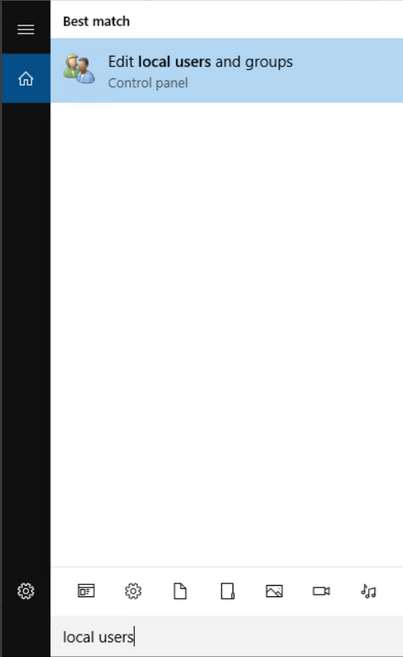
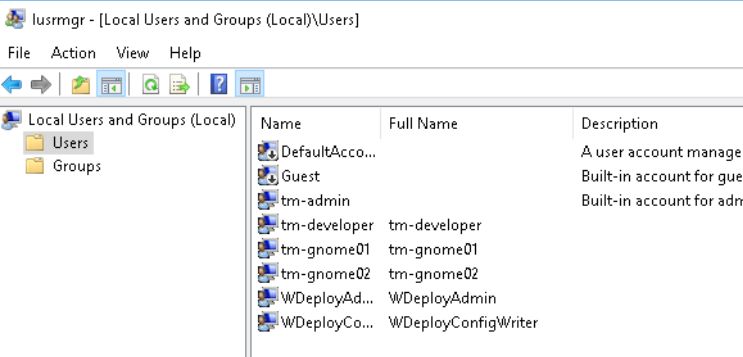
Alternative way is to open 'Edit local users and groups', click on 'Users' and confirm that the user (e.g. TRENDMINER\PIVisionService) is NOT in this list.
Verify the group of the domain user
The user attached to the services in ' Verify user attached to PI Web Crawler and PI Web API service is a domain user' needs to be in the correct group. Confirm this by:
Open 'Edit local users and groups' and click on 'Groups'.
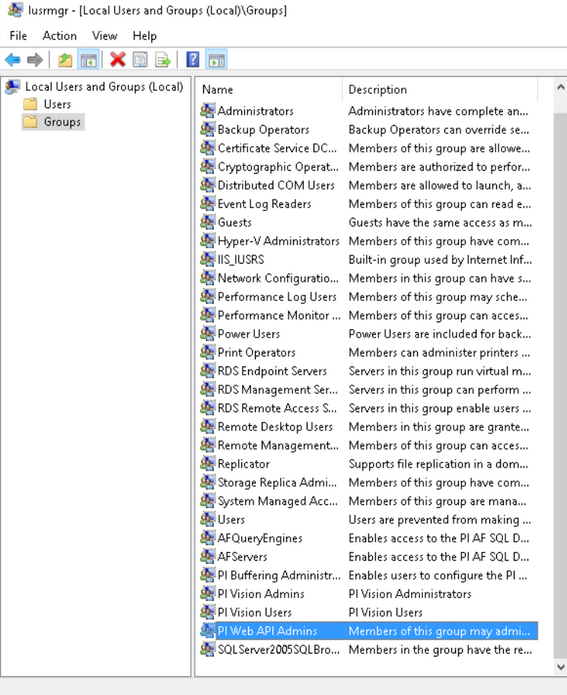
Double click on 'PI Web API Admins' and confirm that the user is in the 'Members' list.
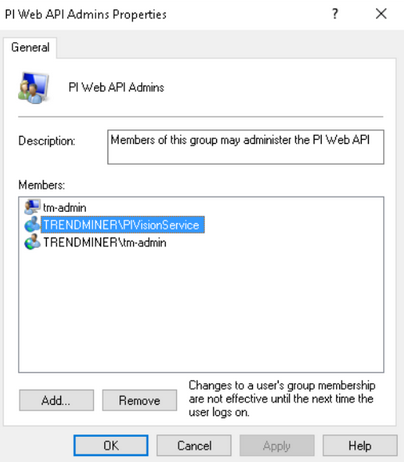
Anmerkung
If this is not the case, click on 'Add...', type in the name of the user and click on 'Check Names', then click 'OK'.
Do step 2. for PI Vision Admins as well (not sure if necessary, but in the current configuration this is the case).