Historian Connector
Although no hard requirement we advise to first upgrade all connectors which are connected to the appliance to ensure connectivity continuity after the appliance is upgraded.
The advised connector for TrendMiner version 2022.R2.0 is v3.6.96-b9d1bb4.
Anmerkung
Note: TrendMiner Plant Integrations version 3.2.1 and above is compiled with Microsoft .NET Framework 4.5.2. To install the updated version, the Windows server needs to be upgraded to .NET Framework version 4.5.2 or higher.
Note that the folder name, e.g. C:\Windows\Microsoft.NET\Framework\v4.0.30319, does not represent your installed .NET version. You can follow instructions here or here to determine which .NET version. you have installed.
Download the Plant Integrations installation file
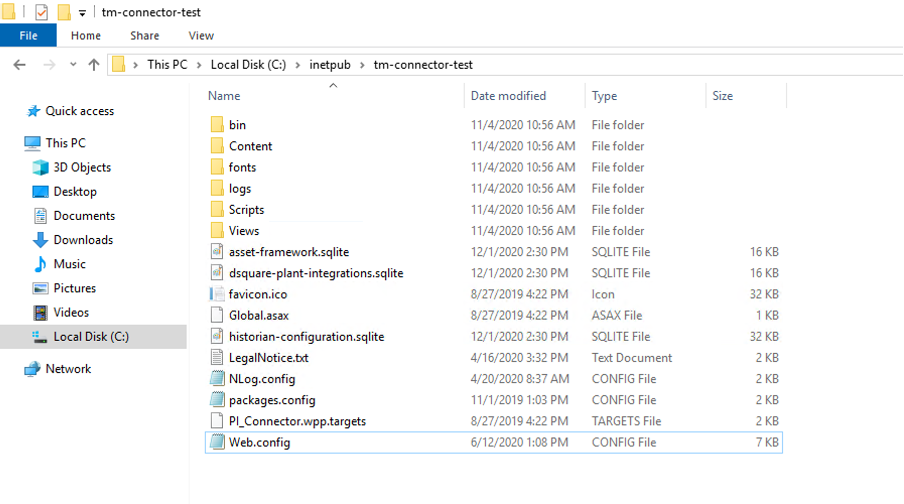
<trendminer-hc-X.Y.Z.zip>from the TrendMiner download site.Before starting the upgrade, make a copy of your Plant Integration folder as a backup. This folder is usually located at C:\inetpub\PlantIntegrations.
Wichtig
Each time the connector is updated a new Web.config file is installed, and the previous settings are lost, which might result in unexpected behavior in TrendMiner. We therefore strongly encourage to keep a list of overridden settings and edit the config file again manually after updating the connector.
Replacing the new Web.config with a backup of an old version is not recommended as the new Web.config might contain new parameters which are not present in previous versions.
More information on the connector configuration file can be found here .
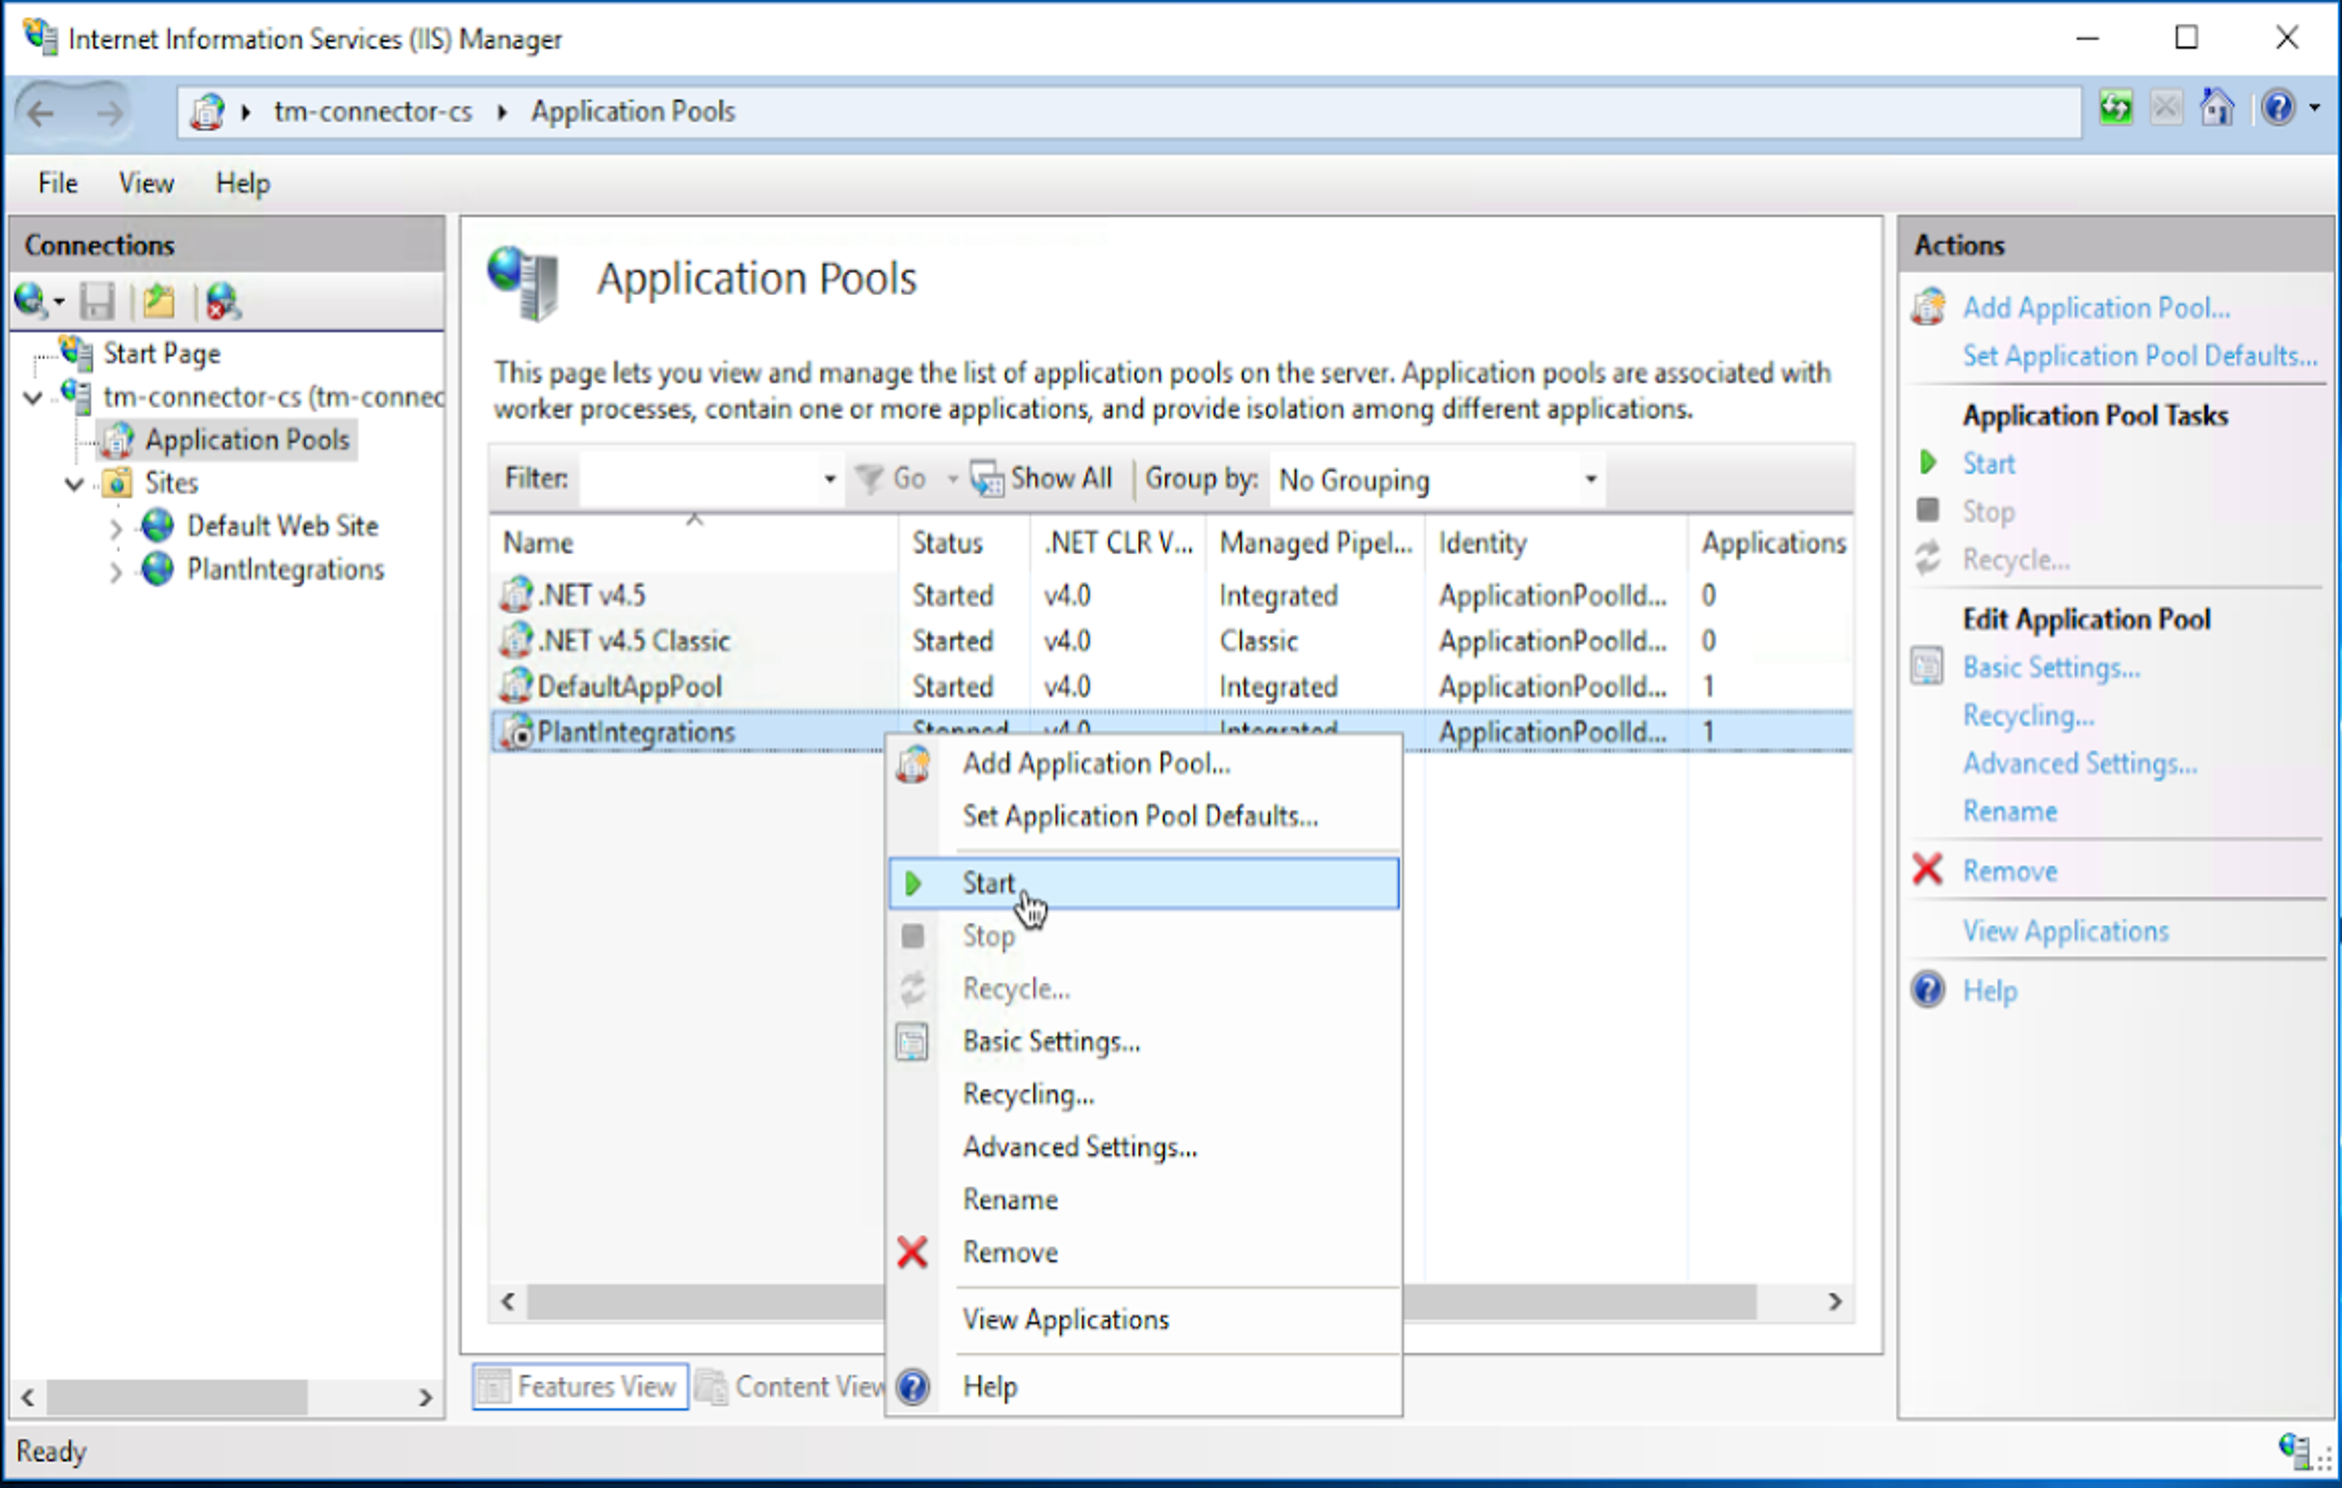
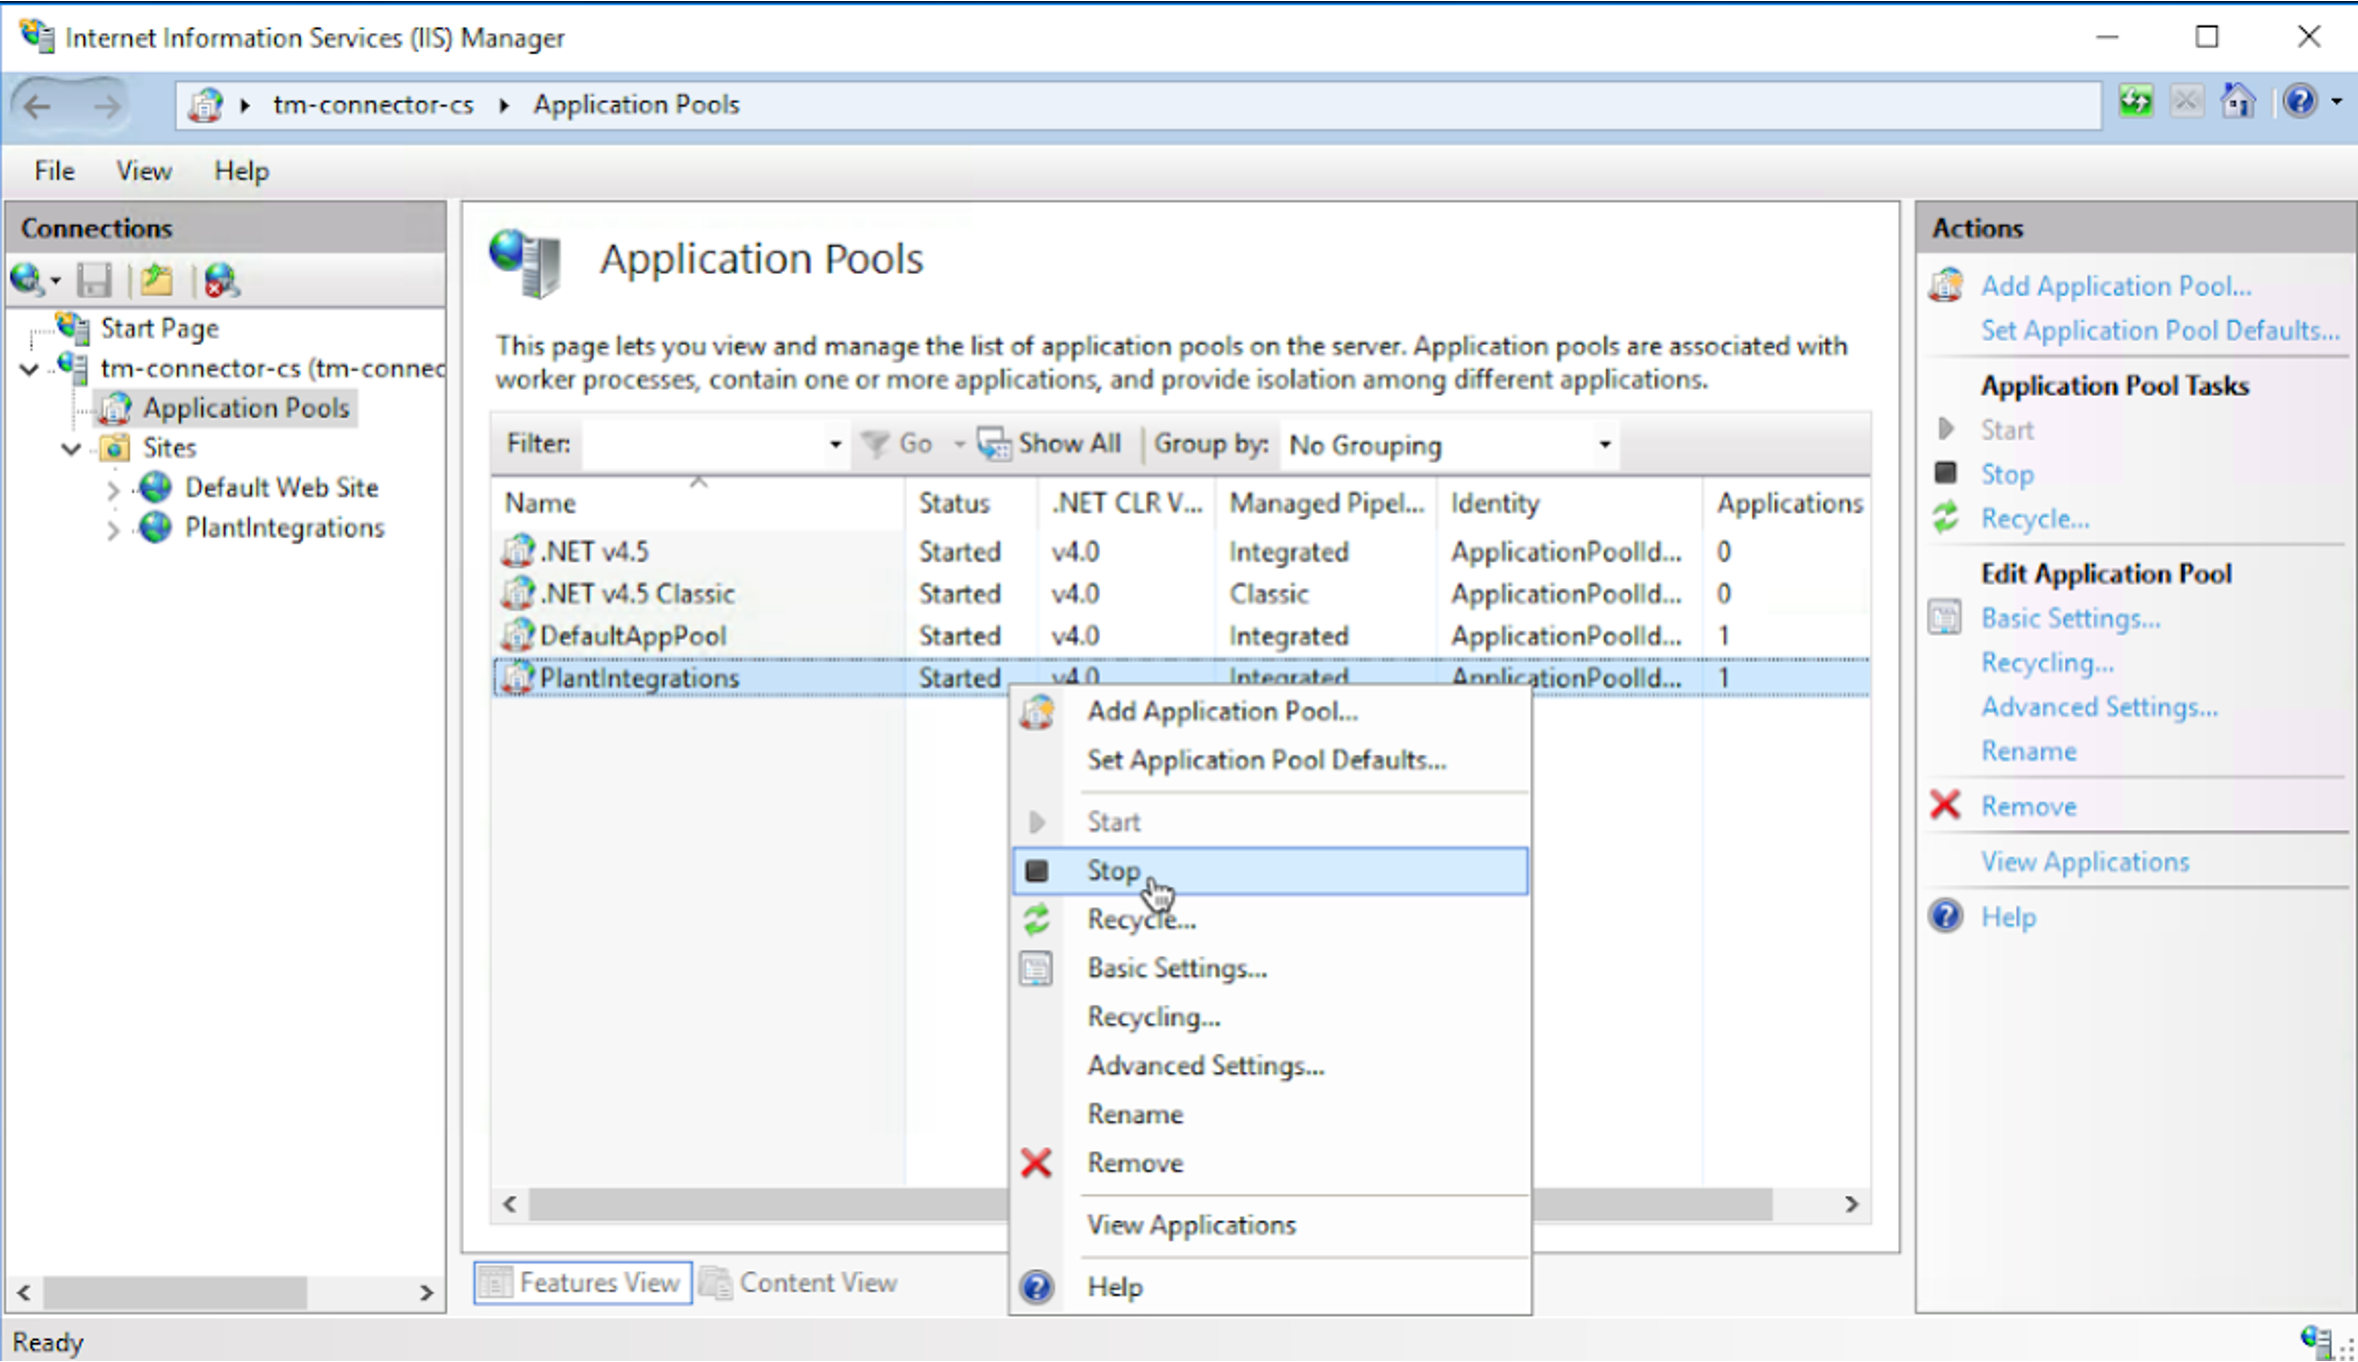
Stop the Plant Integrations application pool in ‘Application Pools’ to begin the upgrade steps.
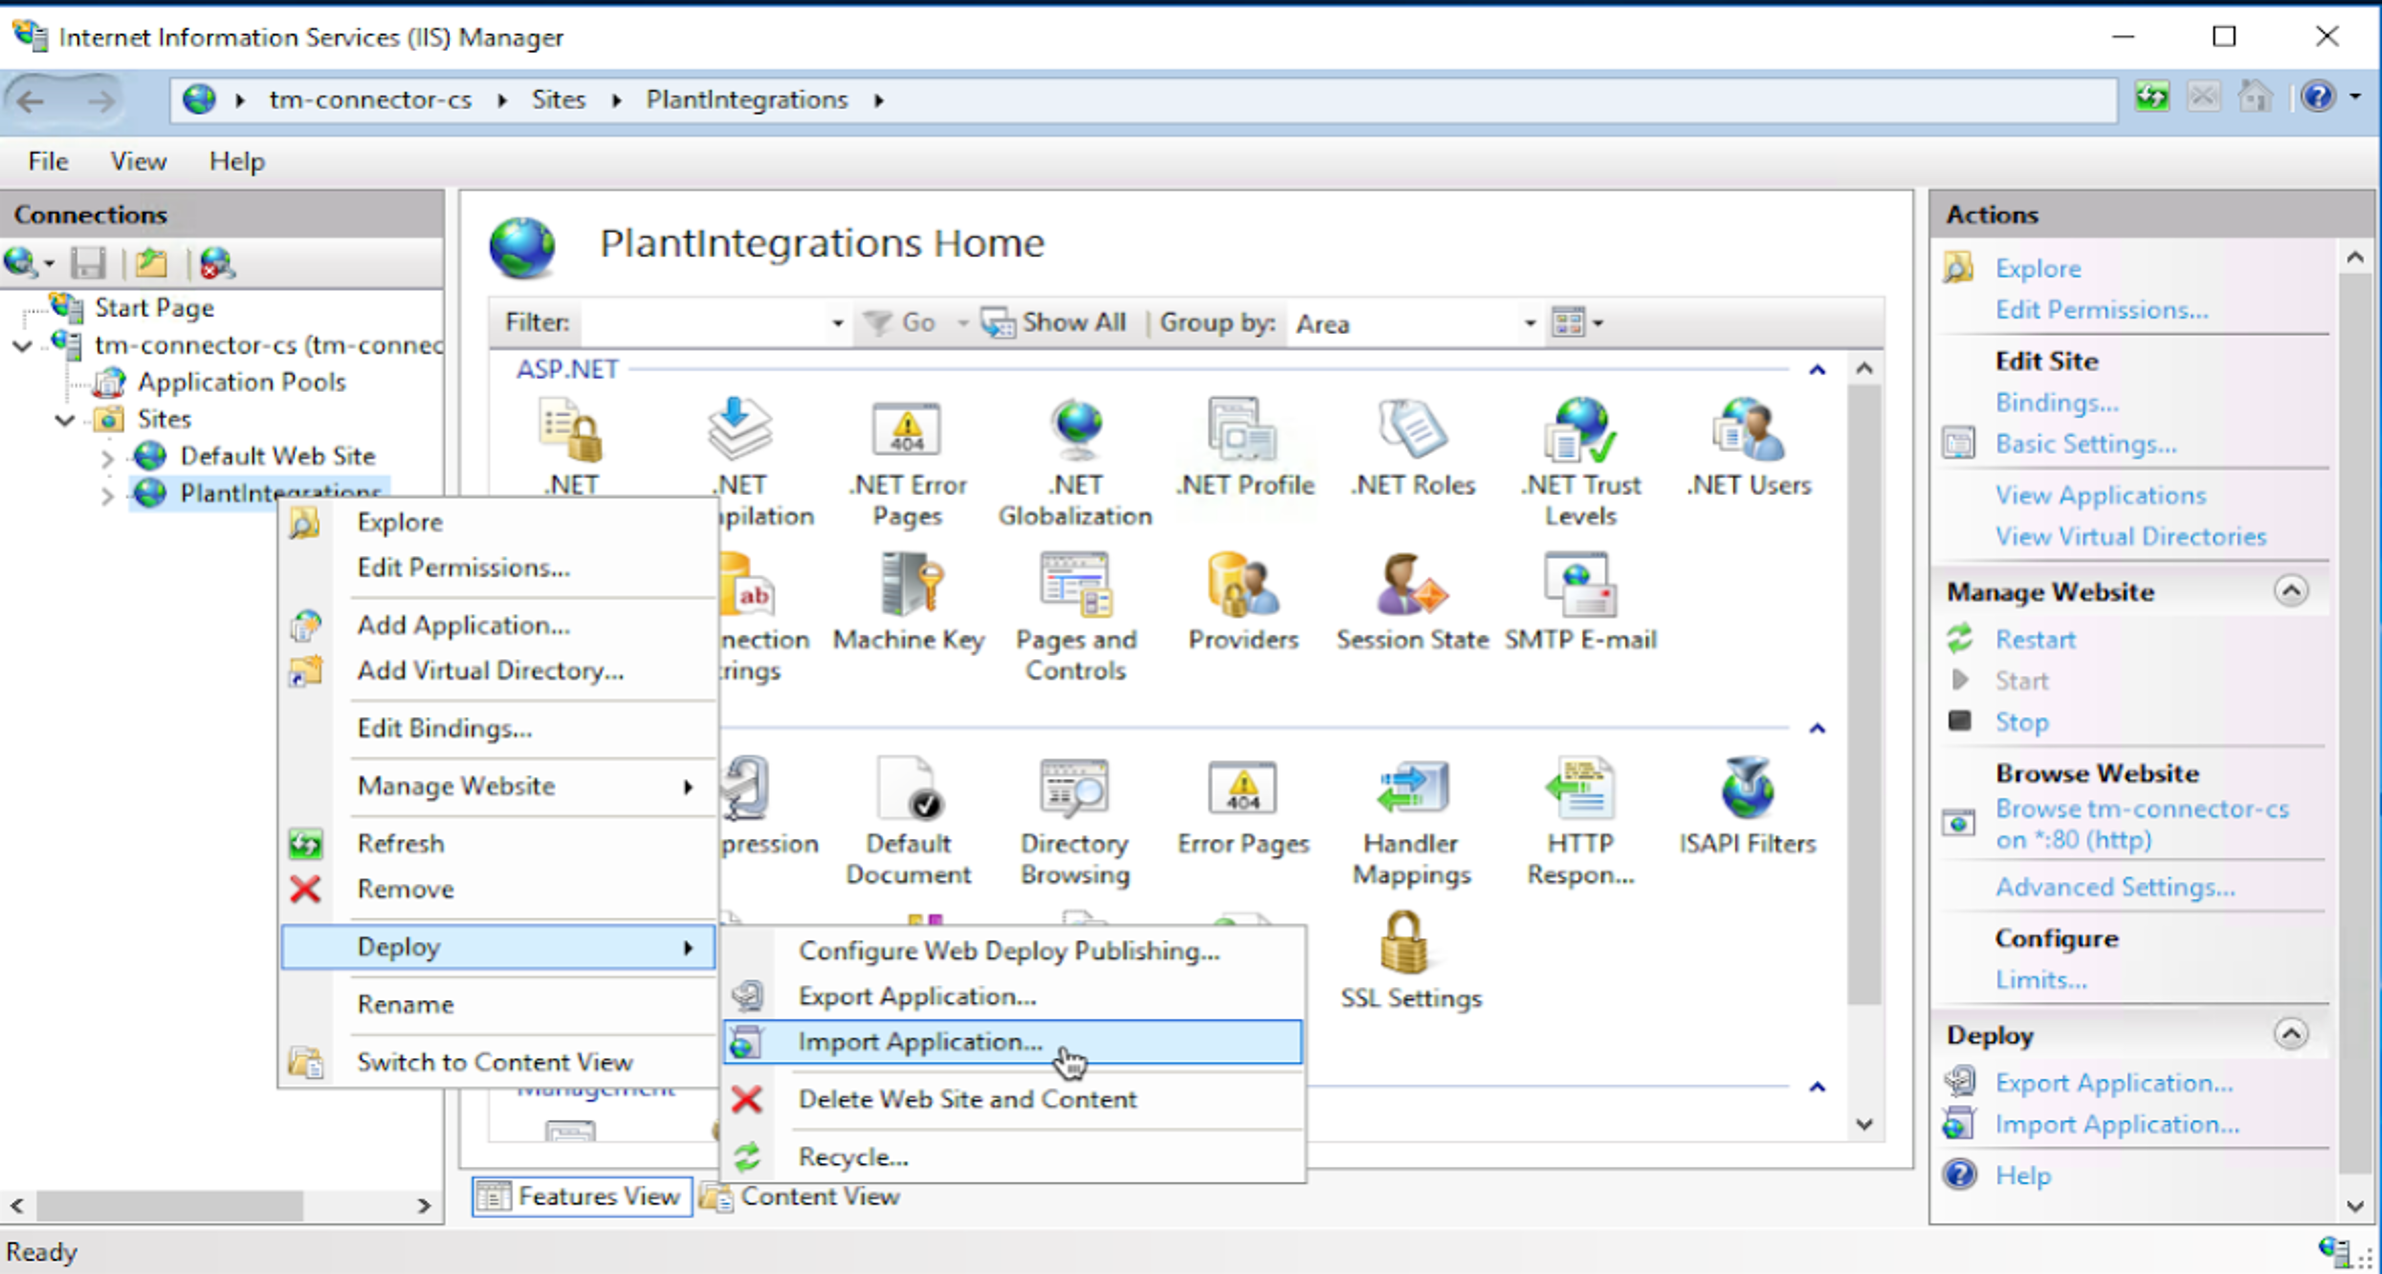
Right-click on the website and choose ‘Deploy’ - ‘Import Application’.
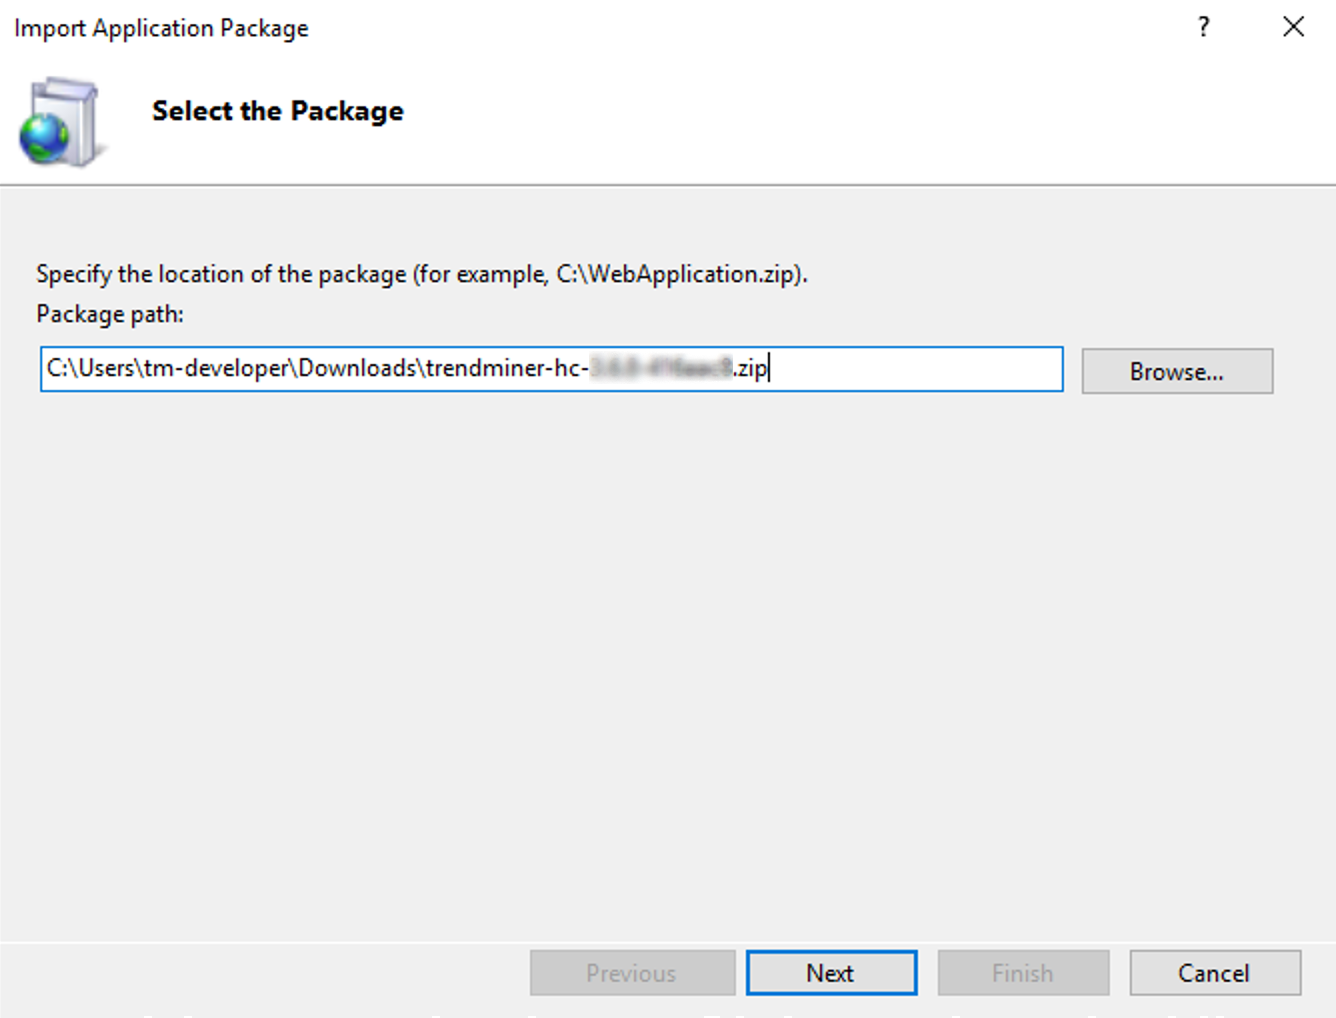
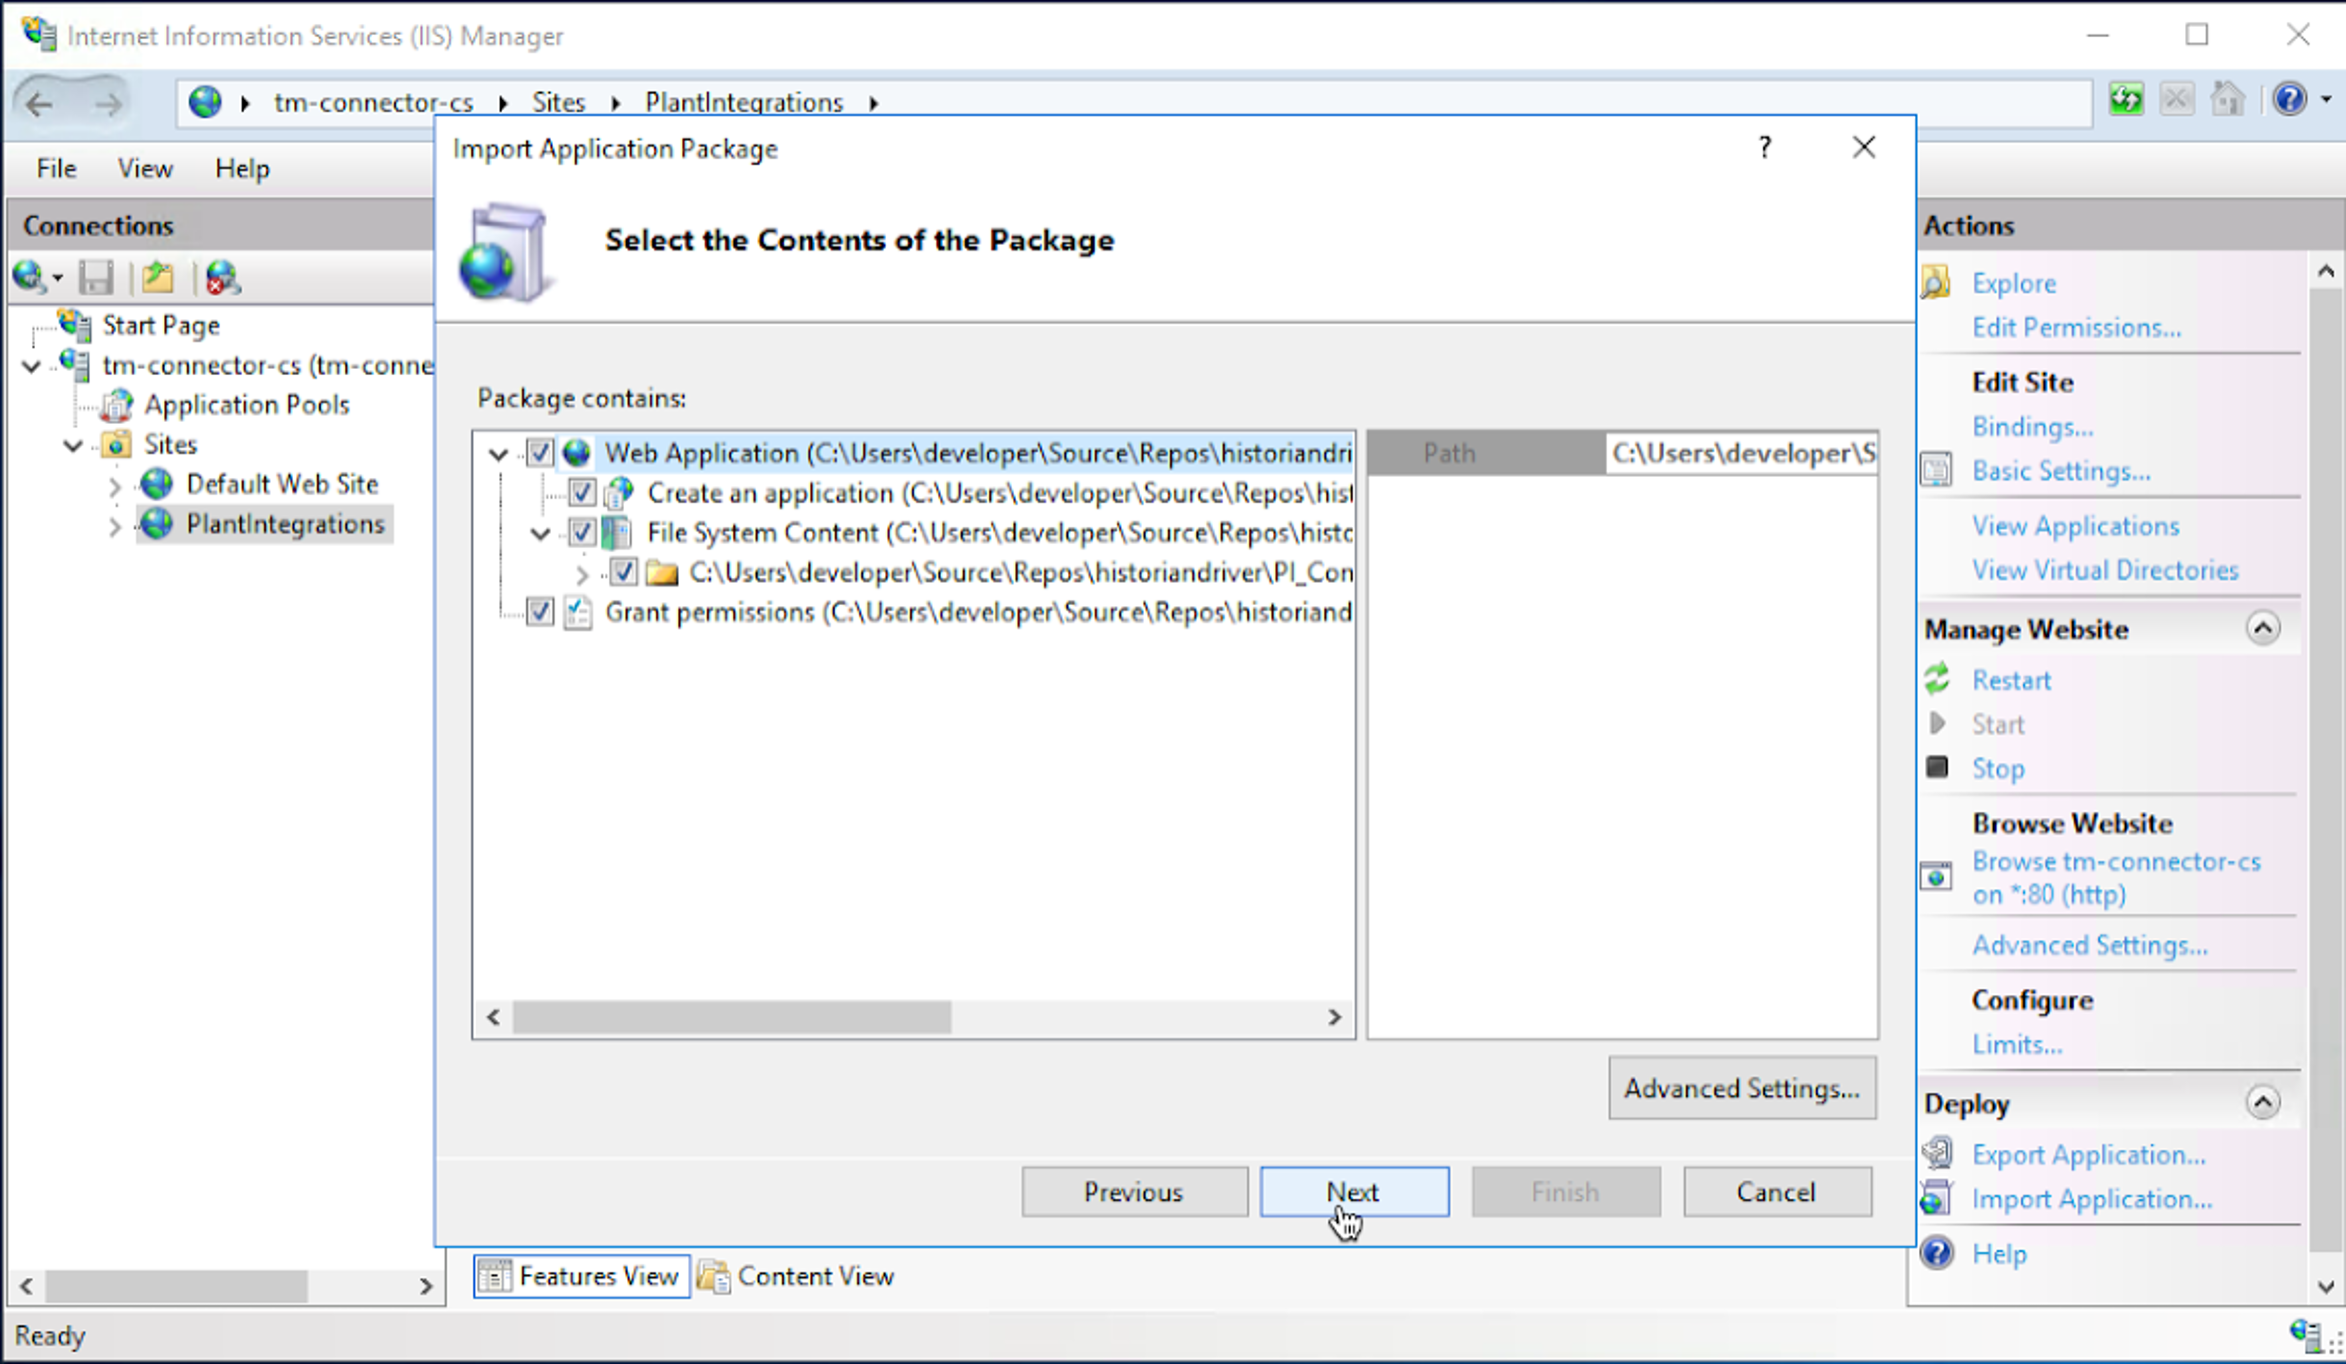
Select the TrendMiner Plant Integrations zip archive and click ‘Next’.
Click ‘Next’.
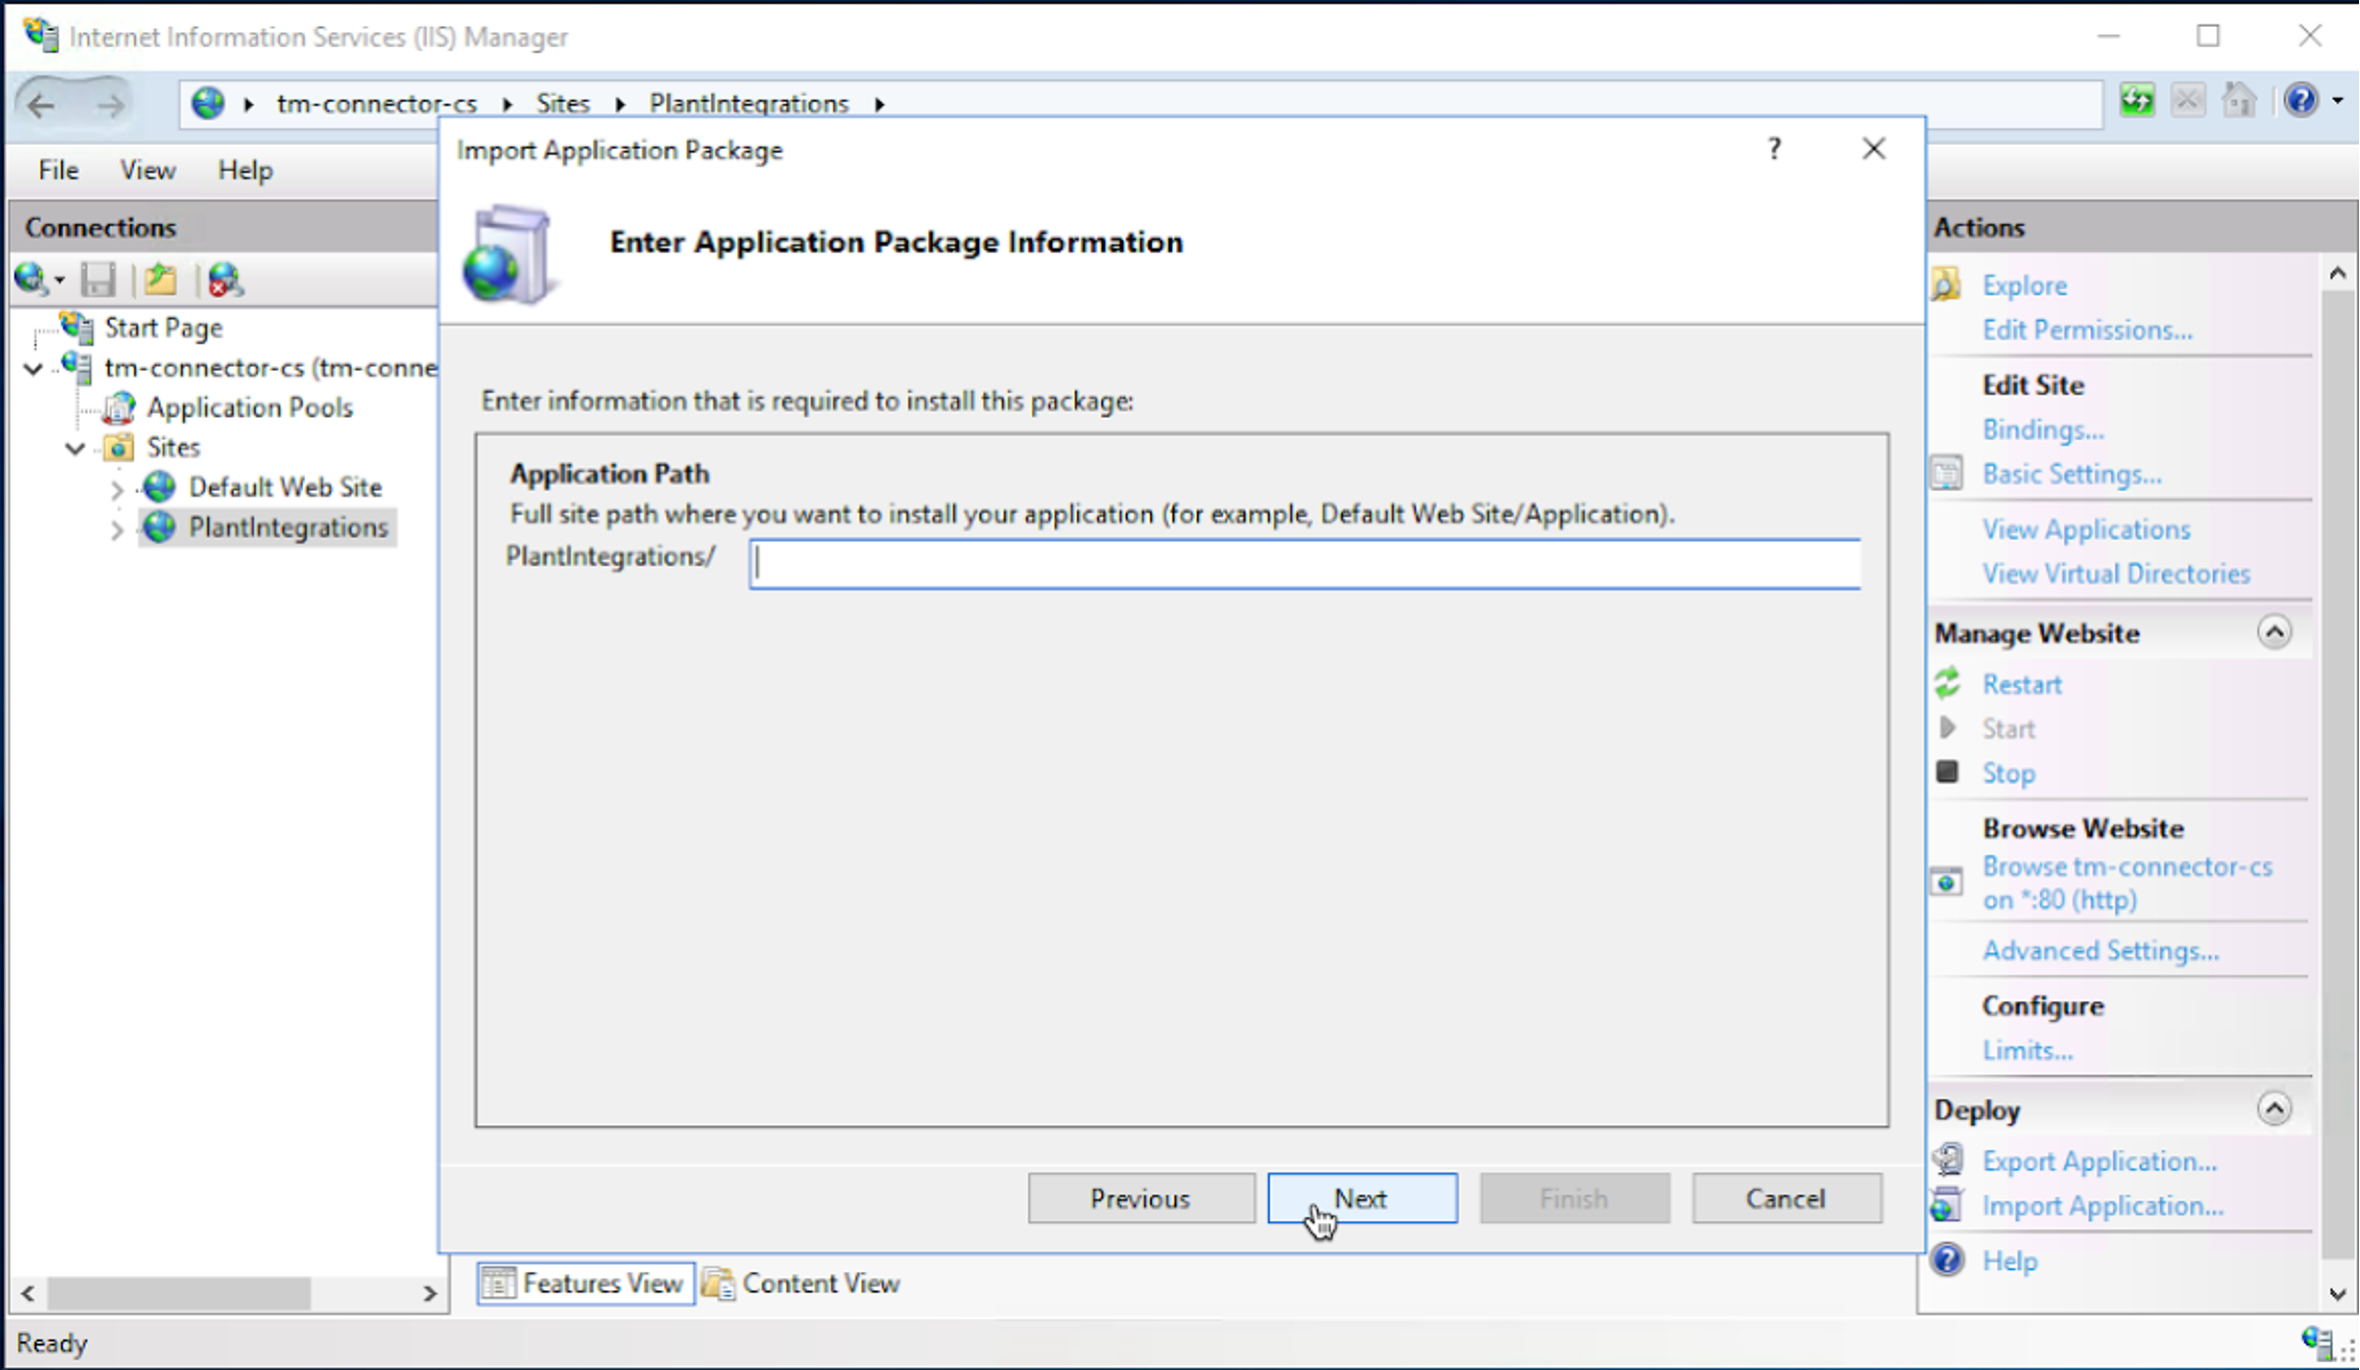
Remove the Application Path to a blank field (default will show HC) and click ‘Next’.
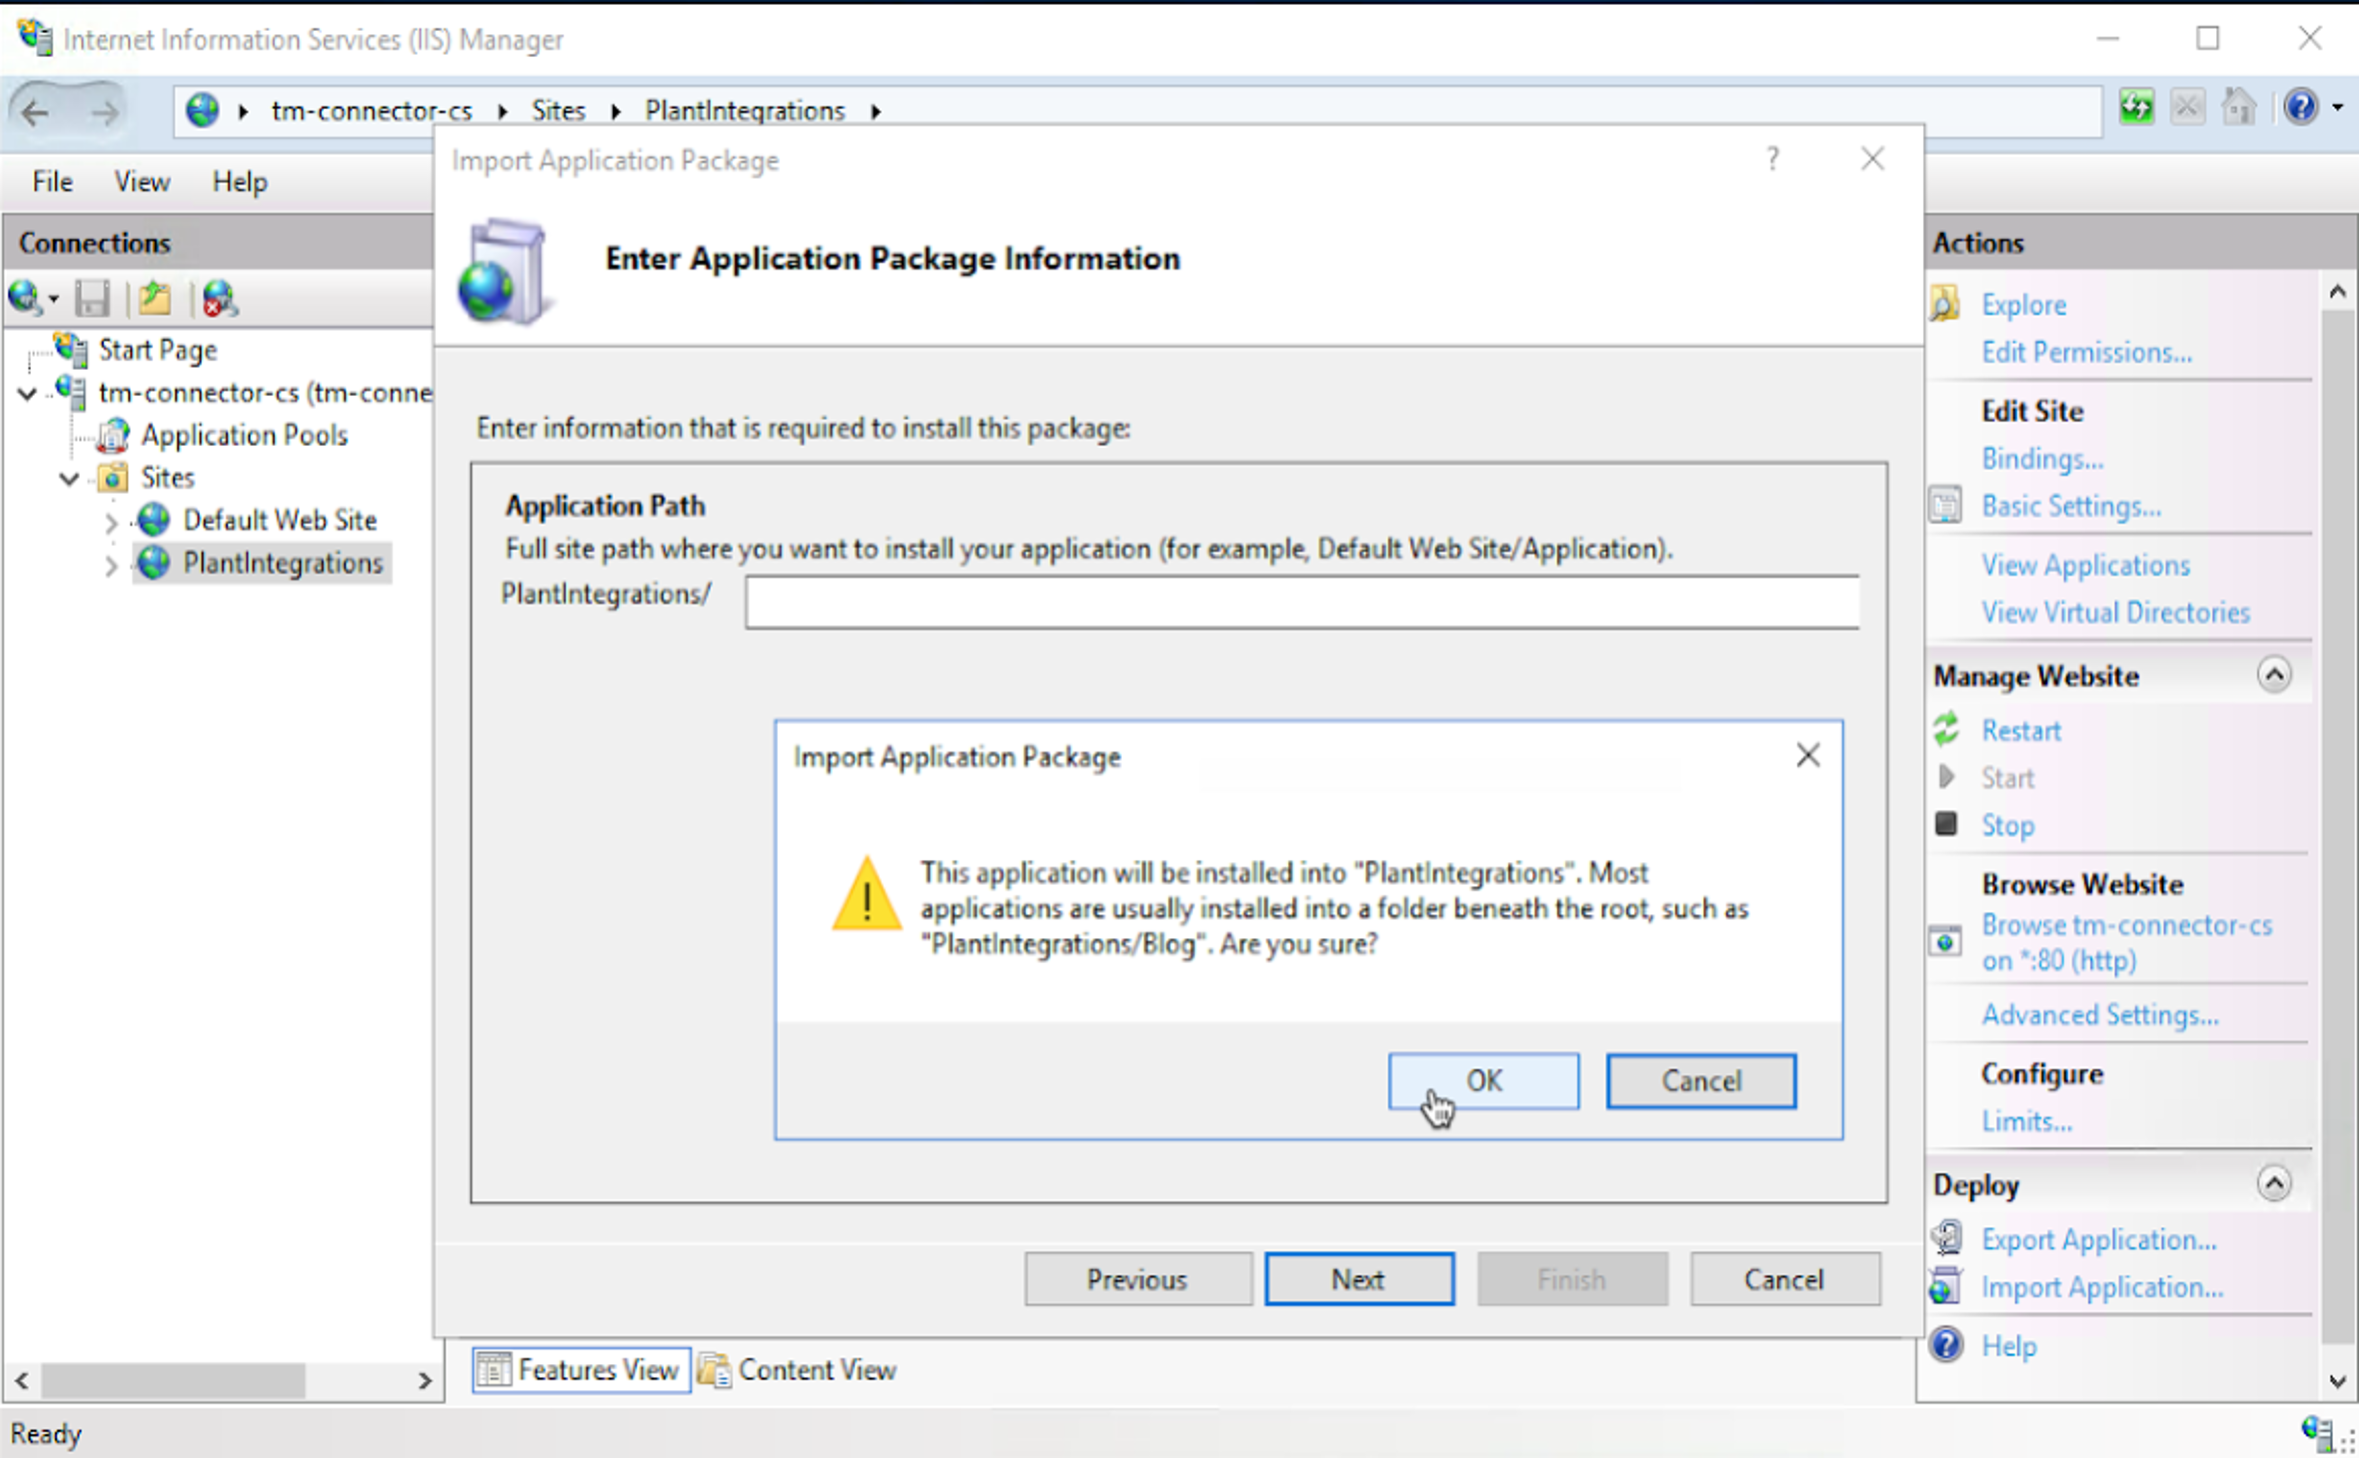
Click ‘OK’ to continue. If this warning message does not appear, go back to the previous step.
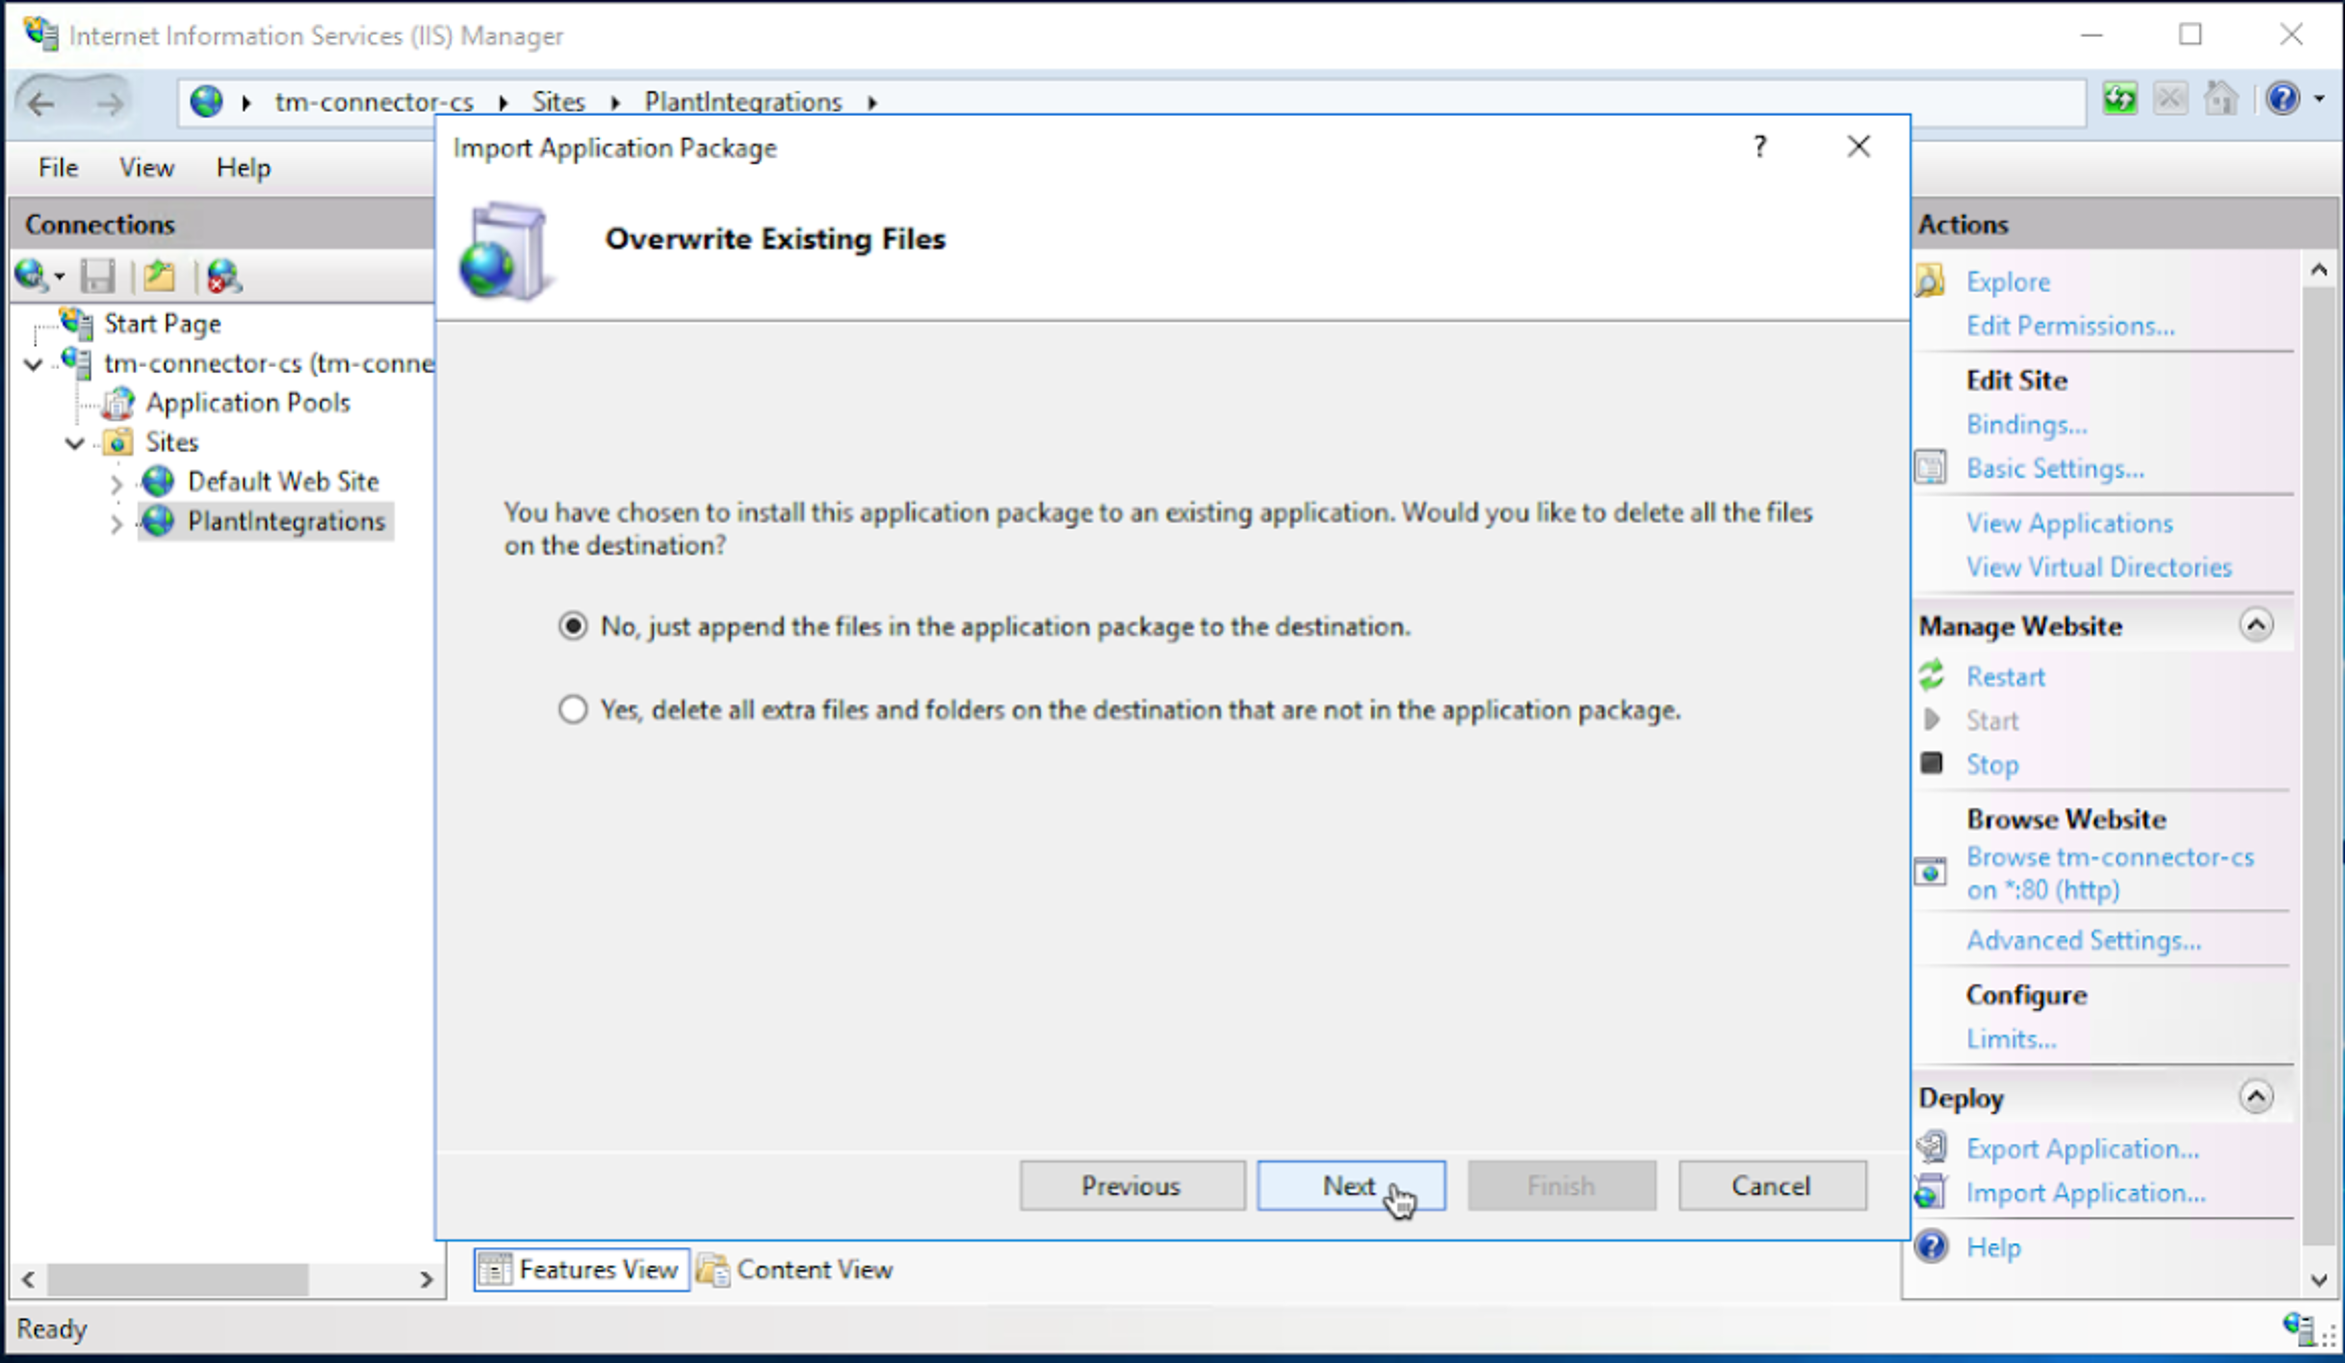
Click ‘Next’.
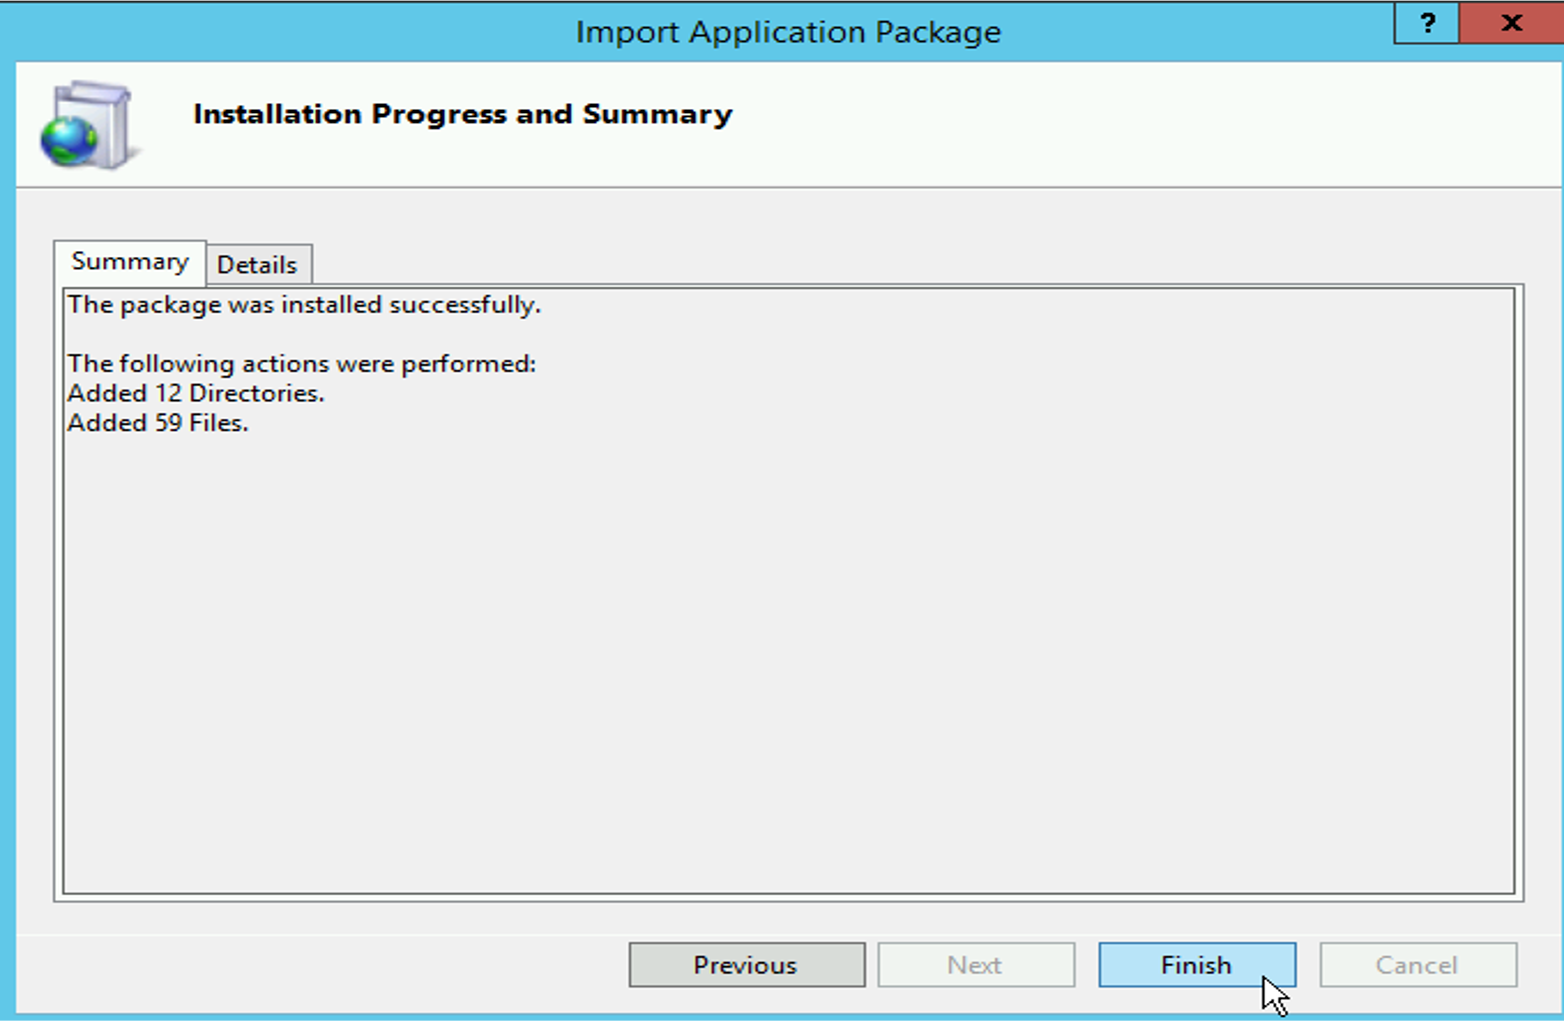
Click ‘Finish’ to complete the Plant Integrations deployment.
Restore the old connector configuration by opening the new Web.config and the old Web.config from the backup folder with a text editor and comparing the settings. Any overridden settings should be manually updated in the new Web.config.
Start the Application Pool again.