Example Setups
Example 1
You are licensed to use TrendMiner at one specific location (e.g., a manufacturing site). The manufacturing site has one historian that contains the time series data that engineers, and operators need to access. The available Active Directory structure is illustrated below.
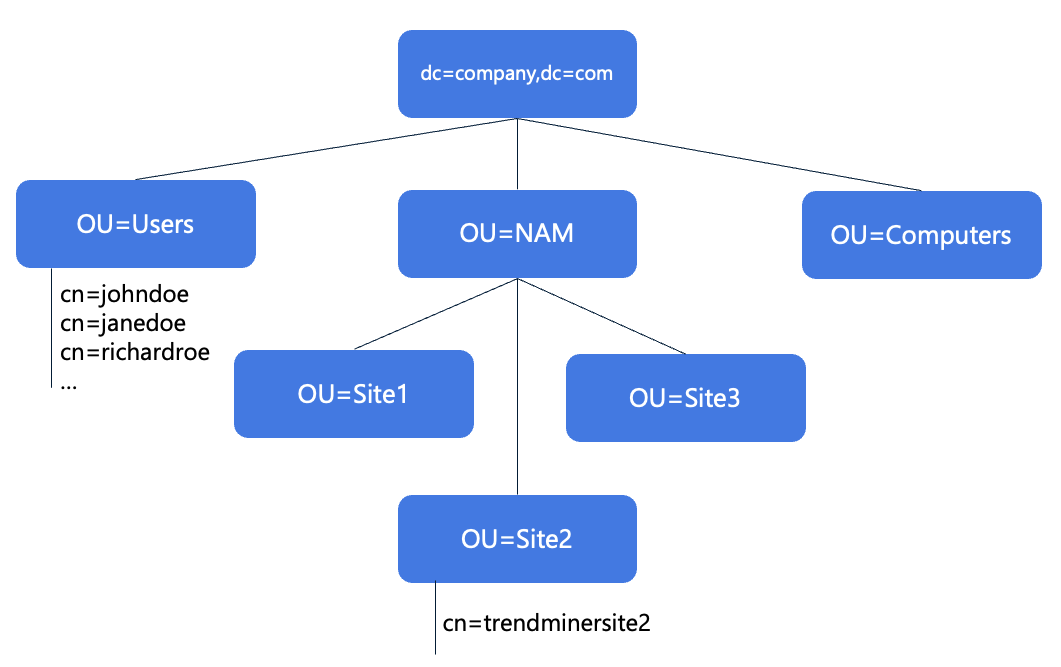 Click image to enlarge | In this example Active Directory structure, we assume that:
|
For this scenario, the best practice is:
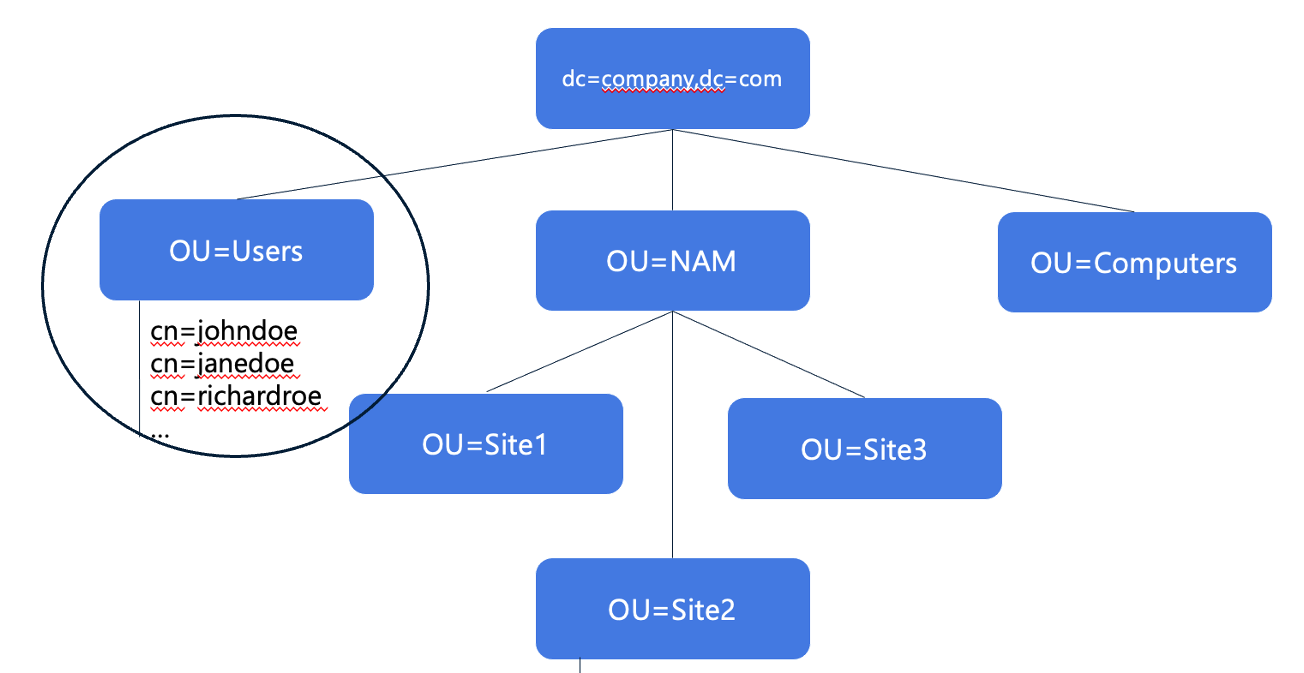
The User base and Group base DN should be as close as possible to the relevant sections of the LDAP tree.
You want to provide all Users with TrendMiner access (i.e., login rights).
People from Site 2, members of the trendminersite2 group, should see Site 2's historian, and these people only! (i.e., access rights).
 Click image to enlarge | Step 1: Define Login rights
|
 Click image to enlarge | Step 2: Configure groups and define access rights
|
Example 2
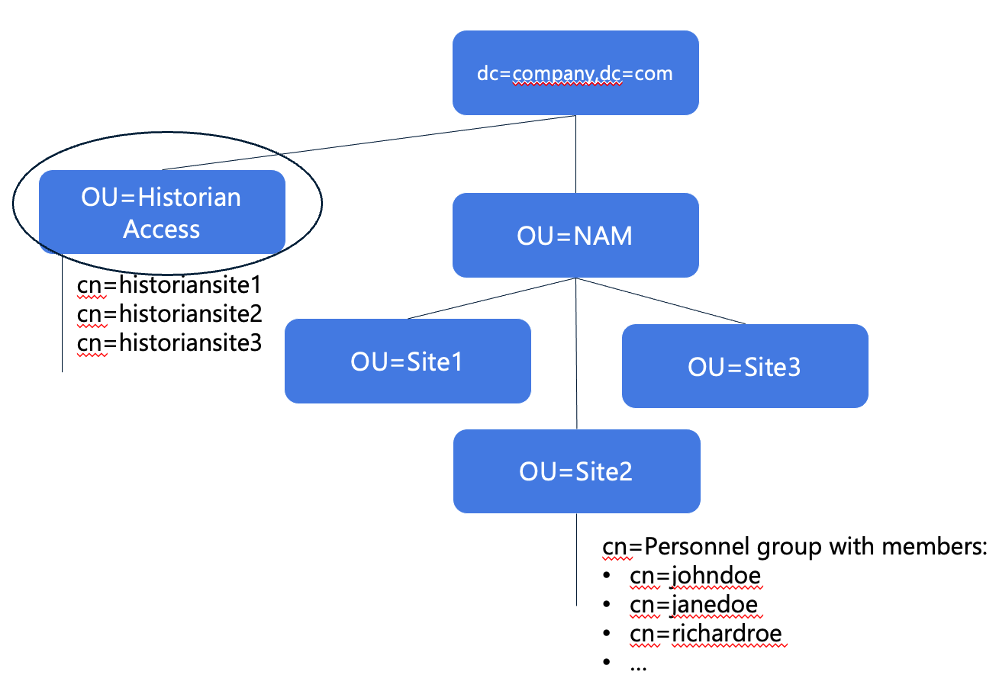
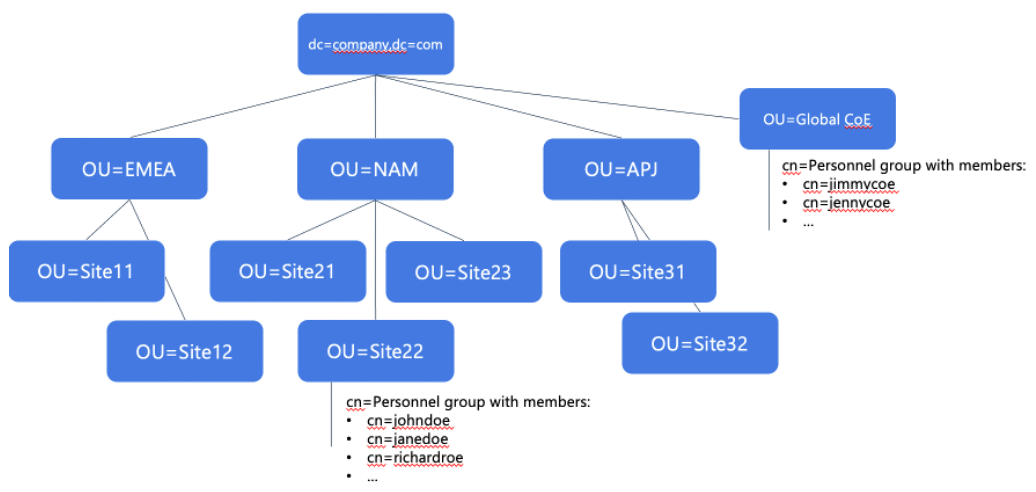
You are licensed to use TrendMiner at three locations (e.g., manufacturing sites Site1, Site2 and Site3). The manufacturing site each have one historian that contains the time series data that engineers, and operators of that site need to access. The available Active Directory structure is illustrated below.
 Click image to enlarge | In this example Active Directory structure, we assume that:
|
For this scenario, the best practice is:
The User base and Group base DN should be as close as possible to the relevant sections of the LDAP tree.
Provide all persons in Site 1, 2 and 3 access to TrendMiner based on their membership of the Site OU’s.
Provide each person data access through their membership of the historian access security groups.
 Click image to enlarge | Step 1: Define login rights
|
NoteIt is not possible to directly filter an OU for membership. | |
Click image to enlarge | Step 2: Configure groups and define access rights
|
Example 3
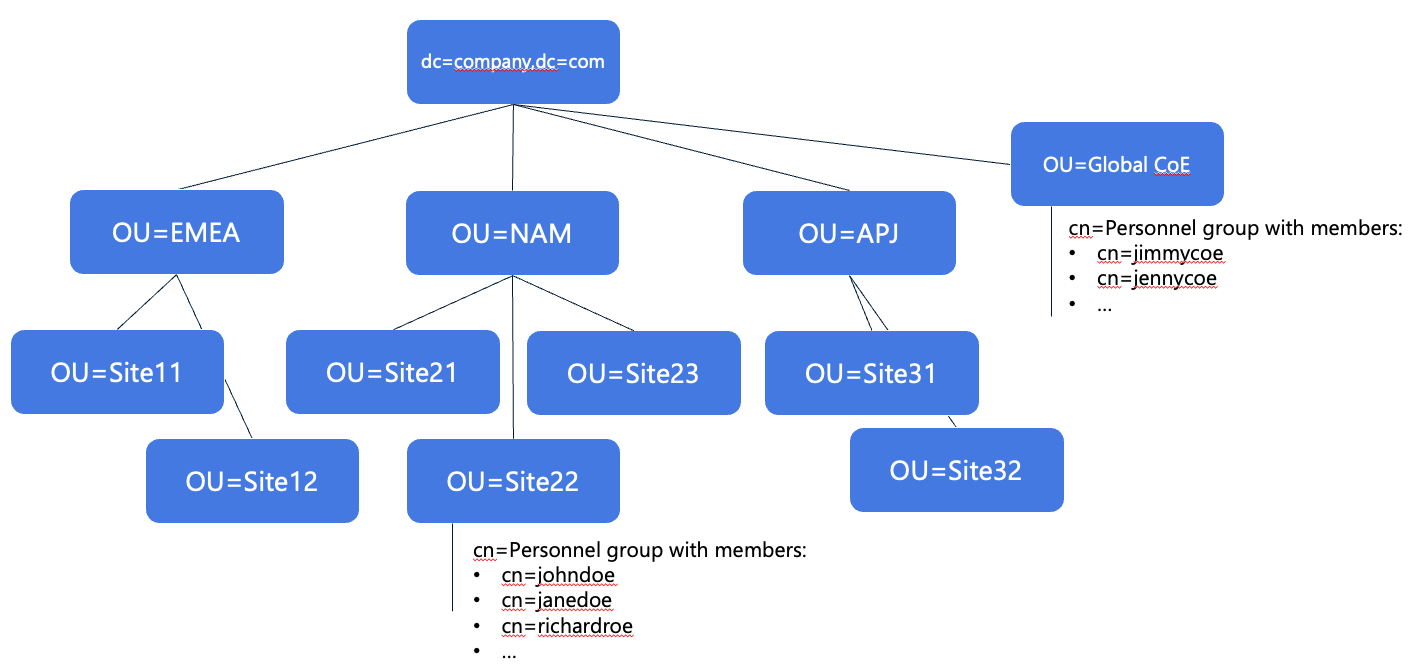
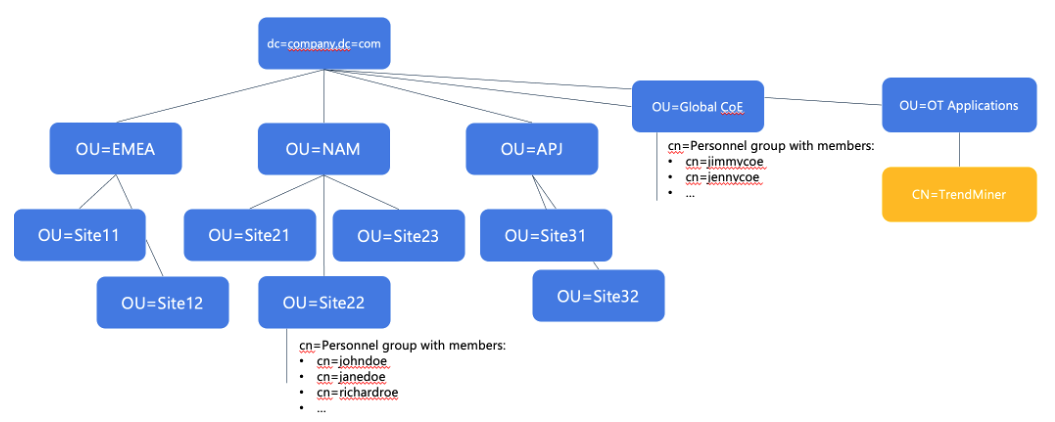
You are licensed to use TrendMiner at many locations around the world. Most sites have one or more historians that contain the time series data that (a subset of) engineers, and operators of that site need to access. There are also a group of central users (from the Data analytics Center of Excellence) that need access to all data sources for global improvement projects. The available Active Directory structure is illustrated below.
 Click image to enlarge | In the previous examples, there were easy ways to either define the users that should have access to TrendMiner or define the correct data access through readily available security groups. In this more complex Active Directory structure, we assume that:
|
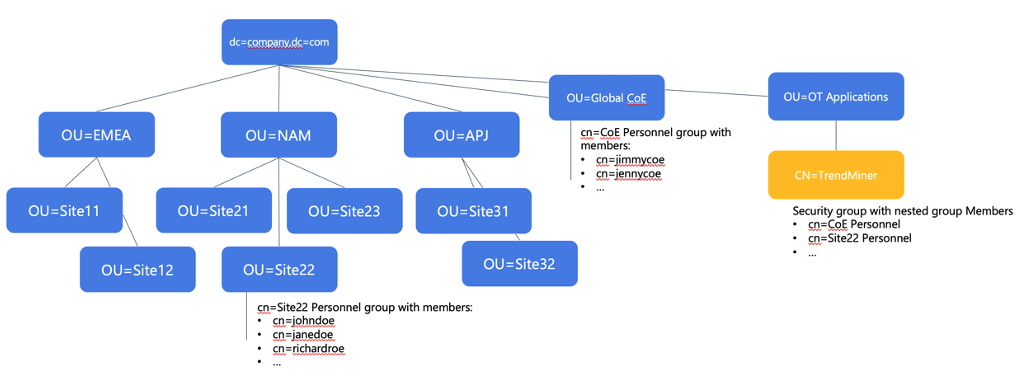
 Click image to enlarge | The first consideration in this case is that we cannot simply use the lowest common root node for users and groups, because in this case, due to the complexity, it would be the root DC node. Synching from the root node will lead to running into the limits for number of allowed users and groups. Secondly, creating a filter will be complex because there are many AND/OR conditions to be combined, leading to an error-prone situation. The filter might potentially even exceed the limit of max. 4000 characters for a search filter. Therefore, we need to consider a different solution. |
 Click image to enlarge | The best practice in this case is to create a new TrendMiner security group that maps the necessary memberships as the license allows. In this case, a new TrendMiner security group has been created as part of an existing OT applications OU. Relevant groups and members can be added to the TrendMiner group as members (e.g. through the MemberOf attribute of an individual group), meaning the normal management can proceed (no impact on existing structures), and the TrendMiner license and access management is strictly managed through this new object. For example, if a site needs to be added to TrendMiner, the only thing that needs to happen is selecting that site’s Personnel security group and make it member of the TrendMiner security group. |
NoteAn existing group that’s already being used for other applications, e.g. historian access, can be re-used, but only if they would not lead to license violations in terms of entitled capacity. | |
 Click image to enlarge | Step 1: Define login rights
|
NoteBecause we nested existing groups in the new TrendMiner group, we need to use the “transitive” magic keyword for the memberOf criterium. This will ensure not only direct membership, but also membership through a nested group is considered. This magic keyword is :1.2.840.113556.1.4.1941:. NoteWe need to be careful not to add too many users/groups this way – we should add the lowest level, most specific groups only. | |
 Click image to enlarge | Step 2: Configure groups and define access rights
|
Note(*) If nested groups are required, the same transitive magic keyword :1.2.840.113556.1.4.1941: should be added to the filter. | |